

Owner Manual
Page 34
... unintentional shutdowns while in the Remote Start Mode, the system will lock. If the lock knob is down on the lock knobs on each door trim panel. The vehicle is also allowed a maximum of one time or the ON/RUN position. allow the Remote Manual Door Locks Start button to run...
... unintentional shutdowns while in the Remote Start Mode, the system will lock. If the lock knob is down on the lock knobs on each door trim panel. The vehicle is also allowed a maximum of one time or the ON/RUN position. allow the Remote Manual Door Locks Start button to run...

Owner Manual
Page 36
..., and lock your keys in the vehicle. This prevents you press the power door lock switch while the Key Fob is on each front door trim panel. Power Door Locks - Removing the Key Fob or closing the door will not operate.
..., and lock your keys in the vehicle. This prevents you press the power door lock switch while the Key Fob is on each front door trim panel. Power Door Locks - Removing the Key Fob or closing the door will not operate.

Owner Manual
Page 39
...will operate only when the ignition switch is in accordance with local laws. If Equipped The Power Vent Window Switch located on the driver's door trim panel allows the driver to operate the two vent windows from the driver's seat. 2 Power Vent Window Switch Open/Close Power Windows You ...can control either the front or rear windows using switches located on the driver's door trim panel. THINGS TO KNOW BEFORE STARTING YOUR VEHICLE 37 NOTE: Use the Lock Doors Automatically at 15 mph (24 km/h) and Unlock Doors Automatically On...
...will operate only when the ignition switch is in accordance with local laws. If Equipped The Power Vent Window Switch located on the driver's door trim panel allows the driver to operate the two vent windows from the driver's seat. 2 Power Vent Window Switch Open/Close Power Windows You ...can control either the front or rear windows using switches located on the driver's door trim panel. THINGS TO KNOW BEFORE STARTING YOUR VEHICLE 37 NOTE: Use the Lock Doors Automatically at 15 mph (24 km/h) and Unlock Doors Automatically On...

Owner Manual
Page 41
The switch will operate only when the ignition switch is a single switch on the front passenger's door trim panel which operates the passenger door window and locks and unlocks all doors. Window Open/Close 2 - Power Door Locks THINGS TO KNOW BEFORE STARTING YOUR VEHICLE 39 Front Passenger Power Window Switch There is in the ON/RUN or ACC position and during power accessory delay. 2 Front Passenger Power Door Switches 1 -
The switch will operate only when the ignition switch is a single switch on the front passenger's door trim panel which operates the passenger door window and locks and unlocks all doors. Window Open/Close 2 - Power Door Locks THINGS TO KNOW BEFORE STARTING YOUR VEHICLE 39 Front Passenger Power Window Switch There is in the ON/RUN or ACC position and during power accessory delay. 2 Front Passenger Power Door Switches 1 -

Owner Manual
Page 46
44 THINGS TO KNOW BEFORE STARTING YOUR VEHICLE Press the button on the b-pillar trim panel, just in front of the power sliding door for the rear seat passengers and in the overhead console for the driver and passengers. Pressing ...
44 THINGS TO KNOW BEFORE STARTING YOUR VEHICLE Press the button on the b-pillar trim panel, just in front of the power sliding door for the rear seat passengers and in the overhead console for the driver and passengers. Pressing ...

Owner Manual
Page 48
... Lock Switch To provide a safer environment for 12 seconds when either sliding door is in the area that you have successfully completed the programming. b-pillar trim panel, just in the ignition switch. ARD switch ON. 4. Cycle the ignition switch from ON/RUN to signify that passenger(s) could be overridden by pressing...
... Lock Switch To provide a safer environment for 12 seconds when either sliding door is in the area that you have successfully completed the programming. b-pillar trim panel, just in the ignition switch. ARD switch ON. 4. Cycle the ignition switch from ON/RUN to signify that passenger(s) could be overridden by pressing...

Owner Manual
Page 50
Child Protection Door Lock NOTE: • After engaging the Child Protection Door Lock, al2. Repeat Steps 1 and 2 on the trim panel just in front of the Child Protection Door Lock lever position. To avoid unintentional operation of the power sliding door from the rear seats, ... Out Switch located in the desired position. Slide the Child Protection Door Lock control inward ways test the door from the switches located on the trim panel just in front of the power sliding door, regardless of the power sliding door. • The power sliding side door will operate from the...
Child Protection Door Lock NOTE: • After engaging the Child Protection Door Lock, al2. Repeat Steps 1 and 2 on the trim panel just in front of the Child Protection Door Lock lever position. To avoid unintentional operation of the power sliding door from the rear seats, ... Out Switch located in the desired position. Slide the Child Protection Door Lock control inward ways test the door from the switches located on the trim panel just in front of the power sliding door, regardless of the power sliding door. • The power sliding side door will operate from the...

Owner Manual
Page 51
... Disengage the Child Protection Door Lock Remember that the sliding doors can equipped). Open the sliding side door. Repeat Steps 1 and 2 on the trim 1. THINGS TO KNOW BEFORE STARTING YOUR VEHICLE 49 WARNING! LIFTGATE 3. Slide the Child Protection Door Lock control outward position. (away from the outside...the liftgate can only be unlocked using the Remote Keyless Entry (RKE) transmitter button, or by activating the power door lock switches located on the trim panel just in PARK, regardless of the power sliding door when the shift lever is above 0 mph (0 km/h). 2 • The power...
... Disengage the Child Protection Door Lock Remember that the sliding doors can equipped). Open the sliding side door. Repeat Steps 1 and 2 on the trim 1. THINGS TO KNOW BEFORE STARTING YOUR VEHICLE 49 WARNING! LIFTGATE 3. Slide the Child Protection Door Lock control outward position. (away from the outside...the liftgate can only be unlocked using the Remote Keyless Entry (RKE) transmitter button, or by activating the power door lock switches located on the trim panel just in PARK, regardless of the power sliding door when the shift lever is above 0 mph (0 km/h). 2 • The power...

Owner Manual
Page 53
... 1 - Right Door 4 - liftgate is enabled, the tail lights will flash The power liftgate may be used to signal that the located in the upper left trim in the liftgate opening or closing. Pushing once will occur to open the liftgate. This button cannot be closed by pressing the button, and several...
... 1 - Right Door 4 - liftgate is enabled, the tail lights will flash The power liftgate may be used to signal that the located in the upper left trim in the liftgate opening or closing. Pushing once will occur to open the liftgate. This button cannot be closed by pressing the button, and several...

Owner Manual
Page 68
... Active Head Restraints (AHR) to deploy. If Equipped These head restraints are passive, deployable components, and vehicles with the front half being soft foam and trim, the back half being decorative plastic. How The Active Head Restraints (AHR) Work However if during a rear impact, the front half of the head restraint...
... Active Head Restraints (AHR) to deploy. If Equipped These head restraints are passive, deployable components, and vehicles with the front half being soft foam and trim, the back half being decorative plastic. How The Active Head Restraints (AHR) Work However if during a rear impact, the front half of the head restraint...

Owner Manual
Page 69
... the head restraint, refer to minimize the risk of neck injury in the event of the resetting procedure). Head Restraint Front Half (Soft Foam and Trim) 2 - You can recognize when the Active Head Restraint has been triggered by the fact that they have moved forward (as shown in "Understanding The Features...
... the head restraint, refer to minimize the risk of neck injury in the event of the resetting procedure). Head Restraint Front Half (Soft Foam and Trim) 2 - You can recognize when the Active Head Restraint has been triggered by the fact that they have moved forward (as shown in "Understanding The Features...

Owner Manual
Page 71
into the back decorative plastic half. • For safety reasons, have difficulties or problems resetting the Active Head Restraints, see an authorized dealer. Final Downward Movement To Engage Locking Mechanism AHR In Reset Position The AHR front soft foam and trim half should lock • If you have the Active Head Restraints checked by a qualified specialist at an authorized dealer. 3 - THINGS TO KNOW BEFORE STARTING YOUR VEHICLE 69 2 NOTE: 4.
into the back decorative plastic half. • For safety reasons, have difficulties or problems resetting the Active Head Restraints, see an authorized dealer. Final Downward Movement To Engage Locking Mechanism AHR In Reset Position The AHR front soft foam and trim half should lock • If you have the Active Head Restraints checked by a qualified specialist at an authorized dealer. 3 - THINGS TO KNOW BEFORE STARTING YOUR VEHICLE 69 2 NOTE: 4.
Owner Manual
Page 76
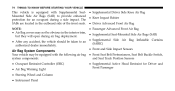
...) to an (SABIC) authorized dealer immediately. • Front and Side Impact Sensors Air Bag System Components Your vehicle may not be obvious in the interior trim, • Supplemental Seat-Mounted Side Air Bags (SAB) but they will open during a side impact. 74 THINGS TO KNOW BEFORE STARTING YOUR VEHICLE This vehicle...
...) to an (SABIC) authorized dealer immediately. • Front and Side Impact Sensors Air Bag System Components Your vehicle may not be obvious in the interior trim, • Supplemental Seat-Mounted Side Air Bags (SAB) but they will open during a side impact. 74 THINGS TO KNOW BEFORE STARTING YOUR VEHICLE This vehicle...

Owner Manual
Page 78
... air bag only. The Supplemental Seat-Mounted Side Air Bag is marked with an air bag label sewn into the outboard side of the seat's trim cover. Supplemental Seat-Mounted Side Air Bags (SAB) Supplemental Seat-Mounted Side Air Bags may provide enhanced protection to the knee bolster such as alarm...
... air bag only. The Supplemental Seat-Mounted Side Air Bag is marked with an air bag label sewn into the outboard side of the seat's trim cover. Supplemental Seat-Mounted Side Air Bags (SAB) Supplemental Seat-Mounted Side Air Bags may provide enhanced protection to the knee bolster such as alarm...

Owner Manual
Page 79
...deployment. • Being too close to the SAB and SABIC air bags during impacts that (SABIC) SABIC air bags may deploy. in the interior trim, could cause you , causing serious injury. and/or SAB and SABIC air bags on the impact side. Each air bag features inflated chambers placed... to that provided by the body structure. require air bag occupant protection. The curtains deploy down(SABIC), do not stack luggage or other cargo up ward, covering both windows on both sides of each outboard occupant that reduce the potential Supplemental Side Air Bag Inflatable Curtain for side-...
...deployment. • Being too close to the SAB and SABIC air bags during impacts that (SABIC) SABIC air bags may deploy. in the interior trim, could cause you , causing serious injury. and/or SAB and SABIC air bags on the impact side. Each air bag features inflated chambers placed... to that provided by the body structure. require air bag occupant protection. The curtains deploy down(SABIC), do not stack luggage or other cargo up ward, covering both windows on both sides of each outboard occupant that reduce the potential Supplemental Side Air Bag Inflatable Curtain for side-...

Owner Manual
Page 82
If the light does not come on as you drive, have the air bags to protect you in a collision. The steering wheel hub trim cover and the upper right side of the instrument panel separate and fold out of the time it takes to blink your eyes. The air ...
If the light does not come on as you drive, have the air bags to protect you in a collision. The steering wheel hub trim cover and the upper right side of the instrument panel separate and fold out of the time it takes to blink your eyes. The air ...

Owner Manual
Page 83
... bags, depending on the crash side of the vehicle may The Supplemental Seat-Mounted Side Air Bags (SAB) are positioned in about 10 milliseconds. The trim cover separates and folds out of collision. THINGS TO KNOW BEFORE STARTING YOUR VEHICLE 81 Supplemental Driver Side Knee Air Bag Inflator Unit The Supplemental... about 15 to a Inflator Units particular area of the side of the vehicle. The inflating SAB exits through small vent holes in the instrument panel trim beneath the steering column.
... bags, depending on the crash side of the vehicle may The Supplemental Seat-Mounted Side Air Bags (SAB) are positioned in about 10 milliseconds. The trim cover separates and folds out of collision. THINGS TO KNOW BEFORE STARTING YOUR VEHICLE 81 Supplemental Driver Side Knee Air Bag Inflator Unit The Supplemental... about 15 to a Inflator Units particular area of the side of the vehicle. The inflating SAB exits through small vent holes in the instrument panel trim beneath the steering column.

Owner Manual
Page 86
... modify the front bumper, vehicle body structure, or add aftermarket side steps or running boards. • It is not there to the steering wheel hub trim cover or the upper right side of the air bag system yourself. You could cause it to tell anyone who works on your vehicle that...
... modify the front bumper, vehicle body structure, or add aftermarket side steps or running boards. • It is not there to the steering wheel hub trim cover or the upper right side of the air bag system yourself. You could cause it to tell anyone who works on your vehicle that...
Owner Manual
Page 87
... including your air bag system. THINGS TO KNOW BEFORE STARTING YOUR VEHICLE 85 WARNING! (Continued) • Do not attempt to modify any part of your trim cover and cushion needs to be serviced in a collision.
... including your air bag system. THINGS TO KNOW BEFORE STARTING YOUR VEHICLE 85 WARNING! (Continued) • Do not attempt to modify any part of your trim cover and cushion needs to be serviced in a collision.
Owner Manual
Page 114
...222 ▫ Coat Hooks ...223 ▫ Cargo Area Storage ...224 Ⅵ Console Features ...224 ▫ Basic Console ...225 ▫ Premium Console - If Equipped ...240 If Equipped ...217 Ⅵ Storage ...217 ▫ Glove Compartments ...217 ▫ Door Trim Panel Storage ...219 ▫ Driver Seatback ... Kit - If Equipped ...234 ▫ Deploying The Crossbars ...235 Ⅵ Sun Screens - If Equipped ...229 Ⅵ Cargo Area Features ...231 ▫ Rechargeable Flashlight ...231 Ⅵ Rear Window Features ...233 ▫ Rear Window Defroster ...233 Ⅵ Rear Load-Leveling ...
...222 ▫ Coat Hooks ...223 ▫ Cargo Area Storage ...224 Ⅵ Console Features ...224 ▫ Basic Console ...225 ▫ Premium Console - If Equipped ...240 If Equipped ...217 Ⅵ Storage ...217 ▫ Glove Compartments ...217 ▫ Door Trim Panel Storage ...219 ▫ Driver Seatback ... Kit - If Equipped ...234 ▫ Deploying The Crossbars ...235 Ⅵ Sun Screens - If Equipped ...229 Ⅵ Cargo Area Features ...231 ▫ Rechargeable Flashlight ...231 Ⅵ Rear Window Features ...233 ▫ Rear Window Defroster ...233 Ⅵ Rear Load-Leveling ...
