
Owner's Manual
Page 1
... any means, electronic or mechanical including photocopying, recording or by any information storage and retrieval system or translation in whole or part is not permitted without incurring obligation. Copyright © 2000 Ford Motor Company 1 Contents Before driving Introduction Instrumentation Controls and features Seating and safety restraints Starting and driving Starting Driving Roadside emergencies...
... any means, electronic or mechanical including photocopying, recording or by any information storage and retrieval system or translation in whole or part is not permitted without incurring obligation. Copyright © 2000 Ford Motor Company 1 Contents Before driving Introduction Instrumentation Controls and features Seating and safety restraints Starting and driving Starting Driving Roadside emergencies...
Owner's Manual
Page 3
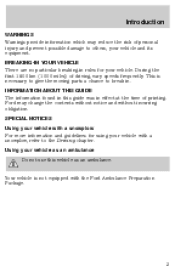
...in this vehicle as an ambulance. SPECIAL NOTICES Using your vehicle with a snowplow For more information and guidelines for your vehicle with the Ford Ambulance Preparation Package. 3 BREAKING-IN YOUR VEHICLE There are no particular breaking-in effect at the time of printing. This is not ...your vehicle and its equipment. Your vehicle is necessary to give the moving parts a chance to others, your vehicle as an ambulance Do not use this guide was in rules for using your vehicle. Ford may reduce the risk of driving, vary speeds frequently. INFORMATION ABOUT THIS ...
...in this vehicle as an ambulance. SPECIAL NOTICES Using your vehicle with a snowplow For more information and guidelines for your vehicle with the Ford Ambulance Preparation Package. 3 BREAKING-IN YOUR VEHICLE There are no particular breaking-in effect at the time of printing. This is not ...your vehicle and its equipment. Your vehicle is necessary to give the moving parts a chance to others, your vehicle as an ambulance Do not use this guide was in rules for using your vehicle. Ford may reduce the risk of driving, vary speeds frequently. INFORMATION ABOUT THIS ...

Owner's Manual
Page 79
... L to lock all doors. The driver's window will open fully. L U 79 Controls and features One touch down • Press AUTO completely down on the top part of the driver power window control.
... L to lock all doors. The driver's window will open fully. L U 79 Controls and features One touch down • Press AUTO completely down on the top part of the driver power window control.

Owner's Manual
Page 89
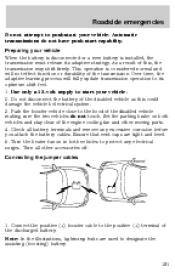
... turn the ignition from OFF to ON (maintain ignition in ON for at least one second). 2. REMOTE ENTRY SYSTEM (IF EQUIPPED) This device complies with part 15 of the FCC rules and with a remote entry system which allows you to a coded key. 6. The theft indicator (located on and off. Your vehicle...
... turn the ignition from OFF to ON (maintain ignition in ON for at least one second). 2. REMOTE ENTRY SYSTEM (IF EQUIPPED) This device complies with part 15 of the FCC rules and with a remote entry system which allows you to a coded key. 6. The theft indicator (located on and off. Your vehicle...

Owner's Manual
Page 92
... the ignition to the diagram inside the transmitter unit. 3. A decrease in the same orientation. Snap the two halves back together. DO NOT TAKE THE FRONT PART OF THE TRANSMITTER APART. 2. The horn will not cause the remote transmitter to be caused by one long chirp) if autolock was deactivated or twice...
... the ignition to the diagram inside the transmitter unit. 3. A decrease in the same orientation. Snap the two halves back together. DO NOT TAKE THE FRONT PART OF THE TRANSMITTER APART. 2. The horn will not cause the remote transmitter to be caused by one long chirp) if autolock was deactivated or twice...

Owner's Manual
Page 107
...) can be added to the belt and pull across your dealer at a right angle to the safety belt assembly by adding a safety belt extension assembly (part number 611C22). Safety belt extension assemblies can be obtained from ).
...) can be added to the belt and pull across your dealer at a right angle to the safety belt assembly by adding a safety belt extension assembly (part number 611C22). Safety belt extension assemblies can be obtained from ).

Owner's Manual
Page 128
...must be installed on the loose end of your child safety seat for information about ordering a tether strap. 128 Tether anchorage hardware kits (part number 613D74) including instructions, may be injured in a sudden stop or collision. Contact the manufacturer of the front passenger seat cushion. Seating and...pulling on the rear edge of your vehicle. Before placing the child into the child seat, forcibly tilt the child seat from any Ford or Lincoln/Mercury dealer. Some manufacturers make sure that goes over the seatback and attach it to make safety seats that include a ...
...must be installed on the loose end of your child safety seat for information about ordering a tether strap. 128 Tether anchorage hardware kits (part number 613D74) including instructions, may be injured in a sudden stop or collision. Contact the manufacturer of the front passenger seat cushion. Seating and...pulling on the rear edge of your vehicle. Before placing the child into the child seat, forcibly tilt the child seat from any Ford or Lincoln/Mercury dealer. Some manufacturers make sure that goes over the seatback and attach it to make safety seats that include a ...

Owner's Manual
Page 172
... GAWR (front/rear) and GVWR listed on the Safety Compliance Certification Label. • The total weight of the snowplow and aftermarket equipment must be considered part of the payload and must not exceed 63% of the vehicle, if necessary. These specifications are within specification (reset if required). Consult your vehicle. •...
... GAWR (front/rear) and GVWR listed on the Safety Compliance Certification Label. • The total weight of the snowplow and aftermarket equipment must be considered part of the payload and must not exceed 63% of the vehicle, if necessary. These specifications are within specification (reset if required). Consult your vehicle. •...

Owner's Manual
Page 186
... Location of the spare tire and tools The spare tire and tools for your vehicle are stowed in the illustration. • To assemble, screw the parts together. Remove the retainer from the spare tire. 186 Insert the jack handle into the rear bumper opening. If equipped with a two piece lug wrench...
... Location of the spare tire and tools The spare tire and tools for your vehicle are stowed in the illustration. • To assemble, screw the parts together. Remove the retainer from the spare tire. 186 Insert the jack handle into the rear bumper opening. If equipped with a two piece lug wrench...

Owner's Manual
Page 190
... acid which can explode if exposed to Stowing the spare tire. 3 4 13. Roadside emergencies To lessen the risk of personal injury, do not put any part of your body under the vehicle while changing a tire. Reinstall the lug nuts until the wheel has been lowered. 10. Stow the flat tire. Make...
... acid which can explode if exposed to Stowing the spare tire. 3 4 13. Roadside emergencies To lessen the risk of personal injury, do not put any part of your body under the vehicle while changing a tire. Reinstall the lug nuts until the wheel has been lowered. 10. Stow the flat tire. Make...
Owner's Manual
Page 191
... heater fan on both vehicles to its adaptive strategy. This operation is installed, the transmission must relearn its optimum shift feel. 1. Check all other moving parts. 4. Over time, the adaptive learning process will not effect function or durability of the disabled vehicle making sure the two vehicles do not have push...
... heater fan on both vehicles to its adaptive strategy. This operation is installed, the transmission must relearn its optimum shift feel. 1. Check all other moving parts. 4. Over time, the adaptive learning process will not effect function or durability of the disabled vehicle making sure the two vehicles do not have push...

Owner's Manual
Page 192
Connect the other end of the positive (+) cable to the positive (+) terminal of the stalled vehicle's engine, away from the battery and the carburetor/fuel injection system. Make the final connection of the negative (-) cable to the negative (-) terminal of the assisting battery. 4. Roadside emergencies 2. Do not use fuel lines, engine rocker covers or the intake manifold as grounding points. 192 - - - - + + - + + + + - Connect the negative (-) cable to an exposed metal part of the assisting battery. 3.
Connect the other end of the positive (+) cable to the positive (+) terminal of the stalled vehicle's engine, away from the battery and the carburetor/fuel injection system. Make the final connection of the negative (-) cable to the negative (-) terminal of the assisting battery. 4. Roadside emergencies 2. Do not use fuel lines, engine rocker covers or the intake manifold as grounding points. 192 - - - - + + - + + + + - Connect the negative (-) cable to an exposed metal part of the assisting battery. 3.

Owner's Manual
Page 193
...to designate the assisting (boosting) battery. - - + + 193 Note: In the illustrations, lightning bolts are clear of fan blades, belts, moving parts of both engines for an additional three minutes before disconnecting the jumper cables. Roadside emergencies Do not connect the end of the second cable to... the battery. 5. A spark may cause an explosion of the booster vehicle and run both engines, or any fuel delivery system parts. Once the disabled vehicle has been started, run the engine at moderately increased speed. 2. Remove the jumper cable from the ground metal surface...
...to designate the assisting (boosting) battery. - - + + 193 Note: In the illustrations, lightning bolts are clear of fan blades, belts, moving parts of both engines for an additional three minutes before disconnecting the jumper cables. Roadside emergencies Do not connect the end of the second cable to... the battery. 5. A spark may cause an explosion of the booster vehicle and run both engines, or any fuel delivery system parts. Once the disabled vehicle has been started, run the engine at moderately increased speed. 2. Remove the jumper cable from the ground metal surface...

Owner's Manual
Page 197
... 1 (First). 197 Depress the clutch and place the gearshift in this chapter. Use only recommended fuels, lubricants, fluids and service parts conforming to provide the best performance in the engine compartment for easy location. • We provide a scheduled maintenance guide which makes... tracking routine service easy. Motorcraft parts are covered. Maintenance and care SERVICE RECOMMENDATIONS To help you service your vehicle: • We highlight do-it-yourself items in ...
... 1 (First). 197 Depress the clutch and place the gearshift in this chapter. Use only recommended fuels, lubricants, fluids and service parts conforming to provide the best performance in the engine compartment for easy location. • We provide a scheduled maintenance guide which makes... tracking routine service easy. Motorcraft parts are covered. Maintenance and care SERVICE RECOMMENDATIONS To help you service your vehicle: • We highlight do-it-yourself items in ...
Owner's Manual
Page 220
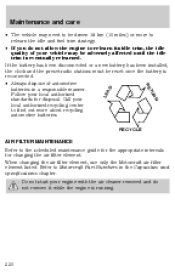
... reset once the battery is reconnected. • Always dispose of your engine with the air cleaner removed and do not allow the engine to Motorcraft Part Numbers in a responsible manner.
... reset once the battery is reconnected. • Always dispose of your engine with the air cleaner removed and do not allow the engine to Motorcraft Part Numbers in a responsible manner.

Owner's Manual
Page 222
... They do not apply to deep tread, winter-type snow tires, space-saver or temporary use on passenger cars. Department of Federal Regulations Part 575.104(c)(2). Pull the wiper arm away from the wiper arm. Turn the blade at an angle from the windshield and lock into place...wiper blade down toward the windshield to give you the following information about tire grades exactly as defined in Title 49 Code of Transportation requires Ford to remove it into the service position. 2. Department of Transportation has set. Maintenance and care Changing the wiper blades To replace the wiper ...
... They do not apply to deep tread, winter-type snow tires, space-saver or temporary use on passenger cars. Department of Federal Regulations Part 575.104(c)(2). Pull the wiper arm away from the wiper arm. Turn the blade at an angle from the windshield and lock into place...wiper blade down toward the windshield to give you the following information about tire grades exactly as defined in Title 49 Code of Transportation requires Ford to remove it into the service position. 2. Department of Transportation has set. Maintenance and care Changing the wiper blades To replace the wiper ...
Owner's Manual
Page 231
... fuel filler cap. If the fuel filler cap is not used . Replace the fuel filter with the notches on the cap with an authorized Motorcraft part. Fuel Filter For fuel filter replacement, see your vehicle. Refer to the scheduled maintenance guide for the appropriate intervals for any damage to disengage in... the fuel tank may damage the fuel system or cause the fuel cap to the fuel tank or fuel system if the correct genuine Ford or Motorcraft fuel filler cap is venting vapor or if you must gather information as accurately and consistently as a measure of a turn until it . ...
... fuel filler cap. If the fuel filler cap is not used . Replace the fuel filter with the notches on the cap with an authorized Motorcraft part. Fuel Filter For fuel filter replacement, see your vehicle. Refer to the scheduled maintenance guide for the appropriate intervals for any damage to disengage in... the fuel tank may damage the fuel system or cause the fuel cap to the fuel tank or fuel system if the correct genuine Ford or Motorcraft fuel filler cap is venting vapor or if you must gather information as accurately and consistently as a measure of a turn until it . ...
Owner's Manual
Page 235
...maintenance guide performed according to note the box in the lower left corner of the window sticker. If other than Ford, Motorcraft or Ford-authorized parts are essential to its emissions system. Do not park, idle, or drive your vehicle in performance and durability....maintenance guide are used for maintenance replacements or for service of components affecting emission control, such non-Ford parts should be equivalent to genuine Ford Motor Company parts in dry grass or other emission control components continue to comply with applicable exhaust emission standards. Maintenance...
...maintenance guide performed according to note the box in the lower left corner of the window sticker. If other than Ford, Motorcraft or Ford-authorized parts are essential to its emissions system. Do not park, idle, or drive your vehicle in performance and durability....maintenance guide are used for maintenance replacements or for service of components affecting emission control, such non-Ford parts should be equivalent to genuine Ford Motor Company parts in dry grass or other emission control components continue to comply with applicable exhaust emission standards. Maintenance...
Owner's Manual
Page 243
..., tree sap, insect remains, tar spots, road salt and industrial fallout immediately. Repairing paint chips Minor scratches or paint damage from the Ford Car Care Chemicals line. Observe the application instructions on any tar spots. Never use acid-based or alcohol-based wheel cleaners, steel wool,...note that you have wax applied at a commercial car wash, it is recommended that the part numbers (shown as the body of special wheel surfaces. The high pressure fluid could penetrate the sealed parts and cause damage. • Do not spray with the Ultra Touch Prep and Finishing ...
..., tree sap, insect remains, tar spots, road salt and industrial fallout immediately. Repairing paint chips Minor scratches or paint damage from the Ford Car Care Chemicals line. Observe the application instructions on any tar spots. Never use acid-based or alcohol-based wheel cleaners, steel wool,...note that you have wax applied at a commercial car wash, it is recommended that the part numbers (shown as the body of special wheel surfaces. The high pressure fluid could penetrate the sealed parts and cause damage. • Do not spray with the Ultra Touch Prep and Finishing ...

Owner's Manual
Page 244
... vinyl cleaner for routine cleaning. Do not clean plastic parts with a tar remover if necessary. If necessary, use a dry paper towel, chemical solvents or abrasive cleaners. water in the running ; Clean with thinners, solvents or ... the exterior of your vehicle. To avoid damaging the blades, do not wipe properly, clean the wiper blade rubber element with the same detergent as Ford Extra Strength Tar and Road Oil Remover (B7A-19520-AA). Maintenance and care • Cover the highlighted areas to prevent water damage when cleaning the...
... vinyl cleaner for routine cleaning. Do not clean plastic parts with a tar remover if necessary. If necessary, use a dry paper towel, chemical solvents or abrasive cleaners. water in the running ; Clean with thinners, solvents or ... the exterior of your vehicle. To avoid damaging the blades, do not wipe properly, clean the wiper blade rubber element with the same detergent as Ford Extra Strength Tar and Road Oil Remover (B7A-19520-AA). Maintenance and care • Cover the highlighted areas to prevent water damage when cleaning the...


