
Owner's Manual
Page 33
... an upshift indicator in this test, it cannot alert you important information about your car for the Canadian model are working. Differences for burned-out bulbs or other problems. * The U.S. If an indicator does not light during this position. Have the dealer check your car.
... an upshift indicator in this test, it cannot alert you important information about your car for the Canadian model are working. Differences for burned-out bulbs or other problems. * The U.S. If an indicator does not light during this position. Have the dealer check your car.

Owner's Manual
Page 36
... and Hazard Warning Indicators The left or right turn signal light blinks when you signal a lane change or turn signal bulbs is burned out (see that you must refuel soon. Replace the bulb as soon as a reminder that you of the car should flash. It does this by lighting to inform you...
... and Hazard Warning Indicators The left or right turn signal light blinks when you signal a lane change or turn signal bulbs is burned out (see that you must refuel soon. Replace the bulb as soon as a reminder that you of the car should flash. It does this by lighting to inform you...

Owner's Manual
Page 118
...147 Specifications...148 Battery...149 Windshield Wipers...152 Air Conditioning...154 Drive Belts...155 Tires...155 Inflation...156 Recommended Tire Pressures for information on your Honda, you may want to take care of yourself. This section also includes Maintenance Schedules for normal driving and severe driving conditions, a Maintenance ...and Wheels ...158 Wheels and Tires...159 Winter Driving...159 Snow Tires...160 Tire Chains...160 Lights...161 Headlight Aiming...161 Replacing Bulbs...163 Storing Your Car...171 Maintenance Safety...120 Important Safety Precautions.. 121 Maintenance
...147 Specifications...148 Battery...149 Windshield Wipers...152 Air Conditioning...154 Drive Belts...155 Tires...155 Inflation...156 Recommended Tire Pressures for information on your Honda, you may want to take care of yourself. This section also includes Maintenance Schedules for normal driving and severe driving conditions, a Maintenance ...and Wheels ...158 Wheels and Tires...159 Winter Driving...159 Snow Tires...160 Tire Chains...160 Lights...161 Headlight Aiming...161 Replacing Bulbs...163 Storing Your Car...171 Maintenance Safety...120 Important Safety Precautions.. 121 Maintenance

Owner's Manual
Page 160
...check their "0" positions after the headlights are burned out, replace them as soon as possible. Load the trunk with the items you find any bulbs are aimed at least once a month. These are set to determine what type of your car's exterior lights at the factory. Each headlight ...if you regularly carry heavy items in the driver's seat for all checks and adjustments. Refer to signal your car was new. A burned out bulb can create an unsafe condition by reducing your car's visibility and the ability to the chart on level ground. 2. Check the following: Headlights (low...
...check their "0" positions after the headlights are burned out, replace them as soon as possible. Load the trunk with the items you find any bulbs are aimed at least once a month. These are set to determine what type of your car's exterior lights at the factory. Each headlight ...if you regularly carry heavy items in the driver's seat for all checks and adjustments. Refer to signal your car was new. A burned out bulb can create an unsafe condition by reducing your car's visibility and the ability to the chart on level ground. 2. Check the following: Headlights (low...

Owner's Manual
Page 162
... the power steering reservoir tank by its holder. If you need to change the headlight bulb on the glass can cause the bulb to align, have your skin or hard objects. When replacing a bulb, handle it by pulling it with your Honda dealer inspect the car for body damage or suspension problems. Halogen headlight...
... the power steering reservoir tank by its holder. If you need to change the headlight bulb on the glass can cause the bulb to align, have your skin or hard objects. When replacing a bulb, handle it by pulling it with your Honda dealer inspect the car for body damage or suspension problems. Halogen headlight...

Owner's Manual
Page 163
... unlock the tab. Push the electrical connector onto the tabs of the headlight assembly. Remove the electrical connector from its slot. Maintenance Insert the new bulb into the slot. 6. Pivot the hold -down wire back in place and clip the end into the hole, making sure the tabs are in ...place. Make sure it is right side up; it locks in their slots. WEATHER SEAL BULB CONNECTOR HOLD-DOWN WIRE 2. Install the rubber seal over the back of the new bulb. Lights 3. Remove the rubber weather seal by squeezing the connector on both sides to test the new...
... unlock the tab. Push the electrical connector onto the tabs of the headlight assembly. Remove the electrical connector from its slot. Maintenance Insert the new bulb into the slot. 6. Pivot the hold -down wire back in place and clip the end into the hole, making sure the tabs are in ...place. Make sure it is right side up; it locks in their slots. WEATHER SEAL BULB CONNECTOR HOLD-DOWN WIRE 2. Install the rubber seal over the back of the new bulb. Lights 3. Remove the rubber weather seal by squeezing the connector on both sides to test the new...

Owner's Manual
Page 164
...in place. 8. Test the lights to the right, and turn counterclockwise. 9. If you are changing the bulb on the passenger's side, turn the steering wheel all the way to make sure the new bulb is working. 1. Turn it in place. 7. Install the holding clip from the socket by turning it ...unlocks. 6. Install the new bulb in place. Pull the inner fender cover off the engine. If you are changing the bulb on the driver's side, start the engine, turn the steering wheel to lock it clockwise to the ...
...in place. 8. Test the lights to the right, and turn counterclockwise. 9. If you are changing the bulb on the passenger's side, turn the steering wheel all the way to make sure the new bulb is working. 1. Turn it in place. 7. Install the holding clip from the socket by turning it ...unlocks. 6. Install the new bulb in place. Pull the inner fender cover off the engine. If you are changing the bulb on the driver's side, start the engine, turn the steering wheel to lock it clockwise to the ...

Owner's Manual
Page 165
... turn signal. 3. Reinstall the trunk lining. 1. Determine which of the two bulbs is working. 7. Pull the lining off. 2. Test the lights to make sure the new bulb is burned out: stop/taillight/side marker light or turn counterclockwise. Pull the bulb straight out of the fastener's head until it pops in Fenders) 4. Undo...
... turn signal. 3. Reinstall the trunk lining. 1. Determine which of the two bulbs is working. 7. Pull the lining off. 2. Test the lights to make sure the new bulb is burned out: stop/taillight/side marker light or turn counterclockwise. Pull the bulb straight out of the fastener's head until it pops in Fenders) 4. Undo...

Owner's Manual
Page 166
Open the trunk. 2. Remove the holder from the bulb holder. Determine which of the trunk lining and push on the housing. 9. Reset the fastener by turning it locks (the center is burned out: stop/... flush with the fingers on the center until it one-quarter turn counterclockwise. Put the fastener in Trunk Lid) SCREW 8. CONTINUED Maintenance Lights Replacing Rear Bulbs (in the hole of the side of the two...
Open the trunk. 2. Remove the holder from the bulb holder. Determine which of the trunk lining and push on the housing. 9. Reset the fastener by turning it locks (the center is burned out: stop/... flush with the fingers on the center until it one-quarter turn counterclockwise. Put the fastener in Trunk Lid) SCREW 8. CONTINUED Maintenance Lights Replacing Rear Bulbs (in the hole of the side of the two...

Owner's Manual
Page 167
...the trunk and remove the socket from the light assembly by turning it in place. 7. Push the new bulb straight into the socket until it bottoms. Replacing a High-mount Brake Light Bulb 3. Test the lights to lock it one-quarter turn counterclockwise. 2. Reinstall the socket. Insert the socket ...back into the socket until it securely. 1. Pull the bulb straight out of its socket. Turn it clockwise until it locks. Push the new bulb straight into the light assembly. Reinstall the bulb holder assembly. Maintenance Pull the bulb straight out of its socket. Install the screw and tighten...
...the trunk and remove the socket from the light assembly by turning it in place. 7. Push the new bulb straight into the socket until it bottoms. Replacing a High-mount Brake Light Bulb 3. Test the lights to lock it one-quarter turn counterclockwise. 2. Reinstall the socket. Insert the socket ...back into the socket until it securely. 1. Pull the bulb straight out of its socket. Turn it clockwise until it locks. Push the new bulb straight into the light assembly. Reinstall the bulb holder assembly. Maintenance Pull the bulb straight out of its socket. Install the screw and tighten...

Owner's Manual
Page 168
.... Remove the lens by turning it locks. 6. Reinstall the two screws and tighten them securely. 1. Lights Replacing a Rear License Bulb Replacing an Interior Light Bulb (U.S.: EX, Canada: Si) INTERIOR LIGHT 1. Pull the bulb straight out of the lens in place. Turn it clockwise until it bottoms in until it one-quarter turn counterclockwise... of the housing around the lens. Do not pry on the edge of its socket. Turn on the parking lights and check that the new bulb is working. 5. Reinstall the socket. Remove the two screws and remove the license light assembly. 2.
.... Remove the lens by turning it locks. 6. Reinstall the two screws and tighten them securely. 1. Lights Replacing a Rear License Bulb Replacing an Interior Light Bulb (U.S.: EX, Canada: Si) INTERIOR LIGHT 1. Pull the bulb straight out of the lens in place. Turn it clockwise until it bottoms in until it one-quarter turn counterclockwise... of the housing around the lens. Do not pry on the edge of its socket. Turn on the parking lights and check that the new bulb is working. 5. Reinstall the socket. Remove the two screws and remove the license light assembly. 2.

Owner's Manual
Page 169
Remove the lens by pulling it straight out of the lens in place. 1. Remove the bulb by carefully prying on the edge of its metal tabs. 3. Maintenance Lights Replacing the Trunk Light Bulb (U.S.: DX, HX, Canada: DX) INTERIOR LIGHT The trunk light is available on HX and EX models in the U.S., and Si... the lens back in Canada TRUNK LIGHT 2. Snap the lens back in the middle with a fingernail file or a small flat-tip screwdriver. Push the new bulb into the metal tabs. Do not pry on the edge of its metal tabs. 3. Push the new...
Remove the lens by pulling it straight out of the lens in place. 1. Remove the bulb by carefully prying on the edge of its metal tabs. 3. Maintenance Lights Replacing the Trunk Light Bulb (U.S.: DX, HX, Canada: DX) INTERIOR LIGHT The trunk light is available on HX and EX models in the U.S., and Si... the lens back in Canada TRUNK LIGHT 2. Snap the lens back in the middle with a fingernail file or a small flat-tip screwdriver. Push the new bulb into the metal tabs. Do not pry on the edge of its metal tabs. 3. Push the new...
Owner's Manual
Page 216
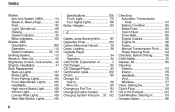
......114 System Indicator...35, 115 Braking System...113 Break-in, New Car...90 Brightness Control, Instruments...42 Brights, Headlights...41 Bulb Replacement Back-up Lights...167 Brake Lights...166 Front Parking Lights...165 Front Side Marker Lights...165 Headlights...163 High-mount Brake Light...168 Interior Light...169 License Plate Lights...169 Rear Side Marker Lights...166 Specifications...205 Trunk Light...170 Turn Signal Lights...165 Bulbs, Halogen...163 Checking Automatic Transmission Fluid...141 Battery Condition...149 Brake Fluid...143 Clutch Fluid...143 Drive Belts...155 Engine Coolant...
......114 System Indicator...35, 115 Braking System...113 Break-in, New Car...90 Brightness Control, Instruments...42 Brights, Headlights...41 Bulb Replacement Back-up Lights...167 Brake Lights...166 Front Parking Lights...165 Front Side Marker Lights...165 Headlights...163 High-mount Brake Light...168 Interior Light...169 License Plate Lights...169 Rear Side Marker Lights...166 Specifications...205 Trunk Light...170 Turn Signal Lights...165 Bulbs, Halogen...163 Checking Automatic Transmission Fluid...141 Battery Condition...149 Brake Fluid...143 Clutch Fluid...143 Drive Belts...155 Engine Coolant...
Owner's Manual
Page 218
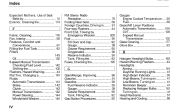
..., Improving...96 Gasohol...91 Gasoline...90 Fuel Reserve Indicator...36 Gauge...38 Octane Requirement...90 Tank, Filling the...92 Gas Station Procedures...92 Halogen Headlight Bulbs...163 Hazard Warning Flashers...44 Headlights Aiming...161 Daytime Running Lights...41 High Beam Indicator...35 High Beams, Turning on...41 Low Beams, Turning on...
..., Improving...96 Gasohol...91 Gasoline...90 Fuel Reserve Indicator...36 Gauge...38 Octane Requirement...90 Tank, Filling the...92 Gas Station Procedures...92 Halogen Headlight Bulbs...163 Hazard Warning Flashers...44 Headlights Aiming...161 Daytime Running Lights...41 High Beam Indicator...35 High Beams, Turning on...41 Low Beams, Turning on...

Owner's Manual
Page 219
......32 Keys...49 Label, Certification...202 Lane Change, Signaling...42 Lap Belt...7 Lap/Shoulder Belts...6 Leaking of Exhaust into Car...28 Lighter, Cigarette...65 Lights Bulb Replacement...159 Indicator...33 Maintenance...119 Periodic Items...128 Record...126-127 Required Indicator...39 Safety...120 Schedule...124-125 CONTINUED
......32 Keys...49 Label, Certification...202 Lane Change, Signaling...42 Lap Belt...7 Lap/Shoulder Belts...6 Leaking of Exhaust into Car...28 Lighter, Cigarette...65 Lights Bulb Replacement...159 Indicator...33 Maintenance...119 Periodic Items...128 Record...126-127 Required Indicator...39 Safety...120 Schedule...124-125 CONTINUED

Owner's Manual
Page 220
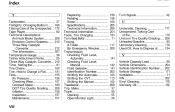
......211 Polishing and Waxing ...175 Power Door Locks...51 Mirrors...62 Radiator Overheating...189 Radio/Cassette Sound System...76 Rear End Towing...200 Rear Lights, Bulb Replacement...166 Rear Seat, Folding...58 Rear View Mirror...61 Rear Window Defogger...44 Reclining the Seat Backs...56 Recommended Shift Speeds ...102 Reminder Lights...
......211 Polishing and Waxing ...175 Power Door Locks...51 Mirrors...62 Radiator Overheating...189 Radio/Cassette Sound System...76 Rear End Towing...200 Rear Lights, Bulb Replacement...166 Rear Seat, Folding...58 Rear View Mirror...61 Rear Window Defogger...44 Reclining the Seat Backs...56 Recommended Shift Speeds ...102 Reminder Lights...

Owner's Manual
Page 221
... ...81 Shifting The Automatic Transmission .. 105 TheCVT...113 The 5-speed Manual Transmission...102 Shift Lever Position Indicator...104 Shift Lock Release...108 Side Marker Lights, Bulb Replacement in...165 Signaling Turns...42 Snow Tires...160 Solvent-type Cleaners...174 Sound System...76 Spare Tire Inflating...180 Specifications...205 Spark Plugs, Replacing...
... ...81 Shifting The Automatic Transmission .. 105 TheCVT...113 The 5-speed Manual Transmission...102 Shift Lever Position Indicator...104 Shift Lock Release...108 Side Marker Lights, Bulb Replacement in...165 Signaling Turns...42 Snow Tires...160 Solvent-type Cleaners...174 Sound System...76 Spare Tire Inflating...180 Specifications...205 Spark Plugs, Replacing...
Owner's Manual
Page 222
......113 Shifting the Manual...102 Treadwear...208 Trip Meter...37 Trunk...55 Opening...55 Open Monitor Light...36 Turn Signals...42 Tachometer...37 Taillights, Changing Bulbs in...166 Taking Care of the Unexpected .. 179 Tape Player...82 Technical Descriptions Anti-lock Brake System...206 Emission Control Systems...210 Three Way Catalytic...
......113 Shifting the Manual...102 Treadwear...208 Trip Meter...37 Trunk...55 Opening...55 Open Monitor Light...36 Turn Signals...42 Tachometer...37 Taillights, Changing Bulbs in...166 Taking Care of the Unexpected .. 179 Tape Player...82 Technical Descriptions Anti-lock Brake System...206 Emission Control Systems...210 Three Way Catalytic...
