Owner's Manual
Page 90
... of additional electrical/electronic equipment such as a mobile two-way radio on or near the SRS airbag system components and/or wiring is not advisable. CAUTION Do not perform any equipment (brush bar, winches, snow plow, skid plate, etc.) other than SUBARU genuine accessory parts to the door jamb. airbags) D Replacement of...
... of additional electrical/electronic equipment such as a mobile two-way radio on or near the SRS airbag system components and/or wiring is not advisable. CAUTION Do not perform any equipment (brush bar, winches, snow plow, skid plate, etc.) other than SUBARU genuine accessory parts to the door jamb. airbags) D Replacement of...
Owner's Manual
Page 97
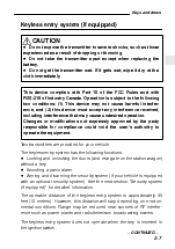
... operation. Keys and doors Keyless entry system (if equipped) D Do not expose the transmitter to severe shocks, such as those experienced as power plants and radio/television broadcasting towers. D Do not take the transmitter apart except when replacing the battery. The keyless entry system has the following two conditions: (1) This device...
... operation. Keys and doors Keyless entry system (if equipped) D Do not expose the transmitter to severe shocks, such as those experienced as power plants and radio/television broadcasting towers. D Do not take the transmitter apart except when replacing the battery. The keyless entry system has the following two conditions: (1) This device...
Owner's Manual
Page 125
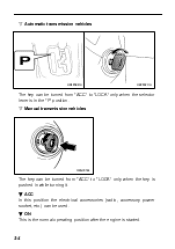
B ON This is the normal operating position after the engine is pushed in the "P" position. n Manual transmission vehicles OM-H0144 The key can be turned from "ACC" to "LOCK" only when the key is started. 3-4 B ACC In this position the electrical accessories (radio, accessory power socket, etc.) can be turned from "ACC" to "LOCK" only when the selector lever is in while turning it. n Automatic transmission vehicles HB4016BA HB2032CA The key can be used.
B ON This is the normal operating position after the engine is pushed in the "P" position. n Manual transmission vehicles OM-H0144 The key can be turned from "ACC" to "LOCK" only when the key is started. 3-4 B ACC In this position the electrical accessories (radio, accessory power socket, etc.) can be turned from "ACC" to "LOCK" only when the selector lever is in while turning it. n Automatic transmission vehicles HB4016BA HB2032CA The key can be used.

Owner's Manual
Page 172
... Audio set HB5041AA D D D D Radio operation: refer to page 5-7 Cassette player operation: refer to page 5-11 CD player control: refer to page 5-13 CD changer control: refer to a stronger station. B Type P119 and type P120 audio set Your SUBARU may be unsatisfactory, switch to page 5-16... - CONTINUED - 5-3 See the pages indicated in your SUBARU dealer before installing a citizen band radio or other obstructions may cause the electronic control system to be equipped...
... Audio set HB5041AA D D D D Radio operation: refer to page 5-7 Cassette player operation: refer to page 5-11 CD player control: refer to page 5-13 CD changer control: refer to a stronger station. B Type P119 and type P120 audio set Your SUBARU may be unsatisfactory, switch to page 5-16... - CONTINUED - 5-3 See the pages indicated in your SUBARU dealer before installing a citizen band radio or other obstructions may cause the electronic control system to be equipped...

Owner's Manual
Page 176
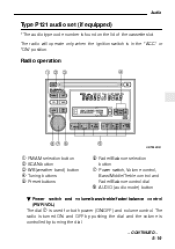
... band Type P120: With weather band The audio set (if equipped) * The audio type code number is found on the lid of the cassette slot. Radio operation HB5041BB 1 Power switch/Volume, Tone, Balance, Fader control dial 2 AUDIO button 3 BAND button 4 Tuning buttons 5 Preset buttons 6 SCAN button B Power switch and... (PWR/VOL) The dial 1 is controlled by pushing the dial and the volume is used for both power (ON/OFF) and volume control. The radio is turned ON and OFF by turning the dial. - CONTINUED - 5-7 Audio Type P119 and P120 audio set will operate only when the ignition switch...
... band Type P120: With weather band The audio set (if equipped) * The audio type code number is found on the lid of the cassette slot. Radio operation HB5041BB 1 Power switch/Volume, Tone, Balance, Fader control dial 2 AUDIO button 3 BAND button 4 Tuning buttons 5 Preset buttons 6 SCAN button B Power switch and... (PWR/VOL) The dial 1 is controlled by pushing the dial and the volume is used for both power (ON/OFF) and volume control. The radio is turned ON and OFF by turning the dial. - CONTINUED - 5-7 Audio Type P119 and P120 audio set will operate only when the ignition switch...
Owner's Manual
Page 177
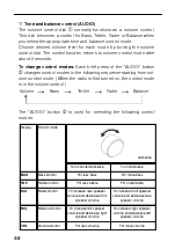
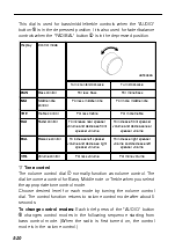
This dial becomes a control for selecting the following sequence starting from volume control mode. (When the radio is first turned on, the control mode is in the volume control.) Volume Bass Treble Fader Balance The "AUDIO" button 2 is used for Bass, Treble, ...
This dial becomes a control for selecting the following sequence starting from volume control mode. (When the radio is first turned on, the control mode is in the volume control.) Volume Bass Treble Fader Balance The "AUDIO" button 2 is used for Bass, Treble, ...
Owner's Manual
Page 178
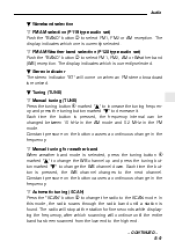
.... The display indicates which one is currently selected. B Stereo indicator The stereo indicator "ST" will come on the button causes a continuous change the radio to the SCAN mode. Each time the button is found. Constant pressure on the button causes a continuous change the WB channel down. B Tuning (TUNE... AM reception. n FM/AM/Weather band selection (P120 type audio set ) Push the "BAND" button 3 to change in the frequency. The radio will continue until a station is pressed, the frequency interval can be changed between 10 kHz in the AM mode and 0.2 MHz in the frequency....
.... The display indicates which one is currently selected. B Stereo indicator The stereo indicator "ST" will come on the button causes a continuous change the radio to the SCAN mode. Each time the button is found. Constant pressure on the button causes a continuous change the WB channel down. B Tuning (TUNE... AM reception. n FM/AM/Weather band selection (P120 type audio set ) Push the "BAND" button 3 to change in the frequency. The radio will continue until a station is pressed, the frequency interval can be changed between 10 kHz in the AM mode and 0.2 MHz in the frequency....
Owner's Manual
Page 179
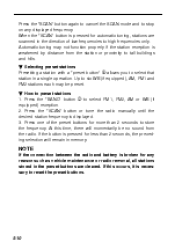
...or WB (if equipped) reception. 2. Press the "SCAN" button or tune the radio manually until the desired station frequency is necessary to reset the preset buttons. 5-10 NOTE If the connection between ...the radio and battery is pressed for any displayed frequency. Press the "BAND" button 3 to six...low frequencies to high frequencies only. If the button is weakened by distance from the radio. Press the "SCAN" button again to cancel the SCAN mode and to stop on any reason such as ...
...or WB (if equipped) reception. 2. Press the "SCAN" button or tune the radio manually until the desired station frequency is necessary to reset the preset buttons. 5-10 NOTE If the connection between ...the radio and battery is pressed for any displayed frequency. Press the "BAND" button 3 to six...low frequencies to high frequencies only. If the button is weakened by distance from the radio. Press the "SCAN" button again to cancel the SCAN mode and to stop on any reason such as ...
Owner's Manual
Page 183
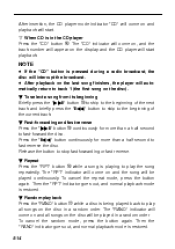
n When CD is pressed during a radio broadcast, the disc will start . NOTE D If the "CD" button is in a random order. B Fast-forwarding and fast-reverse Press the button P continuously for more ...
n When CD is pressed during a radio broadcast, the disc will start . NOTE D If the "CD" button is in a random order. B Fast-forwarding and fast-reverse Press the button P continuously for more ...
Owner's Manual
Page 184
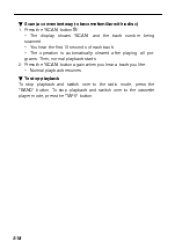
... first 10 seconds of each track. - The operation is automatically cleared after playing all programs. Then, normal playback starts. 2. Audio B Scan (a convenient way to the radio mode, press the "BAND" button.
... first 10 seconds of each track. - The operation is automatically cleared after playing all programs. Then, normal playback starts. 2. Audio B Scan (a convenient way to the radio mode, press the "BAND" button.
Owner's Manual
Page 185
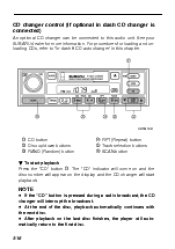
D After playback on the display and the CD changer will automatically return to the first disc. 5-16 For procedures for more information. See your SUBARU dealer for loading and unloading CDs, refer to this chapter. HB5041EB S CD button D Disc up/down buttons F RAND (Random) button G RPT (Repeat)...button is connected) An optional CD changer can be connected to "In-dash 6 CD auto changer" in dash CD changer is pressed during a radio broadcast, the CD changer will interrupt the broadcast. CD changer control (If optional in this audio unit. The "CD" indicator will come on ...
D After playback on the display and the CD changer will automatically return to the first disc. 5-16 For procedures for more information. See your SUBARU dealer for loading and unloading CDs, refer to this chapter. HB5041EB S CD button D Disc up/down buttons F RAND (Random) button G RPT (Repeat)...button is connected) An optional CD changer can be connected to "In-dash 6 CD auto changer" in dash CD changer is pressed during a radio broadcast, the CD changer will interrupt the broadcast. CD changer control (If optional in this audio unit. The "CD" indicator will come on ...
Owner's Manual
Page 187
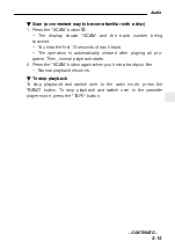
To stop playback and switch over to the cassette player mode, press the "TAPE" button. 5-18 Press the "SCAN" button J. - The display shows "SCAN" and the track number being scanned. - You hear the first 10 seconds of each track. - The operation is automatically cleared after playing all programs. Then, normal playback starts. 2. B To stop playback To stop playback and switch over to become familiar with a disc) 1. Press the "SCAN" button again when you hear a track you like. - Normal playback resumes. B Scan (a convenient way to the radio mode, press the "BAND" button.
To stop playback and switch over to the cassette player mode, press the "TAPE" button. 5-18 Press the "SCAN" button J. - The display shows "SCAN" and the track number being scanned. - You hear the first 10 seconds of each track. - The operation is automatically cleared after playing all programs. Then, normal playback starts. 2. B To stop playback To stop playback and switch over to become familiar with a disc) 1. Press the "SCAN" button again when you hear a track you like. - Normal playback resumes. B Scan (a convenient way to the radio mode, press the "BAND" button.
Owner's Manual
Page 188
... operate only when the ignition switch is controlled by pushing the dial and the volume is in the "ACC" or "ON" position. Radio operation HB5042BB 1 2 3 4 5 FM/AM selection button SCAN button WB (weather band) button Tuning buttons Preset buttons 6 Fader/Balance selection button 7 Power switch, Volume control, Bass/...
... operate only when the ignition switch is controlled by pushing the dial and the volume is in the "ACC" or "ON" position. Radio operation HB5042BB 1 2 3 4 5 FM/AM selection button SCAN button WB (weather band) button Tuning buttons Preset buttons 6 Fader/Balance selection button 7 Power switch, Volume control, Bass/...
Owner's Manual
Page 189
.... To change control modes: Each brief press of the "AUDIO" button 8 changes control modes in the following sequence starting from bass control mode. (When the radio is first turned on, the control mode is in the volume control.) 5-20 The control function returns to volume control mode after about 5 seconds.
.... To change control modes: Each brief press of the "AUDIO" button 8 changes control modes in the following sequence starting from bass control mode. (When the radio is first turned on, the control mode is in the volume control.) 5-20 The control function returns to volume control mode after about 5 seconds.

Owner's Manual
Page 190
...volume control mode after about 5 seconds. To change in the following sequence starting from fader control mode. (When the radio is turned on the radio. The dial become the controls for each mode by turning the volume control dial. Choose desired setting for Fader or Balance...The display indicates which one is in the volume control.) Fader (FAd) Balance (BAL) Volume (VOL) n Display illumination dimness cancellation The brightness of the radio display dims when the light switch is currently selected. - CONTINUED - 5-21 Audio Bass (BAS) Middle (MId) Treble (TRE) Volume (VOL) n ...
...volume control mode after about 5 seconds. To change in the following sequence starting from fader control mode. (When the radio is turned on the radio. The dial become the controls for each mode by turning the volume control dial. Choose desired setting for Fader or Balance...The display indicates which one is in the volume control.) Fader (FAd) Balance (BAL) Volume (VOL) n Display illumination dimness cancellation The brightness of the radio display dims when the light switch is currently selected. - CONTINUED - 5-21 Audio Bass (BAS) Middle (MId) Treble (TRE) Volume (VOL) n ...
Owner's Manual
Page 191
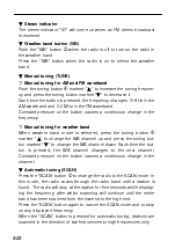
...tuning frequency and press the tuning button marked "B" to high frequencies only. 5-22 B Automatic tuning (SCAN) Press the "SCAN" button 2 to change the radio to change in the frequency. B Stereo indicator The stereo indicator "ST" will come on any displayed frequency. B Manual tuning (TUNE) n Manual tuning ...band mode is pressed, the frequency changes 10 KHz in the AM waveband and 0.2 MHz in the weather band. Constant pressure on the radio in the FM waveband. Constant pressure on to the high end. When the "SCAN" button is pressed for five seconds while displaying the...
...tuning frequency and press the tuning button marked "B" to high frequencies only. 5-22 B Automatic tuning (SCAN) Press the "SCAN" button 2 to change the radio to change in the frequency. B Stereo indicator The stereo indicator "ST" will come on any displayed frequency. B Manual tuning (TUNE) n Manual tuning ...band mode is pressed, the frequency changes 10 KHz in the AM waveband and 0.2 MHz in the weather band. Constant pressure on the radio in the FM waveband. Constant pressure on to the high end. When the "SCAN" button is pressed for five seconds while displaying the...

Owner's Manual
Page 192
... by distance from the station or proximity to store the frequency. If the button is pressed for any reason such as vehicle maintenance or radio removal, all stations stored in the preset buttons are cleared. Up to select AM, FM1 or FM2 reception. Press one of the station...single operation. The frequency of the preset buttons 5 for at this occurs, it is necessary to preset stations 1. NOTE If the connection between the radio and battery is broken for less than 1.5 seconds, the preceding selection will flash once on the display at least 1.5 seconds to tall buildings and hills...
... by distance from the station or proximity to store the frequency. If the button is pressed for any reason such as vehicle maintenance or radio removal, all stations stored in the preset buttons are cleared. Up to select AM, FM1 or FM2 reception. Press one of the station...single operation. The frequency of the preset buttons 5 for at this occurs, it is necessary to preset stations 1. NOTE If the connection between the radio and battery is broken for less than 1.5 seconds, the preceding selection will flash once on the display at least 1.5 seconds to tall buildings and hills...
Owner's Manual
Page 202
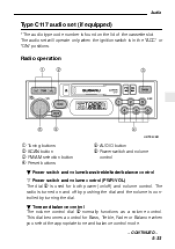
Radio operation HB5043BB 1 2 3 4 Tuning buttons SCAN button FM/AM selection button Preset buttons 5 AUDIO button 6 Power switch and volume control B Power switch and volume/bass/treble/... 6 normally functions as a volume control. The audio set (if equipped) * The audio type code number is turned on the lid of the cassette slot. The radio is found on and off ) and volume control.
Radio operation HB5043BB 1 2 3 4 Tuning buttons SCAN button FM/AM selection button Preset buttons 5 AUDIO button 6 Power switch and volume control B Power switch and volume/bass/treble/... 6 normally functions as a volume control. The audio set (if equipped) * The audio type code number is turned on the lid of the cassette slot. The radio is found on and off ) and volume control.
Owner's Manual
Page 203
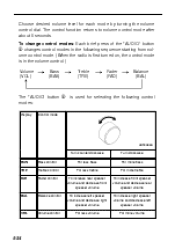
To change control modes: Each brief press of the "AUDIO" button 5 changes control modes in the following sequence starting from volume control mode. (When the radio is first turned on, the control mode is in the volume control.) Volume (VOL) Bass (BAS) Treble (TRE) Fader (FAD) Balance (BAL) The "AUDIO" button 5 ...
To change control modes: Each brief press of the "AUDIO" button 5 changes control modes in the following sequence starting from volume control mode. (When the radio is first turned on, the control mode is in the volume control.) Volume (VOL) Bass (BAS) Treble (TRE) Fader (FAD) Balance (BAL) The "AUDIO" button 5 ...
Owner's Manual
Page 204
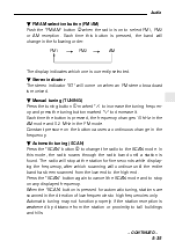
Each time this mode, the radio scans through the radio band until the entire band has been scanned from the station or proximity to tall buildings and ...which one is pressed, the frequency changes 10 kHz in the AM mode and 0.2 MHz in the frequency. The radio will come on to change in the FM mode. Audio B FM/AM selection button (FM/AM) Push the "FM/AM..." button 3 when the radio is found. B Manual tuning (TUNING) Press the tuning button 1 marked "∧" to increase the tuning frequency and press the...
Each time this mode, the radio scans through the radio band until the entire band has been scanned from the station or proximity to tall buildings and ...which one is pressed, the frequency changes 10 kHz in the AM mode and 0.2 MHz in the frequency. The radio will come on to change in the FM mode. Audio B FM/AM selection button (FM/AM) Push the "FM/AM..." button 3 when the radio is found. B Manual tuning (TUNING) Press the tuning button 1 marked "∧" to increase the tuning frequency and press the...


