
User Guide
Page 4
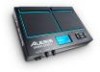
... is currently being edited. 5. Rear Panel 12 3 4 5 6 1. USB/MIDI Port: Connect SamplePad 4 to a computer to send and receive MIDI data or load samples to wall power. 4. LCD Screen 1. 1 Kit: Displays the name of the sample 2 assigned to the Left output.) 6. Cursor Up/Down: Press these single-zone pads with a drumstick. DC Input: Connect the included power...
... is currently being edited. 5. Rear Panel 12 3 4 5 6 1. USB/MIDI Port: Connect SamplePad 4 to a computer to send and receive MIDI data or load samples to wall power. 4. LCD Screen 1. 1 Kit: Displays the name of the sample 2 assigned to the Left output.) 6. Cursor Up/Down: Press these single-zone pads with a drumstick. DC Input: Connect the included power...
User Guide
Page 6
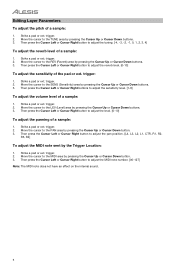
... reverb level. [0-10] To adjust the sensitivity of a sample: 1. Strike a pad or ext. trigger. 2. Strike a pad or ext. Strike a pad or ext. Move the cursor to adjust the tuning. [-4, -3, -2, -1, 0, 1, 2, 3, 4] To adjust the reverb level of a sample: 1. Then press the Cursor Left or Cursor Right button ... the Cursor Left or Cursor Right button to adjust the sensitivity level. [1-8] To adjust the volume level of a sample: 1. trigger. 2. Move the cursor to the MIDI area by pressing the Cursor Up or Cursor Down button. 3. Move the cursor to the PAN area by pressing ...
... reverb level. [0-10] To adjust the sensitivity of a sample: 1. Strike a pad or ext. trigger. 2. Strike a pad or ext. Strike a pad or ext. Move the cursor to adjust the tuning. [-4, -3, -2, -1, 0, 1, 2, 3, 4] To adjust the reverb level of a sample: 1. Then press the Cursor Left or Cursor Right button ... the Cursor Left or Cursor Right button to adjust the sensitivity level. [1-8] To adjust the volume level of a sample: 1. trigger. 2. Move the cursor to the MIDI area by pressing the Cursor Up or Cursor Down button. 3. Move the cursor to the PAN area by pressing ...

