
User Manual
Page 1
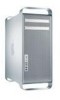
Congratulations, you and your Mac Pro were made for each other.
Congratulations, you and your Mac Pro were made for each other.

User Manual
Page 2
www.apple.com/macosx Mac Help finder Back to My Mac Access files on your files to unclutter your computer using Cover Flow. www.apple.com/macosx Mac Help spaces Time Machine Automatically back up your Mac at home via the Internet - from anywhere. www.apple.com/macosx Mac Help .mac Spaces Arrange windows in different spaces to an extra hard drive. Finder Browse the contents of your desktop. www.apple.com/macosx Mac Help time machine
www.apple.com/macosx Mac Help finder Back to My Mac Access files on your files to unclutter your computer using Cover Flow. www.apple.com/macosx Mac Help spaces Time Machine Automatically back up your Mac at home via the Internet - from anywhere. www.apple.com/macosx Mac Help .mac Spaces Arrange windows in different spaces to an extra hard drive. Finder Browse the contents of your desktop. www.apple.com/macosx Mac Help time machine
User Manual
Page 5
Contents Chapter 1: Ready, Set Up, Go 11 Setting Up Your Mac Pro 19 Putting Your Mac Pro to Sleep or Shutting It Down Chapter 2: Life with Your Mac Pro 24 Basic Features on the Front of Your Mac Pro 26 Features of Your Apple Keyboard 28 Ports and Connectors on the Back of Your Mac Pro 30 More Ports and Connectors on the Back 32 Internal Expansion Options 34 Getting Answers Chapter 3: Making a Good Thing Better 39 Opening the Mac Pro 43 Installing Memory 51 Installing Internal Storage Devices 60 Adding PCI Express Cards 64 Replacing the Internal Backup Battery Contents 5
Contents Chapter 1: Ready, Set Up, Go 11 Setting Up Your Mac Pro 19 Putting Your Mac Pro to Sleep or Shutting It Down Chapter 2: Life with Your Mac Pro 24 Basic Features on the Front of Your Mac Pro 26 Features of Your Apple Keyboard 28 Ports and Connectors on the Back of Your Mac Pro 30 More Ports and Connectors on the Back 32 Internal Expansion Options 34 Getting Answers Chapter 3: Making a Good Thing Better 39 Opening the Mac Pro 43 Installing Memory 51 Installing Internal Storage Devices 60 Adding PCI Express Cards 64 Replacing the Internal Backup Battery Contents 5
User Manual
Page 6
Chapter 4: Problem, Meet Solution 68 Problems with Your Mac Pro 70 Problems with Software 71 Keeping Your Software Up to Date 72 Problems with AirPort Wireless Communication 72 Problems with Your Display 75 Problems with Your Internet Connection 78 Using Apple Hardware Test 79 Reinstalling the Software That Came with Your Computer 80 Maximizing...'s Under the Hood 86 Specifications Chapter 6: Last, but Not Least 96 Important Safety Information 97 General Maintenance 100 Understanding Ergonomics 102 Avoid Hearing Damage 102 Apple and the Environment 103 Regulatory Compliance Information 6 Contents
Chapter 4: Problem, Meet Solution 68 Problems with Your Mac Pro 70 Problems with Software 71 Keeping Your Software Up to Date 72 Problems with AirPort Wireless Communication 72 Problems with Your Display 75 Problems with Your Internet Connection 78 Using Apple Hardware Test 79 Reinstalling the Software That Came with Your Computer 80 Maximizing...'s Under the Hood 86 Specifications Chapter 6: Last, but Not Least 96 Important Safety Information 97 General Maintenance 100 Understanding Ergonomics 102 Avoid Hearing Damage 102 Apple and the Environment 103 Regulatory Compliance Information 6 Contents

User Manual
Page 10
...with easy access to its system software, so the images shown in this Mac Pro. Important: Read all in Mac Help. For information about the new features of your Mac Pro in an anodized aluminum chassis with Your Mac Pro," to questions can be slightly different from what you begin, remove any ...panel. Make sure you first use your Mac Pro. Many answers to find out about opening the side panel, see "Getting Answers" on your Mac Pro and from the outside of this book may release new versions and updates to internal components. Apple may be found on page 34. ...
...with easy access to its system software, so the images shown in this Mac Pro. Important: Read all in Mac Help. For information about the new features of your Mac Pro in an anodized aluminum chassis with Your Mac Pro," to questions can be slightly different from what you begin, remove any ...panel. Make sure you first use your Mac Pro. Many answers to find out about opening the side panel, see "Getting Answers" on your Mac Pro and from the outside of this book may release new versions and updates to internal components. Apple may be found on page 34. ...

User Manual
Page 11
... easy reach so that :  They are each on the next few pages to disconnect their power plugs from the power source. Position your Mac Pro and display is to get started. Follow the steps on a sturdy, flat surface  The power cable connectors don't press against a wall ...or other object  The airflow in front of its handles using it right away. Step 1: Position your Mac Pro and display Pick up your display is heavy, use correct lifting techniques when positioning it up quickly and start using correct lifting techniques. Chapter 1 ...
... easy reach so that :  They are each on the next few pages to disconnect their power plugs from the power source. Position your Mac Pro and display is to get started. Follow the steps on a sturdy, flat surface  The power cable connectors don't press against a wall ...or other object  The airflow in front of its handles using it right away. Step 1: Position your Mac Pro and display Pick up your display is heavy, use correct lifting techniques when positioning it up quickly and start using correct lifting techniques. Chapter 1 ...

User Manual
Page 12
Step 2: Plug in the power cord Plug the power cord completely into the recessed power cord socket on the back of your Mac Pro and plug the other end into a grounded outlet or a grounded power strip. Power cord socket Power cord plug 12 Chapter 1 Ready, Set Up, Go
Step 2: Plug in the power cord Plug the power cord completely into the recessed power cord socket on the back of your Mac Pro and plug the other end into a grounded outlet or a grounded power strip. Power cord socket Power cord plug 12 Chapter 1 Ready, Set Up, Go

User Manual
Page 13
Step 3: Connect the display Connect your Mac Pro. Check the instructions that came with Digital Visual Interface (DVI) connectors to the display ports on the display, you may have one or more cables to connect. Chapter 1 Ready, Set Up, Go 13 Depending on the back of your display as shown in the illustration below. Display ports USB port FireWire 400 port Display cable You can connect two displays with the display for additional setup information.
Step 3: Connect the display Connect your Mac Pro. Check the instructions that came with Digital Visual Interface (DVI) connectors to the display ports on the display, you may have one or more cables to connect. Chapter 1 Ready, Set Up, Go 13 Depending on the back of your display as shown in the illustration below. Display ports USB port FireWire 400 port Display cable You can connect two displays with the display for additional setup information.

User Manual
Page 14
...either port. You can also connect displays that have an Apple Display Connector (ADC) or a video graphics array (VGA) connector using one of the following adapters: Â To connect a VGA display, use the Apple DVI to VGA Display Adapter included with your Mac Pro to connect the display to the DVI port. Â...; To connect an ADC display, use an Apple DVI to ADC Display Adapter, not included, to connect the display to the...
...either port. You can also connect displays that have an Apple Display Connector (ADC) or a video graphics array (VGA) connector using one of the following adapters: Â To connect a VGA display, use the Apple DVI to VGA Display Adapter included with your Mac Pro to connect the display to the DVI port. Â...; To connect an ADC display, use an Apple DVI to ADC Display Adapter, not included, to connect the display to the...

User Manual
Page 15
Connect the other end to either of the gigabit Ethernet ports on the back of an Ethernet cable to a DSL modem, cable modem, or Ethernet network. Gigabit Ethernet ports Chapter 1 Ready, Set Up, Go 15 Step 4: Connect an Ethernet cable To access the Internet or a network, connect one end of your Mac Pro.
Connect the other end to either of the gigabit Ethernet ports on the back of an Ethernet cable to a DSL modem, cable modem, or Ethernet network. Gigabit Ethernet ports Chapter 1 Ready, Set Up, Go 15 Step 4: Connect an Ethernet cable To access the Internet or a network, connect one end of your Mac Pro.

User Manual
Page 16
Step 5: Connect the keyboard and mouse Connect the keyboard cable to one of the USB (d) ports on your Mac Pro or on the keyboard Keyboard Mouse 16 Chapter 1 Ready, Set Up, Go Plug the mouse into a USB port on the keyboard. Plug the Mighty Mouse cable into a USB port on the display.
Step 5: Connect the keyboard and mouse Connect the keyboard cable to one of the USB (d) ports on your Mac Pro or on the keyboard Keyboard Mouse 16 Chapter 1 Ready, Set Up, Go Plug the mouse into a USB port on the keyboard. Plug the Mighty Mouse cable into a USB port on the display.
User Manual
Page 17
... automatically transfer files, applications, and other information from the menu bar. Choose Apple () > System Preferences from your previous Mac to turn on . Setup Assistant helps you want to know your Mac Pro, explore System Preferences-it's your Mac Pro, Setup Assistant starts. Apple keyboard extension cable Using a Wireless Keyboard and Mouse If you get to change...
... automatically transfer files, applications, and other information from the menu bar. Choose Apple () > System Preferences from your previous Mac to turn on . Setup Assistant helps you want to know your Mac Pro, explore System Preferences-it's your Mac Pro, Setup Assistant starts. Apple keyboard extension cable Using a Wireless Keyboard and Mouse If you get to change...

User Manual
Page 18
... If you still don't see anything on your screen, restart your Mac Pro. Press the power (®) button again to restart. Â If you think your Mac Pro didn't start up properly, check the following: Â Is your Mac Pro plugged into the back of your Mac Pro? Â Are the keyboard and display cables connected correctly? Â... on the screen or a series of the display adjusted correctly? Are the brightness and contrast of flashes from the status light, see anything on your Mac Pro for 5 or 6 seconds, until it turns off.
... If you still don't see anything on your screen, restart your Mac Pro. Press the power (®) button again to restart. Â If you think your Mac Pro didn't start up properly, check the following: Â Is your Mac Pro plugged into the back of your Mac Pro? Â Are the keyboard and display cables connected correctly? Â... on the screen or a series of the display adjusted correctly? Are the brightness and contrast of flashes from the status light, see anything on your Mac Pro for 5 or 6 seconds, until it turns off.

User Manual
Page 19
... can quickly wake your Mac Pro for only a short time, put it down. To put your Mac Pro is in the dialogue box that appears. Â Choose Apple () > System Preferences, click Energy Saver, and set a sleep timer. Chapter 1 Ready, Set Up, Go 19 Putting Your Mac Pro to Sleep or Shutting...Down When you finish working, you will be away from your Mac Pro from sleep, do one of the following : Â Choose Apple () > Sleep. Â Press the power (®) button on the front of your Mac Pro. You can put your Mac Pro to sleep, do one of the following : Â ...
... can quickly wake your Mac Pro for only a short time, put it down. To put your Mac Pro is in the dialogue box that appears. Â Choose Apple () > System Preferences, click Energy Saver, and set a sleep timer. Chapter 1 Ready, Set Up, Go 19 Putting Your Mac Pro to Sleep or Shutting...Down When you finish working, you will be away from your Mac Pro from sleep, do one of the following : Â Choose Apple () > Sleep. Â Press the power (®) button on the front of your Mac Pro. You can put your Mac Pro to sleep, do one of the following : Â ...

User Manual
Page 20
... the hard disk, causing loss of your computer while the hard disk is not shut down your Mac Pro is spinning can 't turn off your Mac Pro any other way). NOTICE: Do not turn off your Mac Pro by turning off the switch on the front of data or the inability to start up from the... click Shut Down in the dialogue box that appears. Shutting Down Your Mac Pro If you will not be damaged if your Mac Pro before moving it off. To turn off your Mac Pro, do one of the following: Â Choose Apple () > Shut Down. Â Press the power (®) button on a power strip or by pulling...
... the hard disk, causing loss of your computer while the hard disk is not shut down your Mac Pro is spinning can 't turn off your Mac Pro any other way). NOTICE: Do not turn off your Mac Pro by turning off the switch on the front of data or the inability to start up from the... click Shut Down in the dialogue box that appears. Shutting Down Your Mac Pro If you will not be damaged if your Mac Pro before moving it off. To turn off your Mac Pro, do one of the following: Â Choose Apple () > Shut Down. Â Press the power (®) button on a power strip or by pulling...

User Manual
Page 21
2 Life with Your Mac Pro 2 www.apple.com/macpro Mac Help ports
2 Life with Your Mac Pro 2 www.apple.com/macpro Mac Help ports
User Manual
Page 23
Chapter 2 Life with Your Mac Pro 23 You can also find the manuals for many Apple products, and technical support for all of your Mac Pro. The Apple website at www.apple.com/support. Read on the Apple Support website at www.apple.com links you to the latest Apple news, free downloads, and online catalogs of software and hardware for an overview of the features and ports of Apple's products, on for your Mac Pro.
Chapter 2 Life with Your Mac Pro 23 You can also find the manuals for many Apple products, and technical support for all of your Mac Pro. The Apple website at www.apple.com/support. Read on the Apple Support website at www.apple.com links you to the latest Apple news, free downloads, and online catalogs of software and hardware for an overview of the features and ports of Apple's products, on for your Mac Pro.

User Manual
Page 24
Basic Features on the Front of Your Mac Pro Optical drive Status light Second optical drive (optional) ® Power button f Headphone jack USB 2.0 ports (2) FireWire 800 port FireWire 400 port 24 Chapter 2 Life with Your Mac Pro
Basic Features on the Front of Your Mac Pro Optical drive Status light Second optical drive (optional) ® Power button f Headphone jack USB 2.0 ports (2) FireWire 800 port FireWire 400 port 24 Chapter 2 Life with Your Mac Pro

User Manual
Page 25
... a second optical drive, press the Option and Media Eject (C) keys to open the drive, press the Media Eject (C) key on your Mac Pro is on your Mac Pro, put it again to USB keyboards, mice, printers, scanners, iPods, speakers, microphones, and hubs. The FireWire 400 port supports data rates up to FireWire ... data rates up to sleep, or wake it 's in sleep. To open it. ® Power button Press this button for 5 or 6 seconds until your Mac Pro to turn on ; Status light A white light indicates your Apple Keyboard. H FireWire 400 and 800 ports Connect your...
... a second optical drive, press the Option and Media Eject (C) keys to open the drive, press the Media Eject (C) key on your Mac Pro is on your Mac Pro, put it again to USB keyboards, mice, printers, scanners, iPods, speakers, microphones, and hubs. The FireWire 400 port supports data rates up to FireWire ... data rates up to sleep, or wake it 's in sleep. To open it. ® Power button Press this button for 5 or 6 seconds until your Mac Pro to turn on ; Status light A white light indicates your Apple Keyboard. H FireWire 400 and 800 ports Connect your...

User Manual
Page 26
Features of Your Apple Keyboard Escape Decrease brightness Increase brightness Exposé Dashboard Caps Lock Fast Forward Mute Volume Down Volume Up Media Eject Function Play/Pause Rewind USB port (both sides) 26 Chapter 2 Life with Your Mac Pro
Features of Your Apple Keyboard Escape Decrease brightness Increase brightness Exposé Dashboard Caps Lock Fast Forward Mute Volume Down Volume Up Media Eject Function Play/Pause Rewind USB port (both sides) 26 Chapter 2 Life with Your Mac Pro


