
System Quick Start Guide
Page 3
What's Included Base station Base station power adapter Ethernet cable Magnetic wall mounts Mounting screws 100% wireless cameras Lithium 123 batteries (number of batteries varies with number of cameras) 3
What's Included Base station Base station power adapter Ethernet cable Magnetic wall mounts Mounting screws 100% wireless cameras Lithium 123 batteries (number of batteries varies with number of cameras) 3

System Quick Start Guide
Page 7
b. b. If you already set up an Arlo account, log in, and click or tap Add Device. Follow the onscreen instructions. ¾¾ To add an Arlo Pro camera to Arlo? Follow the onscreen instructions. 7 Launch the Arlo app from your smartphone, tap the New to an existing Arlo account: a. button, and select Arlo Wire-Free. 3 Get an Account ¾¾ To create a new Arlo account: a. If you are using a computer, visit https://my.arlo.com/#/login.
b. b. If you already set up an Arlo account, log in, and click or tap Add Device. Follow the onscreen instructions. ¾¾ To add an Arlo Pro camera to Arlo? Follow the onscreen instructions. 7 Launch the Arlo app from your smartphone, tap the New to an existing Arlo account: a. button, and select Arlo Wire-Free. 3 Get an Account ¾¾ To create a new Arlo account: a. If you are using a computer, visit https://my.arlo.com/#/login.

System Quick Start Guide
Page 8
Slide the battery door back and lift it to open the compartment. Close the battery door. 8 d. Insert two batteries near the compartment hinge. e. c. b. Unlock the battery compartment by sliding and holding the latch. 4 Insert Batteries Into Your Cameras a. Insert two batteries near the back of the camera.
Slide the battery door back and lift it to open the compartment. Close the battery door. 8 d. Insert two batteries near the compartment hinge. e. c. b. Unlock the battery compartment by sliding and holding the latch. 4 Insert Batteries Into Your Cameras a. Insert two batteries near the back of the camera.

System Quick Start Guide
Page 9
a. Bring the camera within 1 to 3 feet (30 to 100 centimeters) of the base station. 1' - 3' 30 cm - 100 cm 9 5 Sync Your Cameras With the Base Station Note: Cameras must be synced one at a time.
a. Bring the camera within 1 to 3 feet (30 to 100 centimeters) of the base station. 1' - 3' 30 cm - 100 cm 9 5 Sync Your Cameras With the Base Station Note: Cameras must be synced one at a time.

System Quick Start Guide
Page 10
b. Wait for about two seconds. Release the button. Release the button. 10 Press the Sync button on top of the base station for the Sync Status LED to blink green. d. c. Press the Sync button on the side of the camera for about two seconds.
b. Wait for about two seconds. Release the button. Release the button. 10 Press the Sync button on top of the base station for the Sync Status LED to blink green. d. c. Press the Sync button on the side of the camera for about two seconds.

System Quick Start Guide
Page 11
A blue LED on the camera blinks slowly when the sync process starts. Note: If the LED blinks amber quickly, the sync is ready for each camera. 11 Syncing more than one camera? You must repeat the sync process. Go to confirm sync. The camera is not successful. The blue LED blinks rapidly to page 9 and repeat steps 5a through 5d for viewing.
A blue LED on the camera blinks slowly when the sync process starts. Note: If the LED blinks amber quickly, the sync is ready for each camera. 11 Syncing more than one camera? You must repeat the sync process. Go to confirm sync. The camera is not successful. The blue LED blinks rapidly to page 9 and repeat steps 5a through 5d for viewing.

System Quick Start Guide
Page 12
6 Place or Mount Your Cameras Locate a spot for your camera You can place your camera on a shelf or other flat surface, or you can mount it to help aim the camera. 12 Tip: Use the Arlo app in Position mode (found in Camera Settings) to the wall.
6 Place or Mount Your Cameras Locate a spot for your camera You can place your camera on a shelf or other flat surface, or you can mount it to help aim the camera. 12 Tip: Use the Arlo app in Position mode (found in Camera Settings) to the wall.

System Quick Start Guide
Page 13
Tip: You can also use the plastic drywall anchors that are provided. To mount your camera to use double-sided tape instead of screws. 13 If you're mounting the camera to drywall, be sure to the wall: Fasten the mounting screw into the wall, and hang the magnetic mount from the screw.
Tip: You can also use the plastic drywall anchors that are provided. To mount your camera to use double-sided tape instead of screws. 13 If you're mounting the camera to drywall, be sure to the wall: Fasten the mounting screw into the wall, and hang the magnetic mount from the screw.

System Quick Start Guide
Page 15
... Off The base station is not connected to the Internet. Blinking amber A camera is powered off. DO NOT TURN OFF BASE STATION OR CAMERAS. Internet Green The base station is connected to the base station. Camera Green Cameras are detected.. 15 Blinking green A firmware update is sending data over the ...Internet. Amber The base station is connected to your router. Blinking green The base station is in progress. Off No cameras are connected to the router but did not establish an Internet connection. Base Station LED Guide Power Green The base station is attempting ...
... Off The base station is not connected to the Internet. Blinking amber A camera is powered off. DO NOT TURN OFF BASE STATION OR CAMERAS. Internet Green The base station is connected to the base station. Camera Green Cameras are detected.. 15 Blinking green A firmware update is sending data over the ...Internet. Amber The base station is connected to your router. Blinking green The base station is in progress. Off No cameras are connected to the router but did not establish an Internet connection. Base Station LED Guide Power Green The base station is attempting ...

Camera Quick Start Guide
Page 2
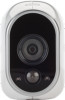
What's in the box 100% wireless camera Lithium 123 batteries Magnetic wall mount Mounting screw
What's in the box 100% wireless camera Lithium 123 batteries Magnetic wall mount Mounting screw

Camera Quick Start Guide
Page 4
Place the camera within one at a time. 1. The base station sync status LED blinks green Or Reset SYNC DC Ethernet Reset SYNC Ethernet Base station varies by region. 4 Sync your camera with a base station Sync cameras one to three feet of the base station. 2. Press the Sync button on the base station for two seconds.
Place the camera within one at a time. 1. The base station sync status LED blinks green Or Reset SYNC DC Ethernet Reset SYNC Ethernet Base station varies by region. 4 Sync your camera with a base station Sync cameras one to three feet of the base station. 2. Press the Sync button on the base station for two seconds.

Camera Quick Start Guide
Page 5
Repeat the sync process. 5 3. Note: If the LED blinks amber, the sync wasn't successful. The camera LED blinks blue slowly and then blinks fast when the sync is finished. Press the Sync button on the camera for two seconds..
Repeat the sync process. 5 3. Note: If the LED blinks amber, the sync wasn't successful. The camera LED blinks blue slowly and then blinks fast when the sync is finished. Press the Sync button on the camera for two seconds..

Camera Quick Start Guide
Page 6
If youre using a computer, visit https://my.arlo.com/#/login. 2. Add the camera to your smartphone, log in, and tap Add Device. Follow the onscreen instructions. 6 Open the Arlo app on your Arlo account 1.
If youre using a computer, visit https://my.arlo.com/#/login. 2. Add the camera to your smartphone, log in, and tap Add Device. Follow the onscreen instructions. 6 Open the Arlo app on your Arlo account 1.

Camera Quick Start Guide
Page 7
To view useful tutorial videos, find troubleshooting tips, or get support, scan the QR code or navigate in your browser to go. Your Arlo camera is set up and ready to www.arlo.com/support. 7 You're done!
To view useful tutorial videos, find troubleshooting tips, or get support, scan the QR code or navigate in your browser to go. Your Arlo camera is set up and ready to www.arlo.com/support. 7 You're done!

User Manual
Page 3
... Station LEDs 8 Get an Account...8 Insert Batteries Into Your Cameras 9 Sync Your Cameras With the Base Station 10 Arlo Camera LED...11 Firmware Updates...12 Add a Camera From Another Arlo Account 12 Place or Mount Your Cameras 13 Choose a Good Spot for Your Camera 13 Position Your Camera to Optimize Its Field of View 14 Position Mode...16 2. View...
... Station LEDs 8 Get an Account...8 Insert Batteries Into Your Cameras 9 Sync Your Cameras With the Base Station 10 Arlo Camera LED...11 Firmware Updates...12 Add a Camera From Another Arlo Account 12 Place or Mount Your Cameras 13 Choose a Good Spot for Your Camera 13 Position Your Camera to Optimize Its Field of View 14 Position Mode...16 2. View...

User Manual
Page 4
... Friends 30 4. Settings 44 Turn the Arlo App Fingerprint ID Login On and Off 44 Change the Time Zone 44 Video Settings...45 Base Station Settings 46 View Device Information 49 Turn an Arlo Camera On and Off 49 Remove a Camera From Your Account 50 6. Personalize Your ...System 28 Name Your Cameras...28 Profile Settings...28 Grant Access to a Paid Subscription Plan 51 4 3. Modes, Rules...
... Friends 30 4. Settings 44 Turn the Arlo App Fingerprint ID Login On and Off 44 Change the Time Zone 44 Video Settings...45 Base Station Settings 46 View Device Information 49 Turn an Arlo Camera On and Off 49 Remove a Camera From Your Account 50 6. Personalize Your ...System 28 Name Your Cameras...28 Profile Settings...28 Grant Access to a Paid Subscription Plan 51 4 3. Modes, Rules...

User Manual
Page 5
...Rechargeable Battery Warning 67 Safe Battery Handling and Usage 68 5 7. Use SmartThings With Arlo Cameras 53 Prepare Arlo to Factory Settings 65 10. Arlo Connect 52 Use Arlo With IFTTT...52 Use Arlo Cameras With SmartThings 52 8. FAQs and Troubleshooting 57 Battery FAQs...57 Manage Bandwidth for ...59 Not Receiving Push Notifications 60 Verify That the Arlo Base Station Is Online 62 Base Station Is Offline 63 Signal Strength...64 Reset the Arlo Base Station to Work With SmartThings 53 Integrate Your Arlo Cameras With the SmartThings App 54 Adjust the Motion ...
...Rechargeable Battery Warning 67 Safe Battery Handling and Usage 68 5 7. Use SmartThings With Arlo Cameras 53 Prepare Arlo to Factory Settings 65 10. Arlo Connect 52 Use Arlo With IFTTT...52 Use Arlo Cameras With SmartThings 52 8. FAQs and Troubleshooting 57 Battery FAQs...57 Manage Bandwidth for ...59 Not Receiving Push Notifications 60 Verify That the Arlo Base Station Is Online 62 Base Station Is Offline 63 Signal Strength...64 Reset the Arlo Base Station to Work With SmartThings 53 Integrate Your Arlo Cameras With the SmartThings App 54 Adjust the Motion ...

User Manual
Page 6
... the app store and search for Arlo in the app store. Set Up Your System How Arlo Works Your camera works wire-free, powered by scanning this QR code or searching for Arlo. 6 Get the Arlo App For the best experience, download the Arlo app by the battery. 1. The appearance of the Arlo base station varies, as shown in...
... the app store and search for Arlo in the app store. Set Up Your System How Arlo Works Your camera works wire-free, powered by scanning this QR code or searching for Arlo. 6 Get the Arlo App For the best experience, download the Arlo app by the battery. 1. The appearance of the Arlo base station varies, as shown in...

User Manual
Page 7
SYNC Reset SYNC Ethernet DC Ethernet DC 3. Reset SYNC Ethernet DC 2. If your router using an Ethernet cable. Connect the AC adapter to the Internet: 1. Plug the AC adapter into an electrical outlet. 4. Connect the base station to your base station includes an On-Off button on the back, press the button. 7 Set Up Your System Connect Your Base Station to the Internet The base station connects to your home network and allows you to view your camera streams from anywhere. ¾¾ To connect your base station to the base station.
SYNC Reset SYNC Ethernet DC Ethernet DC 3. Reset SYNC Ethernet DC 2. If your router using an Ethernet cable. Connect the AC adapter to the Internet: 1. Plug the AC adapter into an electrical outlet. 4. Connect the base station to your base station includes an On-Off button on the back, press the button. 7 Set Up Your System Connect Your Base Station to the Internet The base station connects to your home network and allows you to view your camera streams from anywhere. ¾¾ To connect your base station to the base station.

User Manual
Page 8
... station is weak. Get an Account ¾¾ To set up an Arlo account: 1. Reset SYNC DC Ethernet Your base station is powered on your router. DO NOT TURN OFF THE BASE STATION OR CAMERAS. Camera Green Cameras are prompted to the base station. Blinking green A firmware update is too ...far from the base station. Blinking amber A camera is in progress. If you are using a computer, enter arlo.netgear.com in about two minutes. Set Up Your System The Power LED and Internet LED light green in the...
... station is weak. Get an Account ¾¾ To set up an Arlo account: 1. Reset SYNC DC Ethernet Your base station is powered on your router. DO NOT TURN OFF THE BASE STATION OR CAMERAS. Camera Green Cameras are prompted to the base station. Blinking green A firmware update is too ...far from the base station. Blinking amber A camera is in progress. If you are using a computer, enter arlo.netgear.com in about two minutes. Set Up Your System The Power LED and Internet LED light green in the...
