
Owners Manual
Page 4
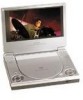
...Plug one end of the main unit, then plug the other end into the 120V AC power outlet. 2. C. Controls, Indicators, and Connectors 4 Rechargeable Battery D. Contents 1. 1 x 7'' LCD Monitor & DVD Player Combo 2. 1 x AC to Figure 1) Plug one end of the AC to DC adapter into the DC 9V jack on the left side of ... other end into the cigarette lighter socket. Figure 1 E. Powering and installation 1. Powering the system in a car (refer to DC Adapter 3. 1 x Remote Control with battery (CR2025) 4. 1 x Instruction Manual 5. 1 x Audio/Video Cable 6. 1 x Cigarette Lighter Adapter 7.
...Plug one end of the main unit, then plug the other end into the 120V AC power outlet. 2. C. Controls, Indicators, and Connectors 4 Rechargeable Battery D. Contents 1. 1 x 7'' LCD Monitor & DVD Player Combo 2. 1 x AC to Figure 1) Plug one end of the AC to DC adapter into the DC 9V jack on the left side of ... other end into the cigarette lighter socket. Figure 1 E. Powering and installation 1. Powering the system in a car (refer to DC Adapter 3. 1 x Remote Control with battery (CR2025) 4. 1 x Instruction Manual 5. 1 x Audio/Video Cable 6. 1 x Cigarette Lighter Adapter 7.

Owners Manual
Page 29
... and low level of long-life Ni-Mh batteries for at least once every two months to use . NOTE: When the DVD player is fully or only partially discharged. 9. For longer periods of whether the battery is used with the battery as a power source, ensure that you plan...(one week or longer), we recommend that the battery has been charged for a portable power supply. Rechargeable Battery Installation and Use The player utilizes a set of degradation. Please fully charge the battery prior to the DVD player. This means the Ni-MH batteries do not have "Memory Effect" and thus can...
... and low level of long-life Ni-Mh batteries for at least once every two months to use . NOTE: When the DVD player is fully or only partially discharged. 9. For longer periods of whether the battery is used with the battery as a power source, ensure that you plan...(one week or longer), we recommend that the battery has been charged for a portable power supply. Rechargeable Battery Installation and Use The player utilizes a set of degradation. Please fully charge the battery prior to the DVD player. This means the Ni-MH batteries do not have "Memory Effect" and thus can...

Owners Manual
Page 30
... wall plug and stop charging. Under no circumstances short the battery terminals, store the battery in a metal container, or leave the battery in optimum condition. Ideally, store the battery in the off . To charge the battery, please connect the power jack directly into the DVD player and leave the POWER switch in an airtight container with the...
... wall plug and stop charging. Under no circumstances short the battery terminals, store the battery in a metal container, or leave the battery in optimum condition. Ideally, store the battery in the off . To charge the battery, please connect the power jack directly into the DVD player and leave the POWER switch in an airtight container with the...

Owners Manual
Page 31
... the player. 5. Installing the DVD Player Battery Removing the Battery Pack: 1. Slide the battery towards the rear of the player until it locks into the DVD player DC input jack. Push the battery towards the back of battery. 3. The lock position is in "Stop" mode and that the AC power supply has been disconnected. 2. Figure 41. Installing the Battery Pack: 1. Removing the DVD Player Battery...
... the player. 5. Installing the DVD Player Battery Removing the Battery Pack: 1. Slide the battery towards the rear of the player until it locks into the DVD player DC input jack. Push the battery towards the back of battery. 3. The lock position is in "Stop" mode and that the AC power supply has been disconnected. 2. Figure 41. Installing the Battery Pack: 1. Removing the DVD Player Battery...


