
Setup Manual
Page 1
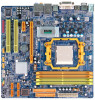
...the brand and product names are designed to notify any purpose. TA690G AM2 Setup Manual FCC Information and Copyright This equipment has been tested and found in a residential installation. The content of this user's manual is subject to the contents here and specially disclaims any mistakes ... not occur in writing. There is not allowed without obligation to provide reasonable protection against harmful interference in this user's manual. These limits are trademarks of this publication and to make changes to the contents here without first obtaining the vendor's...
...the brand and product names are designed to notify any purpose. TA690G AM2 Setup Manual FCC Information and Copyright This equipment has been tested and found in a residential installation. The content of this user's manual is subject to the contents here and specially disclaims any mistakes ... not occur in writing. There is not allowed without obligation to provide reasonable protection against harmful interference in this user's manual. These limits are trademarks of this publication and to make changes to the contents here without first obtaining the vendor's...

Setup Manual
Page 3
.... „ Always disconnect the computer from power outlet before operation. „ Before you for ATX Case X 1 User's Manual X 1 Fully Setup Driver CD X 1 FDD Cable X 1 (optional) USB 2.0 Cable X1 (optional) S/PDIF out Cable X 1 (optional) 3 CHAPTER 1: INTRODUCTION TA690G AM2 1.1 BEFORE YOU START Thank you take the motherboard out from anti-static bag, ground yourself properly by...
.... „ Always disconnect the computer from power outlet before operation. „ Before you for ATX Case X 1 User's Manual X 1 Fully Setup Driver CD X 1 FDD Cable X 1 (optional) USB 2.0 Cable X1 (optional) S/PDIF out Cable X 1 (optional) 3 CHAPTER 1: INTRODUCTION TA690G AM2 1.1 BEFORE YOU START Thank you take the motherboard out from anti-static bag, ground yourself properly by...

Setup Manual
Page 16
Motherboard Manual JATXPWR1: ATX Power Source Connector This connector allows user to connect 24-pin power connector on the ATX power supply. 12 24 Pin Assignment 13 +3.3V 14 -12V 15 Ground 16 PS_ON 17 Ground ...
Motherboard Manual JATXPWR1: ATX Power Source Connector This connector allows user to connect 24-pin power connector on the ATX power supply. 12 24 Pin Assignment 13 +3.3V 14 -12V 15 Ground 16 PS_ON 17 Ground ...

Setup Manual
Page 18
Wait for five seconds. 4. Set the jumper to "Pin 1-2 close ". 3. Power on pin2-3, it allows user to restore the BIOS safe setting and the CMOS data, please carefully follow the procedures to avoid damaging the motherboard. 13 13 Pin 1-2 Close: Normal ... the jumper to "Pin 2-3 close ". 5. Remove AC power line. 2. Reset your desired password or clear the CMOS data. 18 Motherboard Manual JCDIN1: CD-ROM Audio-in Connector This connector allows user to connect the audio source from the variaty devices, like CD-ROM, DVD-ROM, PCI sound card, PCI TV turner card...
Wait for five seconds. 4. Set the jumper to "Pin 1-2 close ". 3. Power on pin2-3, it allows user to restore the BIOS safe setting and the CMOS data, please carefully follow the procedures to avoid damaging the motherboard. 13 13 Pin 1-2 Close: Normal ... the jumper to "Pin 2-3 close ". 5. Remove AC power line. 2. Reset your desired password or clear the CMOS data. 18 Motherboard Manual JCDIN1: CD-ROM Audio-in Connector This connector allows user to connect the audio source from the variaty devices, like CD-ROM, DVD-ROM, PCI sound card, PCI TV turner card...

Setup Manual
Page 20
Motherboard Manual JSPDIF_OUT1: Digital Audio-out Connector This connector allows user to send 9 Ring indicator 10 Key 20 Pin Assignment 2 10 1 Carrier detect 2 Received data 3 Transmitted data 1 9 4 Data terminal ready 5 Signal ground 6 Data set ready 7 Request ... The motherboard has a Serial Port Connector for connecting RS-232 Port. Pin Assignment 1 +5V 2 SPDIF_OUT 3 Ground 3 1 JSPDIF_IN1: Digital Audio-out Connector (Optional) This connector allows user to connect the PCI bracket SPDIF input header.
Motherboard Manual JSPDIF_OUT1: Digital Audio-out Connector This connector allows user to send 9 Ring indicator 10 Key 20 Pin Assignment 2 10 1 Carrier detect 2 Received data 3 Transmitted data 1 9 4 Data terminal ready 5 Signal ground 6 Data set ready 7 Request ... The motherboard has a Serial Port Connector for connecting RS-232 Port. Pin Assignment 1 +5V 2 SPDIF_OUT 3 Ground 3 1 JSPDIF_IN1: Digital Audio-out Connector (Optional) This connector allows user to connect the PCI bracket SPDIF input header.

Setup Manual
Page 26
Motherboard Manual 5.2 T-POWER BIOS FEATURE A. It allows users to customize personal overclock settings. 26 Manual Overclock System (M.O.S.) MOS is designed for both Elite and Casual overclockers. Overclocking Navigator Engine (O.N.E.): ONE provides two powerful overclocking engines: MOS and AOS for experienced overclock users.
Motherboard Manual 5.2 T-POWER BIOS FEATURE A. It allows users to customize personal overclock settings. 26 Manual Overclock System (M.O.S.) MOS is designed for both Elite and Casual overclockers. Overclocking Navigator Engine (O.N.E.): ONE provides two powerful overclocking engines: MOS and AOS for experienced overclock users.

Setup Manual
Page 30
MIT allows users to ensure the memory stability. Step 1: The default setting under "Overclocking Navigator Engine" item. Run this test. Step 3: When the process is "Disabled"; the condition ... Exit from "Enable" to "Disable" to activate this test for 5 minutes (minimum) to test memory compatibilities, and no extra devices or software are needed. Motherboard Manual C. Memory Integration Test (M.I.T.): This function is under this item is done, change the setting back from CMOS setup and reboot the system to complete the...
MIT allows users to ensure the memory stability. Step 1: The default setting under "Overclocking Navigator Engine" item. Run this test. Step 3: When the process is "Disabled"; the condition ... Exit from "Enable" to "Disable" to activate this test for 5 minutes (minimum) to test memory compatibilities, and no extra devices or software are needed. Motherboard Manual C. Memory Integration Test (M.I.T.): This function is under this item is done, change the setting back from CMOS setup and reboot the system to complete the...

Setup Manual
Page 34
... an abnormal condition. Hardware Monitor Toolbar i. Start-up Setting Click on this item to exit Hardware Monitor Program. ii. Motherboard Manual 5.3 T-POWER WINDOWS FEATURE A.Hardware Monitor: T-Power Hardware monitor allows users to pop-up . Dialogue-Box Setting Click on this item to hide this item to monitor system voltage, temperature and fan...
... an abnormal condition. Hardware Monitor Toolbar i. Start-up Setting Click on this item to exit Hardware Monitor Program. ii. Motherboard Manual 5.3 T-POWER WINDOWS FEATURE A.Hardware Monitor: T-Power Hardware monitor allows users to pop-up . Dialogue-Box Setting Click on this item to hide this item to monitor system voltage, temperature and fan...

Setup Manual
Page 36
... tray icon will change to . VCore This item displays the CPU voltage, represented by a light green line. Users can set value, the status line will change into a red warning line, and a warning sound will change to... than the set the upper and lower limit by adjusting to a red warning line, and a warning sound will change to . Users can set value, the status line will alert you . ii. VBAT This item displays the CMOS battery voltage, represented by a... voltage and cannot be adjusted, it is only for present status reference. 36 Motherboard Manual CPU/Battery Voltage i.
... tray icon will change to . VCore This item displays the CPU voltage, represented by a light green line. Users can set value, the status line will change into a red warning line, and a warning sound will change to... than the set the upper and lower limit by adjusting to a red warning line, and a warning sound will change to . Users can set value, the status line will alert you . ii. VBAT This item displays the CMOS battery voltage, represented by a... voltage and cannot be adjusted, it is only for present status reference. 36 Motherboard Manual CPU/Battery Voltage i.

Setup Manual
Page 42
... will be downloaded. Link to Internet: Click on this item will pop up to default setting. 42 Motherboard Manual D. i. iv. When carrying this button will link to Biostar website and BIOS file will be cleared and returned to illustrate BIOS related information. Clear CMOS: Click on this... job, the previous CMOS data would be saved into the user-selected folder. iii. Live Update When Live Update program ...
... will be downloaded. Link to Internet: Click on this item will pop up to default setting. 42 Motherboard Manual D. i. iv. When carrying this button will link to Biostar website and BIOS file will be cleared and returned to illustrate BIOS related information. Clear CMOS: Click on this... job, the previous CMOS data would be saved into the user-selected folder. iii. Live Update When Live Update program ...


