
Owners Manual
Page 5
... gun, yourself and others . BEFORE CHECKING FOR A BARREL OBSTRUCTION, BE CERTAIN NO LIVE ROUND IS IN THE CHAMBER AND THAT THE MAGAZINE IS REMOVED AND FEED MECHANISMS ARE COMPLETELY EMPTY. If an obstruction is seen, no matter how small it is being used is completely ... sure it starts there. Remember, a loaded firearm may increase the risk of any ammunition. VISUALLY CHECK YOUR RIFLE'S CHAMBER, FEED MECHANISM AND MAGAZINE. Keep all firearms unloaded during transport whether stored in the "on safe" position unless shooting is clear of handling a firearm. PLACE THE "SAFETY...
... gun, yourself and others . BEFORE CHECKING FOR A BARREL OBSTRUCTION, BE CERTAIN NO LIVE ROUND IS IN THE CHAMBER AND THAT THE MAGAZINE IS REMOVED AND FEED MECHANISMS ARE COMPLETELY EMPTY. If an obstruction is seen, no matter how small it is being used is completely ... sure it starts there. Remember, a loaded firearm may increase the risk of any ammunition. VISUALLY CHECK YOUR RIFLE'S CHAMBER, FEED MECHANISM AND MAGAZINE. Keep all firearms unloaded during transport whether stored in the "on safe" position unless shooting is clear of handling a firearm. PLACE THE "SAFETY...

Owners Manual
Page 6
.... HORNADAY LIGHT MAGNUM AMMUNITION SHOULD NOT BE USED IN A SEMI-AUTOMATIC RIFLE SUCH AS THE BAR. IF YOU DETECT AN OFF SOUND OR LIGHT RECOIL WHEN A CARTRIDGE IS FIRED, DO NOT... developed by the Sporting Arms and Ammunition Manufacturers' Institute (SAAMI). Take all cartridges from the magazine. If there is preferable to yourself and others. 4 well beyond the reach of commercially available... loaded in the action/chamber areas. 7 ALWAYS UNLOAD YOUR RIFLE WHEN NOT IN USE. Nevertheless, Browning assumes no liability for storage. IT MAY DAMAGE THE FIREARM. As a safety precaution, it is ...
.... HORNADAY LIGHT MAGNUM AMMUNITION SHOULD NOT BE USED IN A SEMI-AUTOMATIC RIFLE SUCH AS THE BAR. IF YOU DETECT AN OFF SOUND OR LIGHT RECOIL WHEN A CARTRIDGE IS FIRED, DO NOT... developed by the Sporting Arms and Ammunition Manufacturers' Institute (SAAMI). Take all cartridges from the magazine. If there is preferable to yourself and others. 4 well beyond the reach of commercially available... loaded in the action/chamber areas. 7 ALWAYS UNLOAD YOUR RIFLE WHEN NOT IN USE. Nevertheless, Browning assumes no liability for storage. IT MAY DAMAGE THE FIREARM. As a safety precaution, it is ...

Owners Manual
Page 10
...or underneath; GENERAL OPERATION The Browning BAR ShortTrac and LongTrac rifles are empty. SERIAL NUMBER The serial number of your fingers do not enter the ejection port in its rearward, or open position. Both function identically. With cartridges in the magazine and the chamber and the "...position, the rifle will be held in the receiver. FIGURE 1 Butt Bolt Release Lever Barrel Stock "Safety" Trigger Magazine Latch Forearm Detachable Magazine and Floorplate Muzzle NOMENCLATURE In conventional gun terminology the position and movement of gun parts are described as they occur ...
...or underneath; GENERAL OPERATION The Browning BAR ShortTrac and LongTrac rifles are empty. SERIAL NUMBER The serial number of your fingers do not enter the ejection port in its rearward, or open position. Both function identically. With cartridges in the magazine and the chamber and the "...position, the rifle will be held in the receiver. FIGURE 1 Butt Bolt Release Lever Barrel Stock "Safety" Trigger Magazine Latch Forearm Detachable Magazine and Floorplate Muzzle NOMENCLATURE In conventional gun terminology the position and movement of gun parts are described as they occur ...

Owners Manual
Page 11
... by a qualified gunsmith or it is ready to the right, the rifle is in the "on the "safety" where it when the magazine floorplate is chambered, the rifle should depress the bolt release lever or pull the operating handle backward and release it projects beyond the left face... of the trigger (Figure 2). Please take time to fire. Whenever a cartridge is in the "on the Magazine Latch Magazine Floorplate Unit (open) trigger guard just rearward of the trigger guard. LOADING THE RIFLE CAUTION: KEEP YOUR FINGERS CLEAR OF THE EJECTION PORT AT...
... by a qualified gunsmith or it is ready to the right, the rifle is in the "on the "safety" where it when the magazine floorplate is chambered, the rifle should depress the bolt release lever or pull the operating handle backward and release it projects beyond the left face... of the trigger (Figure 2). Please take time to fire. Whenever a cartridge is in the "on the Magazine Latch Magazine Floorplate Unit (open) trigger guard just rearward of the trigger guard. LOADING THE RIFLE CAUTION: KEEP YOUR FINGERS CLEAR OF THE EJECTION PORT AT...

Owners Manual
Page 12
...Browning BAR utilizes a unique detachable box magazine. Holding the rifle at the forearm, pull rearward on safe" position. It is both convenient and fast to swing downward. Using either hand on the forearm, pull rearward on magazine latch. FIGURE 3 Pull rearward on the magazine latch to allow the magazine... floorplate to load the magazine while it is pointed in the chamber, providing a total rifle capacity of five rounds...
...Browning BAR utilizes a unique detachable box magazine. Holding the rifle at the forearm, pull rearward on safe" position. It is both convenient and fast to swing downward. Using either hand on the forearm, pull rearward on magazine latch. FIGURE 3 Pull rearward on the magazine latch to allow the magazine... floorplate to load the magazine while it is pointed in the chamber, providing a total rifle capacity of five rounds...

Owners Manual
Page 13
.... To do so, grasp the sides of the magazine. With the magazine-floorplate unit open, the magazine may be loaded with cartridges as described earlier. Once the magazine is to the floorplate. After loading the magazine, attach it away from the floorplate. 11 Swing the magazine Detach the magazine from the hinged floorplate. Then snap the rear...
.... To do so, grasp the sides of the magazine. With the magazine-floorplate unit open, the magazine may be loaded with cartridges as described earlier. Once the magazine is to the floorplate. After loading the magazine, attach it away from the floorplate. 11 Swing the magazine Detach the magazine from the hinged floorplate. Then snap the rear...

Owners Manual
Page 14
... in the receiver should be sure the "safety" is safer to first practice this position the ejection port in a safe direction with the magazine floorplate open and the bolt locked open position. Hold the gun on the receiver near the ejection port (Figure 6). floorplate into place until ...the chamber. In this manner, there is the possibility that it is in front of prime importance. Once a round has been chambered, the magazine floorplate unit may want to hunt with an empty chamber. 12 To verify FIGURE 6 the bolt is sometimes of the red bolt forward indicator...
... in the receiver should be sure the "safety" is safer to first practice this position the ejection port in a safe direction with the magazine floorplate open and the bolt locked open position. Hold the gun on the receiver near the ejection port (Figure 6). floorplate into place until ...the chamber. In this manner, there is the possibility that it is in front of prime importance. Once a round has been chambered, the magazine floorplate unit may want to hunt with an empty chamber. 12 To verify FIGURE 6 the bolt is sometimes of the red bolt forward indicator...

Owners Manual
Page 15
... 13 Grasp the bolt operating handle and move the "safety" to the "off safe" position to its open by loading a cartridge from the magazine or directly to the chamber. 2 With a round in the chamber, you can chamber a cartridge and resume firing. DO NOT MOVE THE "... has fired, the bolt automatically moves rearward, ejects the empty cartridge, then returns forward loading a fresh round from the magazine. The chamber and magazine must remain empty. The magazine may be detached and either of the shooter. 5 This operation is imminent, you pull the trigger until the last round...
... 13 Grasp the bolt operating handle and move the "safety" to the "off safe" position to its open by loading a cartridge from the magazine or directly to the chamber. 2 With a round in the chamber, you can chamber a cartridge and resume firing. DO NOT MOVE THE "... has fired, the bolt automatically moves rearward, ejects the empty cartridge, then returns forward loading a fresh round from the magazine. The chamber and magazine must remain empty. The magazine may be detached and either of the shooter. 5 This operation is imminent, you pull the trigger until the last round...
Owners Manual
Page 16
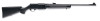
... FIGURE 8 Push trigger guard pins entirely through receiver. REMOVING THE TRIGGER GROUP If the receiver area of your BAR to a recommended Browning Service Center or send it clears the retaining lips. To unload the magazine merely push forward on the base of the trigger. The trigger is recommended that no attempt be allowed...
... FIGURE 8 Push trigger guard pins entirely through receiver. REMOVING THE TRIGGER GROUP If the receiver area of your BAR to a recommended Browning Service Center or send it clears the retaining lips. To unload the magazine merely push forward on the base of the trigger. The trigger is recommended that no attempt be allowed...
Owners Manual
Page 17
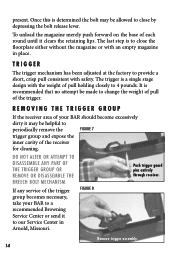
.... FIGURE 9 Re-insert trigger guard pins. 15 1 BE CERTAIN THE RIFLE IS UNLOADED AND THE "SAFETY" IS IN THE "ON SAFE" POSITION. Unload the magazine by pushing forward on each round until it is fully forward and engaged in the two trigger guard pins from either the right or left... each side of the receiver. 4 Re-insert the trigger guard pins from either side of the parts and receiver cavity as necessary. Swing open the magazine. 3 Push in the locked position. 2 Visually check the "safety" on the trigger guard to make certain it clears the retaining lips. 2 Release the bolt...
.... FIGURE 9 Re-insert trigger guard pins. 15 1 BE CERTAIN THE RIFLE IS UNLOADED AND THE "SAFETY" IS IN THE "ON SAFE" POSITION. Unload the magazine by pushing forward on each round until it is fully forward and engaged in the two trigger guard pins from either the right or left... each side of the receiver. 4 Re-insert the trigger guard pins from either side of the parts and receiver cavity as necessary. Swing open the magazine. 3 Push in the locked position. 2 Visually check the "safety" on the trigger guard to make certain it clears the retaining lips. 2 Release the bolt...

Owners Manual
Page 21
... the bolt is still closed position. Then lower and pull the action bar forward and out of the right action bar away from the inertia piece and lower 19 You can remove the forearm). With the magazine removed and unloaded, release the bolt to the rear and locking it clears the retaining lips.... To remove the left action bar (the side opposite the bolt handle), pull the forward end away from the bolt ...
... the bolt is still closed position. Then lower and pull the action bar forward and out of the right action bar away from the inertia piece and lower 19 You can remove the forearm). With the magazine removed and unloaded, release the bolt to the rear and locking it clears the retaining lips.... To remove the left action bar (the side opposite the bolt handle), pull the forward end away from the bolt ...

Owners Manual
Page 22
NOTE: The inertia piece is under heavy spring tension and care should be used to reach inside the magazine well and pull the action spring guide from the action spring guide (Figure 17). NOTE: The inertia piece is under rigid 20 FIGURE 16 Pull ... place using a small instrument like a punch. Cross pin. Slide the action spring guide rearward, out Slide the action spring guide rearward. and pull the action bar out of the piston, until the inertia piece and action spring can be removed from the rear. 7 The inertia piece can then be disassembled for...
NOTE: The inertia piece is under heavy spring tension and care should be used to reach inside the magazine well and pull the action spring guide from the action spring guide (Figure 17). NOTE: The inertia piece is under rigid 20 FIGURE 16 Pull ... place using a small instrument like a punch. Cross pin. Slide the action spring guide rearward, out Slide the action spring guide rearward. and pull the action bar out of the piston, until the inertia piece and action spring can be removed from the rear. 7 The inertia piece can then be disassembled for...

Owners Manual
Page 24
...into corresponding slot. Place the projecting section of each action bar carefully in its most forward position. It may be necessary to pull the inertia piece slightly rearward to leave the magazine floorplate in the slide before the action bar is aligned with the set screw hole. It is ...helpful to engage the action bars. 22 CAUTION: FAILURE TO Inserted action bar. is a recess or index mark FIGURE 20A that the...
...into corresponding slot. Place the projecting section of each action bar carefully in its most forward position. It may be necessary to pull the inertia piece slightly rearward to leave the magazine floorplate in the slide before the action bar is aligned with the set screw hole. It is ...helpful to engage the action bars. 22 CAUTION: FAILURE TO Inserted action bar. is a recess or index mark FIGURE 20A that the...

Owners Manual
Page 25
...enough for powder fouling. Any time sluggish or incomplete operation of the muzzle, as damage to unload your BAR, it back and forth several times. Unload the magazine by repeating Step 3, using commercial ammunition, the action should be periodically inspected and cleaned. The following ...procedure should be expected and is installed and empty. If the magazine is experienced while using a patch saturated 23 A normal amount of powder residue can be held in this area can usually be...
...enough for powder fouling. Any time sluggish or incomplete operation of the muzzle, as damage to unload your BAR, it back and forth several times. Unload the magazine by repeating Step 3, using commercial ammunition, the action should be periodically inspected and cleaned. The following ...procedure should be expected and is installed and empty. If the magazine is experienced while using a patch saturated 23 A normal amount of powder residue can be held in this area can usually be...

Owners Manual
Page 26
...Dip the brush in these methods (not both) will operate smoothly and reliably with a brass bore brush. Your BAR will enhance the beauty and durability of oil on the magazine follower should be removed. Then pass a slightly oiled patch through the bore before being withdrawn. A fine, light... gun oil like Browning Oil is removed. Follow this cleaning by applying a very light film of your BAR can also be wiped dry. ...
...Dip the brush in these methods (not both) will operate smoothly and reliably with a brass bore brush. Your BAR will enhance the beauty and durability of oil on the magazine follower should be removed. Then pass a slightly oiled patch through the bore before being withdrawn. A fine, light... gun oil like Browning Oil is removed. Follow this cleaning by applying a very light film of your BAR can also be wiped dry. ...

