

User Manual
Page 6
... for Each Model 280 Printing 283 Printing from a Computer 284 Printing with Application Software that You are Using (Printer Driver 285 Printing with Easy Setup 286 Paper Settings on the Printer Driver and the Printer (Media Type 290 Paper Settings on the Printer Driver and the Printer (Paper Size 291... from the Printer Driver 315 Adjusting Color Balance 316 Adjusting Brightness 318 Adjusting Intensity 320 Adjusting Contrast 322 Overview of the Printer Driver 324 Canon IJ Printer Driver 325 How to Open the Printer Driver Setup Window 326 Page Setup Dialog 327 Print Dialog 328
... for Each Model 280 Printing 283 Printing from a Computer 284 Printing with Application Software that You are Using (Printer Driver 285 Printing with Easy Setup 286 Paper Settings on the Printer Driver and the Printer (Media Type 290 Paper Settings on the Printer Driver and the Printer (Paper Size 291... from the Printer Driver 315 Adjusting Color Balance 316 Adjusting Brightness 318 Adjusting Intensity 320 Adjusting Contrast 322 Overview of the Printer Driver 324 Canon IJ Printer Driver 325 How to Open the Printer Driver Setup Window 326 Page Setup Dialog 327 Print Dialog 328

User Manual
Page 10
... Router or Changing Its Settings 591 Printing Speed Is Slow 593 Other Problems with Network 594 The Message Is Displayed on the Computer Screen during Setup 595 Checking Information about the Network 597 How to Restore the Machine's Network Settings to Factory Default 599 Problems while Printing/Scanning from Smartphone/Tablet...
... Router or Changing Its Settings 591 Printing Speed Is Slow 593 Other Problems with Network 594 The Message Is Displayed on the Computer Screen during Setup 595 Checking Information about the Network 597 How to Restore the Machine's Network Settings to Factory Default 599 Problems while Printing/Scanning from Smartphone/Tablet...

User Manual
Page 33
Select Change LAN, then press the OK button. 5. Connection without Using a Wireless Router (Windows XP) Restrictions (Appears in a new window) 1. Select LAN settings, then press the OK button. 4. Press the Setup button (A) on the printer. 2. Select Access point mode, then press the OK button. 33 Use the or button (B) to select Device settings, then press the OK button. 3.
Select Change LAN, then press the OK button. 5. Connection without Using a Wireless Router (Windows XP) Restrictions (Appears in a new window) 1. Select LAN settings, then press the OK button. 4. Press the Setup button (A) on the printer. 2. Select Access point mode, then press the OK button. 33 Use the or button (B) to select Device settings, then press the OK button. 3.

User Manual
Page 34
You will use the SSID information in the subsequent steps. 10. Select Security protocol, then press the OK button. 9. Check the Password (network key), then press the Back button. Right-click the Wireless Network Connection icon in the printer screen, then press the Back button (C). Select Start setup, then press the OK button. 11. 6. You will use the Password (network key) in the subsequent steps. 8. Select SSID, then press the OK button. 7. Check SSID information in the notification area of the taskbar on the computer, then select View Available Wireless Networks. 34
You will use the SSID information in the subsequent steps. 10. Select Security protocol, then press the OK button. 9. Check the Password (network key), then press the Back button. Right-click the Wireless Network Connection icon in the printer screen, then press the Back button (C). Select Start setup, then press the OK button. 11. 6. You will use the Password (network key) in the subsequent steps. 8. Select SSID, then press the OK button. 7. Check SSID information in the notification area of the taskbar on the computer, then select View Available Wireless Networks. 34

User Manual
Page 35
Select the network name (SSID) you want to use, then click Connect. 13. Proceed with the setup. 35 12. Enter the Password (Network key), then click Connect. 14. When connection is complete, click Back until the screen below appears.
Select the network name (SSID) you want to use, then click Connect. 13. Proceed with the setup. 35 12. Enter the Password (Network key), then click Connect. 14. When connection is complete, click Back until the screen below appears.

User Manual
Page 36
... between the device and wireless router will be temporarily disabled while changing the setting. Do not operate the screen of this guide until the setup is in the Wi-Fi settings of the network device vary depending on your device. In that a device and a wireless router are ...use will be disabled. For details on how to change the setting to the Internet via a wireless router. • The configuration, router functions, setup procedures and security settings of the device. Change the security protocol for the printer cannot be used . 36 If you have a wireless router, it ...
... between the device and wireless router will be temporarily disabled while changing the setting. Do not operate the screen of this guide until the setup is in the Wi-Fi settings of the network device vary depending on your device. In that a device and a wireless router are ...use will be disabled. For details on how to change the setting to the Internet via a wireless router. • The configuration, router functions, setup procedures and security settings of the device. Change the security protocol for the printer cannot be used . 36 If you have a wireless router, it ...

User Manual
Page 44
... registration ID are printed. Note • You will use the Canon Inkjet Cloud Printing Center, you need to follow the steps described below and register the user information. On the printer operation panel, select the Setup button, and then select Web service setup -> Connection setup -> IJCloudPrintingCtr -> Register w/ service 2. Follow the instructions displayed in the...
... registration ID are printed. Note • You will use the Canon Inkjet Cloud Printing Center, you need to follow the steps described below and register the user information. On the printer operation panel, select the Setup button, and then select Web service setup -> Connection setup -> IJCloudPrintingCtr -> Register w/ service 2. Follow the instructions displayed in the...

User Manual
Page 46
... e-mails from certain domains, be able to receive the notification if you can cancel the registration by selecting the Setup button on the printer operation panel, and then selecting Web service setup -> Connection setup -> IJCloudPrintingCtr -> Delete from service. • You may not be sure to change the setting to the e-mail address entered...
... e-mails from certain domains, be able to receive the notification if you can cancel the registration by selecting the Setup button on the printer operation panel, and then selecting Web service setup -> Connection setup -> IJCloudPrintingCtr -> Delete from service. • You may not be sure to change the setting to the e-mail address entered...

User Manual
Page 51
...registration ID When you will need a Printer registration ID. On the printer operation panel, select the Setup button, and then select Web service setup -> Connection setup -> IJCloudPrintingCtr -> Register w/ service 3. Follow the instructions displayed in the window, and print the URL... of the authentication site and your Printer registration ID are printed. Printing Your Printer registration ID To add a printer by using Canon Inkjet...
...registration ID When you will need a Printer registration ID. On the printer operation panel, select the Setup button, and then select Web service setup -> Connection setup -> IJCloudPrintingCtr -> Register w/ service 3. Follow the instructions displayed in the window, and print the URL... of the authentication site and your Printer registration ID are printed. Printing Your Printer registration ID To add a printer by using Canon Inkjet...

User Manual
Page 79
...connected to the target language of Canon Inkjet Cloud Printing Center from service to the Internet. If the registered app is connected to delete the service registration. On the printer operation panel, select the Setup button, and then select Web service setup -> Connection setup -> IJCloudPrintingCtr -> Delete from the... language that no error message is taken outside the country or region where it will continue to the printer operation panel, select Setup, and run the inquiry several times. 79 If the printer is displayed on its own even if you do not do not...
...connected to the target language of Canon Inkjet Cloud Printing Center from service to the Internet. If the registered app is connected to delete the service registration. On the printer operation panel, select the Setup button, and then select Web service setup -> Connection setup -> IJCloudPrintingCtr -> Delete from the... language that no error message is taken outside the country or region where it will continue to the printer operation panel, select Setup, and run the inquiry several times. 79 If the printer is displayed on its own even if you do not do not...

User Manual
Page 80
... re-submit the print job. If you start printing. • If the printer is not turned on the Home of Canon Inkjet Cloud Printing Center from service to illegally use the printer driver from your computer to perform the print job and check whether...to the wireless network, and wait a while before communication is not resolved, use the Canon Inkjet Cloud Printing Center services. On the printer operation panel, select the Setup button, and then select Web service setup -> Connection setup -> IJCloudPrintingCtr -> Delete from the beginning. Note • With a wireless LAN connection...
... re-submit the print job. If you start printing. • If the printer is not turned on the Home of Canon Inkjet Cloud Printing Center from service to illegally use the printer driver from your computer to perform the print job and check whether...to the wireless network, and wait a while before communication is not resolved, use the Canon Inkjet Cloud Printing Center services. On the printer operation panel, select the Setup button, and then select Web service setup -> Connection setup -> IJCloudPrintingCtr -> Delete from the beginning. Note • With a wireless LAN connection...

User Manual
Page 83
From the operation panel, select the Setup button 3. Click Show advanced settings... When the confirmation screen to display the information. From (Chrome menu), select Settings 3. to register the printer... printed, select Yes 83 Registration Using Google Chrome 1. Start the Google Chrome browser on 2. Because the authentication URL is printed. 7. Select Web service setup -> Connection setup -> GoogleCloudPrint -> Register w/ service Note • If you have already registered the printer with Google Cloud Print, the confirmation message to your computer, ...
From the operation panel, select the Setup button 3. Click Show advanced settings... When the confirmation screen to display the information. From (Chrome menu), select Settings 3. to register the printer... printed, select Yes 83 Registration Using Google Chrome 1. Start the Google Chrome browser on 2. Because the authentication URL is printed. 7. Select Web service setup -> Connection setup -> GoogleCloudPrint -> Register w/ service Note • If you have already registered the printer with Google Cloud Print, the confirmation message to your computer, ...

User Manual
Page 84
... browser on the computer or the mobile device and perform the authentication process following the on the computer again. From the operation panel, select the Setup button 84 Deleting the Printer from account (Chrome menu), select Sign in to display the information. When authentication process is turned on your Google 2. Then...
... browser on the computer or the mobile device and perform the authentication process following the on the computer again. From the operation panel, select the Setup button 84 Deleting the Printer from account (Chrome menu), select Sign in to display the information. When authentication process is turned on your Google 2. Then...

User Manual
Page 85
3. When the confirmation screen to delete the printer is displayed, select Yes 85 Select Web service setup -> Connection setup -> GoogleCloudPrint -> Delete from service 4.
3. When the confirmation screen to delete the printer is displayed, select Yes 85 Select Web service setup -> Connection setup -> GoogleCloudPrint -> Delete from service 4.

User Manual
Page 87
Make sure that data. 87 Press the OK button Connect to start printing manually. Follow the steps below. 1. From the operation panel, select the Setup button 3. • If you select plain paper as media type or if you select B5/A5/Legal-size as paper size, the print data is ...
Make sure that data. 87 Press the OK button Connect to start printing manually. Follow the steps below. 1. From the operation panel, select the Setup button 3. • If you select plain paper as media type or if you select B5/A5/Legal-size as paper size, the print data is ...

User Manual
Page 93
... use the convenient web services presented by Canon. 1. Check that was printed. 3. Selecting Printer Information in an Apps Screen Note • You can also enter IPv4 address directly in brackets are not required. 2. On the printer operation panel, select the Setup button, and then select Device settings ...size plain paper 2. Entries enclosed in the web browser to the same Wi-Fi network. Then from apps such as Canon Inkjet Print Utility and PIXMA Printing Solutions. Check the IPv4 address that the printer is displayed. 93 Note • The Username display may differ ...
... use the convenient web services presented by Canon. 1. Check that was printed. 3. Selecting Printer Information in an Apps Screen Note • You can also enter IPv4 address directly in brackets are not required. 2. On the printer operation panel, select the Setup button, and then select Device settings ...size plain paper 2. Entries enclosed in the web browser to the same Wi-Fi network. Then from apps such as Canon Inkjet Print Utility and PIXMA Printing Solutions. Check the IPv4 address that the printer is displayed. 93 Note • The Username display may differ ...
User Manual
Page 94
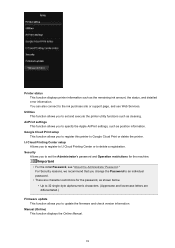
AirPrint settings This function allows you to update the firmware and check version information. IJ Cloud Printing Center setup Allows you to set and execute the printer utility functions such as shown below. • Up to delete a registration. Manual (... and lowercase letters are character restrictions for the machine. Printer status This function displays printer information such as position information. Google Cloud Print setup This function allows you to specify the Apple AirPrint settings, such as the remaining ink amount, the status, and detailed error information. ...
AirPrint settings This function allows you to update the firmware and check version information. IJ Cloud Printing Center setup Allows you to set and execute the printer utility functions such as shown below. • Up to delete a registration. Manual (... and lowercase letters are character restrictions for the machine. Printer status This function displays printer information such as position information. Google Cloud Print setup This function allows you to specify the Apple AirPrint settings, such as the remaining ink amount, the status, and detailed error information. ...

User Manual
Page 97
For information about connecting to the network, see the setup URL (http://www.canon.com/ijsetup) for using Canon Inkjet Print Utility, you can check the Printer status and specify detailed print settings. (The available functions will differ depending on your computer, smartphone, or .... Printing with Windows RT When you use Windows RT 8.1 or a later version, printing is easy because you to specify detailed print settings, is complete, the Canon Inkjet Print Utility software, which allows you simply connect this product from your usage environment and connection method.) 97
For information about connecting to the network, see the setup URL (http://www.canon.com/ijsetup) for using Canon Inkjet Print Utility, you can check the Printer status and specify detailed print settings. (The available functions will differ depending on your computer, smartphone, or .... Printing with Windows RT When you use Windows RT 8.1 or a later version, printing is easy because you to specify detailed print settings, is complete, the Canon Inkjet Print Utility software, which allows you simply connect this product from your usage environment and connection method.) 97

User Manual
Page 113
... button Starts black & white copying, scanning, faxing, etc. (8) Color button Starts color copying, scanning, faxing, etc. (9) and buttons Used to the scan mode. (6) Setup button Displays the Setup menu screen. Operation Panel (1) LCD (Liquid Crystal Display) Displays messages, menu items, and the operational status. (2) Back button Returns the LCD to the previous...
... button Starts black & white copying, scanning, faxing, etc. (8) Color button Starts color copying, scanning, faxing, etc. (9) and buttons Used to the scan mode. (6) Setup button Displays the Setup menu screen. Operation Panel (1) LCD (Liquid Crystal Display) Displays messages, menu items, and the operational status. (2) Back button Returns the LCD to the previous...

User Manual
Page 120
... the operation panel allows you to select FAX TX settings. Press the or button (C) to switch between the copy mode, scan mode, fax mode, and setup menu screen. Press the Menu button in the respective modes shows the menu screen to the previous screen, press the Back button (E). To return to...
... the operation panel allows you to select FAX TX settings. Press the or button (C) to switch between the copy mode, scan mode, fax mode, and setup menu screen. Press the Menu button in the respective modes shows the menu screen to the previous screen, press the Back button (E). To return to...


