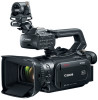
XF400 XF405 Instruction Manual
Page 2
... High-Definition Multimedia Interface are trademarks or registered trademarks of HDMI Licensing Administrator, Inc. NO LICENSE IS GRANTED OR SHALL BE IMPLIED FOR ANY OTHER USE. in the United States and other countries. • Wi-Fi is a registered trademark of the Wi-Fi Alliance. • Wi-Fi Certified...that was encoded only (1) for MPEG-4 standard. • THIS PRODUCT IS LICENSED UNDER THE AVC PATENT PORTFOLIO LICENSE FOR THE PERSONAL USE OF A CONSUMER OR OTHER USES IN WHICH IT DOES NOT RECEIVE REMUNERATION TO (i) ENCODE VIDEO IN COMPLIANCE WITH THE AVC STANDARD ("AVC VIDEO") AND/OR (ii) ...
... High-Definition Multimedia Interface are trademarks or registered trademarks of HDMI Licensing Administrator, Inc. NO LICENSE IS GRANTED OR SHALL BE IMPLIED FOR ANY OTHER USE. in the United States and other countries. • Wi-Fi is a registered trademark of the Wi-Fi Alliance. • Wi-Fi Certified...that was encoded only (1) for MPEG-4 standard. • THIS PRODUCT IS LICENSED UNDER THE AVC PATENT PORTFOLIO LICENSE FOR THE PERSONAL USE OF A CONSUMER OR OTHER USES IN WHICH IT DOES NOT RECEIVE REMUNERATION TO (i) ENCODE VIDEO IN COMPLIANCE WITH THE AVC STANDARD ("AVC VIDEO") AND/OR (ii) ...
XF400 XF405 Instruction Manual
Page 3
...). Network functions (A 117) You can connect the camcorder to ensure you can choose the movie format according to a remote FTP server using the Browser Remote application (A 127), to stream live video and audio over IP (A 135), and to easily transfer files to your recordings...You can also be output from a connected network device using the FTP protocol (A 137). Dual recording is a convenient way to excel in a variety of -the-art dual DIGIC DV 6 image processing platform. Highlights of the XF405 / XF400 The Canon XF405 / XF400 4K Camcorder is a high-performance camcorder ...
...). Network functions (A 117) You can connect the camcorder to ensure you can choose the movie format according to a remote FTP server using the Browser Remote application (A 127), to stream live video and audio over IP (A 135), and to easily transfer files to your recordings...You can also be output from a connected network device using the FTP protocol (A 137). Dual recording is a convenient way to excel in a variety of -the-art dual DIGIC DV 6 image processing platform. Highlights of the XF405 / XF400 The Canon XF405 / XF400 4K Camcorder is a high-performance camcorder ...

XF400 XF405 Instruction Manual
Page 4
...surpassing that of the supplied wireless controller. • Clear, adjustable LCD panel (A 24) and adjustable viewfinder (A 24) for ease of use regardless of the preset looks offered. Alternatively, you can change the recording frame rate to continue your recording conditions. • Compatibility with... you smoothly link them to major NLE software* to achieve a fast or slow motion effect. Software for aiding the production workflow The Canon XF Utility software and various XF plugins are available as the color depth, sharpness and brightness, to Working with Clips on a Computer ...
...surpassing that of the supplied wireless controller. • Clear, adjustable LCD panel (A 24) and adjustable viewfinder (A 24) for ease of use regardless of the preset looks offered. Alternatively, you can change the recording frame rate to continue your recording conditions. • Compatibility with... you smoothly link them to major NLE software* to achieve a fast or slow motion effect. Software for aiding the production workflow The Canon XF Utility software and various XF plugins are available as the color depth, sharpness and brightness, to Working with Clips on a Computer ...

XF400 XF405 Instruction Manual
Page 5
... this Manual 9 Supplied Accessories 11 Names of the Camcorder 28 Turning the Camcorder On and Off 28 Changing the Camcorder's Operating Mode 29 Using the MENU Button and Joystick 29 Date, Time and Language Settings 30 Setting the Date and Time 30 Changing the Language 31 Changing the Time ...Zone 31 Using SD Cards 32 Compatible SD Cards 32 Inserting and Removing an SD Card 33 Initializing an SD Card 34 Selecting the SD Card for XF...
... this Manual 9 Supplied Accessories 11 Names of the Camcorder 28 Turning the Camcorder On and Off 28 Changing the Camcorder's Operating Mode 29 Using the MENU Button and Joystick 29 Date, Time and Language Settings 30 Setting the Date and Time 30 Changing the Language 31 Changing the Time ...Zone 31 Using SD Cards 32 Compatible SD Cards 32 Inserting and Removing an SD Card 33 Initializing an SD Card 34 Selecting the SD Card for XF...

XF400 XF405 Instruction Manual
Page 6
...71 Exposure Lock (AE Lock) 71 Touch Exposure 71 Exposure Compensation 72 Backlight Correction 72 Zebra Pattern 73 ND Filter 74 White Balance 75 Using Looks 77 Setting the Time Code 78 Selecting the Time Code Mode 78 Selecting Drop Frame or Non-Drop Frame 79 Setting the User Bit...Selecting the Audio Input Source for Access Points 123 Manual Setup 124 Connecting to an External Monitor or Recorder 111 Connection Diagram 111 Recording Video Using an External Recorder 111 Connecting an External Monitor 112 Audio Output 114 Selecting the Audio Channels 114 Working with Clips on a Computer 115 Saving...
...71 Exposure Lock (AE Lock) 71 Touch Exposure 71 Exposure Compensation 72 Backlight Correction 72 Zebra Pattern 73 ND Filter 74 White Balance 75 Using Looks 77 Setting the Time Code 78 Selecting the Time Code Mode 78 Selecting Drop Frame or Non-Drop Frame 79 Setting the User Bit...Selecting the Audio Input Source for Access Points 123 Manual Setup 124 Connecting to an External Monitor or Recorder 111 Connection Diagram 111 Recording Video Using an External Recorder 111 Connecting an External Monitor 112 Audio Output 114 Selecting the Audio Channels 114 Working with Clips on a Computer 115 Saving...

XF400 XF405 Instruction Manual
Page 7
... a Fully Charged Battery Pack 168 Index 171 7 Browser Remote: Controlling the Camcorder from a Network Device 127 Setting Up Browser Remote 127 Starting Browser Remote 128 Using Browser Remote 130 IP Streaming 135 IP Streaming Settings 135 Streaming Video over IP 136 FTP File Transfer 137 Setting Up the FTP Server and...
... a Fully Charged Battery Pack 168 Index 171 7 Browser Remote: Controlling the Camcorder from a Network Device 127 Setting Up Browser Remote 127 Starting Browser Remote 128 Using Browser Remote 130 IP Streaming 135 IP Streaming Settings 135 Streaming Video over IP 136 FTP File Transfer 137 Setting Up the FTP Server and...
XF400 XF405 Instruction Manual
Page 9
...indicates that the function described can be used. Position of the mode switch. 1 Introduction 9 About this Manual Thank you use the camcorder and retain it is pressed to start recording until it for purchasing the Canon XF405 / XF400. Some screenshots have been ...MEDIA) mode. Unless indicated otherwise, illustrations refer to the LCD screen and the viewfinder screen. "Screen" refers to the m. Conventions Used in this Manual • IMPORTANT: Precautions related to the camcorder's operation. • NOTES: Additional topics that complement the basic operating...
...indicates that the function described can be used. Position of the mode switch. 1 Introduction 9 About this Manual Thank you use the camcorder and retain it is pressed to start recording until it for purchasing the Canon XF405 / XF400. Some screenshots have been ...MEDIA) mode. Unless indicated otherwise, illustrations refer to the LCD screen and the viewfinder screen. "Screen" refers to the m. Conventions Used in this Manual • IMPORTANT: Precautions related to the camcorder's operation. • NOTES: Additional topics that complement the basic operating...
XF400 XF405 Instruction Manual
Page 10
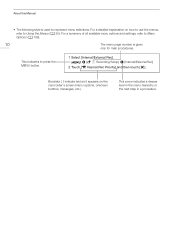
...For a summary of all available menu options and settings, refer to Menu Options (A 139). 10 The menu page number is used to represent menu selections. This indicates to Using the Menus (A 35). Recording Setup] > [Internal/External Rec] 2 Touch [v Internal Rec Priority] and then touch [X].... Brackets [ ] indicate text as it appears on how to use the menus, refer to press the MENU button. 1 Select [Internal/External Rec]. > [3 ! For a detailed explanation on the camcorder's screen (menu ...
...For a summary of all available menu options and settings, refer to Menu Options (A 139). 10 The menu page number is used to represent menu selections. This indicates to Using the Menus (A 35). Recording Setup] > [Internal/External Rec] 2 Touch [v Internal Rec Priority] and then touch [X].... Brackets [ ] indicate text as it appears on how to use the menus, refer to press the MENU button. 1 Select [Internal/External Rec]. > [3 ! For a detailed explanation on the camcorder's screen (menu ...

XF400 XF405 Instruction Manual
Page 18
Names of Parts WL-D89 Wireless Controller 18 7 1 2 8 3 4 9 5 10 6 1 START/STOP button (A 39) Same as the REC button on the camcorder, used to start/stop recording video. 2 G (open the index selection screen) button (A 102) 3 MENU button (A 36) 4 DISP. (onscreen display) button (A 44) 5 SET button 6 Ñ (stop) button (A 102) 7 PHOTO button (A 40) 8 Zoom buttons (A 62) 9 Navigation buttons 10 Ò (play/pause) button (A 102)
Names of Parts WL-D89 Wireless Controller 18 7 1 2 8 3 4 9 5 10 6 1 START/STOP button (A 39) Same as the REC button on the camcorder, used to start/stop recording video. 2 G (open the index selection screen) button (A 102) 3 MENU button (A 36) 4 DISP. (onscreen display) button (A 44) 5 SET button 6 Ñ (stop) button (A 102) 7 PHOTO button (A 40) 8 Zoom buttons (A 62) 9 Navigation buttons 10 Ò (play/pause) button (A 102)

XF400 XF405 Instruction Manual
Page 19
... pack softly into the battery attachment unit and slide it forward until it clicks in minutes) on the screen. For more accurate readings, when using the supplied CA-946 AC Adapter. 1 Make sure the power switch is completely exhausted. Charging the Battery Pack Charge battery packs... using a battery pack for the first time, charge it fully and then use the camcorder until the battery pack is set to OFF. 2 Connect the AC adapter's DC plug to the camcorder...
... pack softly into the battery attachment unit and slide it forward until it clicks in minutes) on the screen. For more accurate readings, when using the supplied CA-946 AC Adapter. 1 Make sure the power switch is completely exhausted. Charging the Battery Pack Charge battery packs... using a battery pack for the first time, charge it fully and then use the camcorder until the battery pack is set to OFF. 2 Connect the AC adapter's DC plug to the camcorder...

XF400 XF405 Instruction Manual
Page 21
...176;F and 86 °F). Note that you prepare battery packs to last 2 to 3 times longer than you think you can power the camcorder using the AC adapter, do not connect the supplied AC adapter to voltage converters for about 5 seconds a screen showing the approximate battery charge level ...updated on aircraft and ships, DC-AC inverters, etc. If either the ambient temperature or the battery pack's temperature is outside the range of use with a fully charged battery pack, refer to the Reference Tables (A 167, 168). • Charged battery packs continue to discharge naturally. ...
...176;F and 86 °F). Note that you prepare battery packs to last 2 to 3 times longer than you think you can power the camcorder using the AC adapter, do not connect the supplied AC adapter to voltage converters for about 5 seconds a screen showing the approximate battery charge level ...updated on aircraft and ships, DC-AC inverters, etc. If either the ambient temperature or the battery pack's temperature is outside the range of use with a fully charged battery pack, refer to the Reference Tables (A 167, 168). • Charged battery packs continue to discharge naturally. ...

XF400 XF405 Instruction Manual
Page 22
...the viewfinder and LCD screen. 22 IMPORTANT • Be careful not to the camcorder. 1 Align the handle unit with the two supplied screws. However, to use a coin or similar object. Attaching the Handle Unit The camcorder is in place. 2 Firmly tighten the front and rear screws. • To tighten the... unit to the handle unit with the handle attachment unit and then slide the handle unit forward until it is functional even if you can use the INPUT terminals (A 83), infrared light (A 92) and tally lamp (A 40), the handle unit must be correctly attached to drop the camcorder when attaching...
...the viewfinder and LCD screen. 22 IMPORTANT • Be careful not to the camcorder. 1 Align the handle unit with the two supplied screws. However, to use a coin or similar object. Attaching the Handle Unit The camcorder is in place. 2 Firmly tighten the front and rear screws. • To tighten the... unit to the handle unit with the handle attachment unit and then slide the handle unit forward until it is functional even if you can use the INPUT terminals (A 83), infrared light (A 92) and tally lamp (A 40), the handle unit must be correctly attached to drop the camcorder when attaching...

XF400 XF405 Instruction Manual
Page 23
... supplied lens hood with the thread. Preparing the Camcorder 23 ባ ቢ Lens hood release button To carry/transport the camcorder or store it after use, remove the lens hood and place the lens cap back on the camcorder. 1 Remove the lens cap. • The lens cap and lens hood cannot... cap back on the lens hood is effective for reducing stray light that the groove on the lens. Additionally, closing the lens barrier can be used simultaneously. 2 Place the lens hood on the front of the lens (ቢ), and then turn the lens hood clockwise until it stops with a click (ባ...
... supplied lens hood with the thread. Preparing the Camcorder 23 ባ ቢ Lens hood release button To carry/transport the camcorder or store it after use, remove the lens hood and place the lens cap back on the camcorder. 1 Remove the lens cap. • The lens cap and lens hood cannot... cap back on the lens hood is effective for reducing stray light that the groove on the lens. Additionally, closing the lens barrier can be used simultaneously. 2 Place the lens hood on the front of the lens (ቢ), and then turn the lens hood clockwise until it stops with a click (ባ...

XF400 XF405 Instruction Manual
Page 24
... Viewfinder Adjust the position of the eye cup toward the lens. 180° 90° Using the LCD Screen Open the LCD panel 90 degrees. • You can also adjust the diopter, if ...necessary. 1 Pull out the viewfinder and adjust the viewing angle. 24 2 Turn on the camcorder (A 28). 3 Adjust the viewfinder using the camcorder. You can rotate the panel 90 degrees downward and 180 degrees toward the camcorder body. If you wear glasses, you may... lever ቢ ቤ NOTES • Make sure you flip back the outer edge of the viewfinder to use if you keep the eye cup attached when...
... Viewfinder Adjust the position of the eye cup toward the lens. 180° 90° Using the LCD Screen Open the LCD panel 90 degrees. • You can also adjust the diopter, if ...necessary. 1 Pull out the viewfinder and adjust the viewing angle. 24 2 Turn on the camcorder (A 28). 3 Adjust the viewfinder using the camcorder. You can rotate the panel 90 degrees downward and 180 degrees toward the camcorder body. If you wear glasses, you may... lever ቢ ቤ NOTES • Make sure you flip back the outer edge of the viewfinder to use if you keep the eye cup attached when...

XF400 XF405 Instruction Manual
Page 25
... battery pack. • When the LCD panel is on the recorded image and does not constitute a malfunction. Adjusting the Grip Belt and Using Straps Fasten the grip belt. • Adjust the grip belt so that you can also press and hold the DISP button for more than... LCD screen and viewfinder, refer to Handling Precautions (A 158), Cleaning (A 161). • About the LCD and viewfinder screens: The screens are produced using extremely high-precision manufacturing techniques, with more than 2 seconds to specification. This has no effect on , you can reach the zoom rocker with your...
... battery pack. • When the LCD panel is on the recorded image and does not constitute a malfunction. Adjusting the Grip Belt and Using Straps Fasten the grip belt. • Adjust the grip belt so that you can also press and hold the DISP button for more than... LCD screen and viewfinder, refer to Handling Precautions (A 158), Cleaning (A 161). • About the LCD and viewfinder screens: The screens are produced using extremely high-precision manufacturing techniques, with more than 2 seconds to specification. This has no effect on , you can reach the zoom rocker with your...

XF400 XF405 Instruction Manual
Page 27
Using a Tripod You can rotate the LCD panel 180 degrees to the camcorder. Preparing the Camcorder 27 ...the camcorder's remote sensor when you press the buttons. • You can mount the camcorder on a tripod but do not use tripods with mounting screws longer than 6 mm (0.24 in.) as this may not work properly when the remote sensor is ...situated under strong light sources or direct sunlight. To use the wireless controller Point the wireless controller at very close range, replace the battery. • The wireless controller may cause ...
Using a Tripod You can rotate the LCD panel 180 degrees to the camcorder. Preparing the Camcorder 27 ...the camcorder's remote sensor when you press the buttons. • You can mount the camcorder on a tripod but do not use tripods with mounting screws longer than 6 mm (0.24 in.) as this may not work properly when the remote sensor is ...situated under strong light sources or direct sunlight. To use the wireless controller Point the wireless controller at very close range, replace the battery. • The wireless controller may cause ...

XF400 XF405 Instruction Manual
Page 28
... 28 The camcorder has two basic modes: CAMERA ( ) mode for mode (A 101). You can set [B System Setup] > [POWER LED] in green. Select the operating mode using the power switch. ) mode for To turn on the camcorder Set the power switch to CAMERA for MEDIA for making recordings or MEDIA ( playing back...
... 28 The camcorder has two basic modes: CAMERA ( ) mode for mode (A 101). You can set [B System Setup] > [POWER LED] in green. Select the operating mode using the power switch. ) mode for To turn on the camcorder Set the power switch to CAMERA for MEDIA for making recordings or MEDIA ( playing back...

XF400 XF405 Instruction Manual
Page 29
... press again to move the orange selection frame in the manual, "press SET") to n. Using the MENU Button and Joystick You can navigate some of the camcorder's menus and screens using the MENU button and joystick instead of using the touch screen. Joystick/SET button When making a menu selection, push the joystick to...
... press again to move the orange selection frame in the manual, "press SET") to n. Using the MENU Button and Joystick You can navigate some of the camcorder's menus and screens using the MENU button and joystick instead of using the touch screen. Joystick/SET button When making a menu selection, push the joystick to...

XF400 XF405 Instruction Manual
Page 30
... information received from the GPS signal (A 94). In such case, recharge the built-in short form (numbers instead of the camcorder before you do not use 12-hour clock (AM/PM). 7 Touch [OK] to confirm. The same is not set. Operating modes: 1 Turn on the camcorder. • The [Date/Time]...] - [ System Setup] > [Date/Time] • When you can also push the joystick to select the desired button and press SET to start using it unselected to use the camcorder for the rest of the steps in this procedure. • In some screens, the date will be lost. Date, Time and Language...
... information received from the GPS signal (A 94). In such case, recharge the built-in short form (numbers instead of the camcorder before you do not use 12-hour clock (AM/PM). 7 Touch [OK] to confirm. The same is not set. Operating modes: 1 Turn on the camcorder. • The [Date/Time]...] - [ System Setup] > [Date/Time] • When you can also push the joystick to select the desired button and press SET to start using it unselected to use the camcorder for the rest of the steps in this procedure. • In some screens, the date will be lost. Date, Time and Language...

XF400 XF405 Instruction Manual
Page 31
...menu. The following procedure is able to set the time zone of 27 languages. If necessary, touch [$] to adjust for daylight saving time. 4 Touch [X] to Using the Menus (A 35). 31 Operating modes: 1 Select [Language H]. > [B ! Operating modes: 1 Select [Time Zone/DST]. > [B ! System Setup] ...> [Language H] 2 Touch the desired language and then touch [OK]. 3 Touch [X] to Using the Menus (A 35). This is English. For a detailed explanation, refer to close the menu. You can set the camcorder to match the time of your...
...menu. The following procedure is able to set the time zone of 27 languages. If necessary, touch [$] to adjust for daylight saving time. 4 Touch [X] to Using the Menus (A 35). 31 Operating modes: 1 Select [Language H]. > [B ! Operating modes: 1 Select [Time Zone/DST]. > [B ! System Setup] ...> [Language H] 2 Touch the desired language and then touch [OK]. 3 Touch [X] to Using the Menus (A 35). This is English. For a detailed explanation, refer to close the menu. You can set the camcorder to match the time of your...


