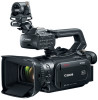
XF400 XF405 Instruction Manual
Page 2
...; Microsoft and Windows are trademarks or registered trademarks of Microsoft Corporation in the U.S. Introduction COPYRIGHT WARNING Unauthorized recording of copyrighted materials may infringe on the camcorder's settings, onscreen displays and in this manual signifies Wi-Fi Protected Setup. • The Wi-Fi Protected Setup Identifier Mark is a mark of the Wi...
...; Microsoft and Windows are trademarks or registered trademarks of Microsoft Corporation in the U.S. Introduction COPYRIGHT WARNING Unauthorized recording of copyrighted materials may infringe on the camcorder's settings, onscreen displays and in this manual signifies Wi-Fi Protected Setup. • The Wi-Fi Protected Setup Identifier Mark is a mark of the Wi...
XF400 XF405 Instruction Manual
Page 3
...situations. Manual controls at full wide angle of 25.5 mm (35 mm equivalent), offering superb wide-angle shooting capability. Additionally, the camcorder also features 5 assignable buttons on an SD card. Even while focusing manually, the newly-added Dual Pixel Focus Guide function (A 53...formats use to check if the image is in order to create a backup of your workflow needs. Highlights of the XF405 / XF400 The Canon XF405 / XF400 4K Camcorder is equipped with a 1.0-inch CMOS sensor that captures video at an effective pixel count of approximately 8.29 megapixels (...
...situations. Manual controls at full wide angle of 25.5 mm (35 mm equivalent), offering superb wide-angle shooting capability. Additionally, the camcorder also features 5 assignable buttons on an SD card. Even while focusing manually, the newly-added Dual Pixel Focus Guide function (A 53...formats use to check if the image is in order to create a backup of your workflow needs. Highlights of the XF405 / XF400 The Canon XF405 / XF400 4K Camcorder is equipped with a 1.0-inch CMOS sensor that captures video at an effective pixel count of approximately 8.29 megapixels (...

XF400 XF405 Instruction Manual
Page 5
... Used in this Manual 9 Supplied Accessories 11 Names of Contents 1. Preparations 19 Preparing the Power Supply 19 Using a Battery Pack 19 Preparing the Camcorder 22 Attaching the Microphone Holder Unit 22 Attaching the Handle Unit 22 Using the Lens Hood and Lens Cap 23 Using the Viewfinder 24 Using... 24 Adjusting the Grip Belt and Using Straps 25 Wireless Controller 26 Using a Tripod 27 Basic Operation of the Camcorder 28 Turning the Camcorder On and Off 28 Changing the Camcorder's Operating Mode 29 Using the MENU Button and Joystick 29 Date, Time and Language Settings 30 Setting the Date...
... Used in this Manual 9 Supplied Accessories 11 Names of Contents 1. Preparations 19 Preparing the Power Supply 19 Using a Battery Pack 19 Preparing the Camcorder 22 Attaching the Microphone Holder Unit 22 Attaching the Handle Unit 22 Using the Lens Hood and Lens Cap 23 Using the Viewfinder 24 Using... 24 Adjusting the Grip Belt and Using Straps 25 Wireless Controller 26 Using a Tripod 27 Basic Operation of the Camcorder 28 Turning the Camcorder On and Off 28 Changing the Camcorder's Operating Mode 29 Using the MENU Button and Joystick 29 Date, Time and Language Settings 30 Setting the Date...

XF400 XF405 Instruction Manual
Page 6
... of MP4 Clips 81 Audio Settings and Recorded Audio Channels 82 Connecting an External Microphone or External Audio Input Source to the Camcorder 83 Selecting the Audio Input Source for Access Points 123 Manual Setup 124 Connecting to a Wired (Ethernet) Network 125 Selecting ...Network Settings 126 Customization 97 CUSTOM Dial and Button 97 Assignable Buttons 98 Assignable functions 99 Saving and Loading Camcorder Settings 100 Saving Camcorder Settings 100 Loading Camcorder Settings 100 5. Network Functions 117 About the Network Functions 117 Connecting to an External Monitor or Recorder ...
... of MP4 Clips 81 Audio Settings and Recorded Audio Channels 82 Connecting an External Microphone or External Audio Input Source to the Camcorder 83 Selecting the Audio Input Source for Access Points 123 Manual Setup 124 Connecting to a Wired (Ethernet) Network 125 Selecting ...Network Settings 126 Customization 97 CUSTOM Dial and Button 97 Assignable Buttons 98 Assignable functions 99 Saving and Loading Camcorder Settings 100 Saving Camcorder Settings 100 Loading Camcorder Settings 100 5. Network Functions 117 About the Network Functions 117 Connecting to an External Monitor or Recorder ...

XF400 XF405 Instruction Manual
Page 7
7 Browser Remote: Controlling the Camcorder from a Network Device 127 Setting Up Browser Remote 127 Starting Browser Remote 128 Using Browser Remote 130 IP Streaming 135 IP Streaming Settings 135 Streaming ...
7 Browser Remote: Controlling the Camcorder from a Network Device 127 Setting Up Browser Remote 127 Starting Browser Remote 128 Using Browser Remote 130 IP Streaming 135 IP Streaming Settings 135 Streaming ...
XF400 XF405 Instruction Manual
Page 9
...SDHC or SDXC card. a non-shaded icon (like ) indicates that apply only to read this manual carefully before you for purchasing the Canon XF405 / XF400. Position of the mode switch. Operating modes: Position of the POWER switch: shooting (CAMERA) or playback (MEDIA) mode. Please...number within this manual. • m: Text and/or illustrations that the function described can be used. For details, refer to Changing the Camcorder's Operating Mode (A 29). For details, refer to the m. Movie format (MP4 or XF-AVC). Unless indicated otherwise, illustrations refer to ...
...SDHC or SDXC card. a non-shaded icon (like ) indicates that apply only to read this manual carefully before you for purchasing the Canon XF405 / XF400. Position of the mode switch. Operating modes: Position of the POWER switch: shooting (CAMERA) or playback (MEDIA) mode. Please...number within this manual. • m: Text and/or illustrations that the function described can be used. For details, refer to Changing the Camcorder's Operating Mode (A 29). For details, refer to the m. Movie format (MP4 or XF-AVC). Unless indicated otherwise, illustrations refer to ...
XF400 XF405 Instruction Manual
Page 10
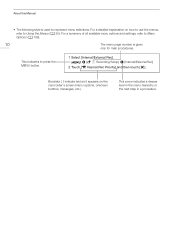
... Rec Priority] and then touch [X]. This arrow indicates a deeper level in the menu hierarchy or the next step in a procedure. For a detailed explanation on the camcorder's screen (menu options, onscreen buttons, messages, etc.).
... Rec Priority] and then touch [X]. This arrow indicates a deeper level in the menu hierarchy or the next step in a procedure. For a detailed explanation on the camcorder's screen (menu options, onscreen buttons, messages, etc.).

XF400 XF405 Instruction Manual
Page 11
Supplied Accessories The following accessories are supplied with lens barrier Lens cap WL-D89 Wireless Controller (incl. screws) Handle unit (incl. CR2025 lithium button battery) Quick Guide power cord) BP-828 Battery Pack Microphone holder unit (incl. screws) Lens hood with the camcorder: Supplied Accessories 11 CA-946 AC Adapter (incl.
Supplied Accessories The following accessories are supplied with lens barrier Lens cap WL-D89 Wireless Controller (incl. screws) Handle unit (incl. CR2025 lithium button battery) Quick Guide power cord) BP-828 Battery Pack Microphone holder unit (incl. screws) Lens hood with the camcorder: Supplied Accessories 11 CA-946 AC Adapter (incl.

XF400 XF405 Instruction Manual
Page 12
buttons (A 74) 2 PRE REC (pre-recording) button (A 91)/ Assignable button 3 (A 98) 3 u (review recording) button (A 41)/ Assignable button 4 (A 98) 4 Lens barrier switch (A 39) 5 Lens hood (A 23) 6 Focus/Zoom ring (A 52, 59) 7 CUSTOM (customizable) dial (A 97) 8 CUSTOM (customizable) button (A 97) 9 Focus/Zoom ring switch (A 52, 59) 10 INFRARED switch (A 92) 11 DISP (onscreen display) button (A 44)/ BATT. Names of Parts Names of Parts Camcorder 12 1 23 4 5 6 78 9 10 11 1 ND FILTER +/- INFO (battery information) button (A 21)
buttons (A 74) 2 PRE REC (pre-recording) button (A 91)/ Assignable button 3 (A 98) 3 u (review recording) button (A 41)/ Assignable button 4 (A 98) 4 Lens barrier switch (A 39) 5 Lens hood (A 23) 6 Focus/Zoom ring (A 52, 59) 7 CUSTOM (customizable) dial (A 97) 8 CUSTOM (customizable) button (A 97) 9 Focus/Zoom ring switch (A 52, 59) 10 INFRARED switch (A 92) 11 DISP (onscreen display) button (A 44)/ BATT. Names of Parts Names of Parts Camcorder 12 1 23 4 5 6 78 9 10 11 1 ND FILTER +/- INFO (battery information) button (A 21)

XF400 XF405 Instruction Manual
Page 18
Names of Parts WL-D89 Wireless Controller 18 7 1 2 8 3 4 9 5 10 6 1 START/STOP button (A 39) Same as the REC button on the camcorder, used to start/stop recording video. 2 G (open the index selection screen) button (A 102) 3 MENU button (A 36) 4 DISP. (onscreen display) button (A 44) 5 SET button 6 Ñ (stop) button (A 102) 7 PHOTO button (A 40) 8 Zoom buttons (A 62) 9 Navigation buttons 10 Ò (play/pause) button (A 102)
Names of Parts WL-D89 Wireless Controller 18 7 1 2 8 3 4 9 5 10 6 1 START/STOP button (A 39) Same as the REC button on the camcorder, used to start/stop recording video. 2 G (open the index selection screen) button (A 102) 3 MENU button (A 36) 4 DISP. (onscreen display) button (A 44) 5 SET button 6 Ñ (stop) button (A 102) 7 PHOTO button (A 40) 8 Zoom buttons (A 62) 9 Navigation buttons 10 Ò (play/pause) button (A 102)

XF400 XF405 Instruction Manual
Page 19
...check the approximate remaining battery usage time (in place. Both battery packs are compatible with Intelligent System so you connect the AC adapter to the camcorder. ቦ • Press the battery pack softly into the battery attachment unit and slide it clicks in minutes) on the screen. Using ... packs using the supplied CA-946 AC Adapter. 1 Make sure the power switch is set to OFF. 2 Connect the AC adapter's DC plug to the camcorder's DC IN ቢ terminal. 3 Connect the power cord to the AC adapter. 4 Plug the power cord into a power outlet. ብ ባ ቤ...
...check the approximate remaining battery usage time (in place. Both battery packs are compatible with Intelligent System so you connect the AC adapter to the camcorder. ቦ • Press the battery pack softly into the battery attachment unit and slide it clicks in minutes) on the screen. Using ... packs using the supplied CA-946 AC Adapter. 1 Make sure the power switch is set to OFF. 2 Connect the AC adapter's DC plug to the camcorder's DC IN ቢ terminal. 3 Connect the power cord to the AC adapter. 4 Plug the power cord into a power outlet. ብ ባ ቤ...

XF400 XF405 Instruction Manual
Page 21
...charge level and an estimate of use, or the day before connecting or disconnecting the AC adapter. Checking the Remaining Battery Charge With the camcorder turned off . • If the power supply was disconnected while charging a battery pack, make sure the POWER/CHG indicator has gone...need. • For handling precautions regarding the battery pack, refer to display for overseas travels or special power sources such as this camcorder. • Turn off the camcorder before , to ensure a full charge. • We recommend that is updated on the SD card. Therefore, charge them on ...
...charge level and an estimate of use, or the day before connecting or disconnecting the AC adapter. Checking the Remaining Battery Charge With the camcorder turned off . • If the power supply was disconnected while charging a battery pack, make sure the POWER/CHG indicator has gone...need. • For handling precautions regarding the battery pack, refer to display for overseas travels or special power sources such as this camcorder. • Turn off the camcorder before , to ensure a full charge. • We recommend that is updated on the SD card. Therefore, charge them on ...

XF400 XF405 Instruction Manual
Page 22
... the handle unit with the two supplied screws. Preparing the Camcorder Preparing the Camcorder This section covers the basic preparations for the camcorder such as attaching the handle unit and lens hood, and adjusting the viewfinder and LCD screen. 22 IMPORTANT • Be careful not to... place. 2 Firmly tighten the front and rear screws. • To tighten the rear screws you remove the handle unit. Attaching the Handle Unit The camcorder is recommended. Using a table or other stable surface is functional even if you can use the INPUT terminals (A 83), infrared light (A 92) and ...
... the handle unit with the two supplied screws. Preparing the Camcorder Preparing the Camcorder This section covers the basic preparations for the camcorder such as attaching the handle unit and lens hood, and adjusting the viewfinder and LCD screen. 22 IMPORTANT • Be careful not to... place. 2 Firmly tighten the front and rear screws. • To tighten the rear screws you remove the handle unit. Attaching the Handle Unit The camcorder is recommended. Using a table or other stable surface is functional even if you can use the INPUT terminals (A 83), infrared light (A 92) and ...

XF400 XF405 Instruction Manual
Page 23
... turn the lens hood counterclockwise. 2 Place the lens cap back on the lens. To carry/transport the camcorder or store it after use, remove the lens hood and place the lens cap back on the camcorder. 1 Remove the lens cap. • The lens cap and lens hood cannot be the cause of...
... turn the lens hood counterclockwise. 2 Place the lens cap back on the lens. To carry/transport the camcorder or store it after use, remove the lens hood and place the lens cap back on the camcorder. 1 Remove the lens cap. • The lens cap and lens hood cannot be the cause of...

XF400 XF405 Instruction Manual
Page 24
You can rotate the panel 90 degrees downward and 180 degrees toward the camcorder body. Preparing the Camcorder Using the Viewfinder Adjust the position of the eye cup toward the lens. 180° 90° Using the LCD Screen Open the LCD panel .... • You can also adjust the diopter, if necessary. 1 Pull out the viewfinder and adjust the viewing angle. 24 2 Turn on the camcorder (A 28). 3 Adjust the viewfinder using the camcorder. If you wear glasses, you may find the viewfinder easier to a comfortable angle. Dioptric adjustment lever ቢ ቤ NOTES • Make sure...
You can rotate the panel 90 degrees downward and 180 degrees toward the camcorder body. Preparing the Camcorder Using the Viewfinder Adjust the position of the eye cup toward the lens. 180° 90° Using the LCD Screen Open the LCD panel .... • You can also adjust the diopter, if necessary. 1 Pull out the viewfinder and adjust the viewing angle. 24 2 Turn on the camcorder (A 28). 3 Adjust the viewfinder using the camcorder. If you wear glasses, you may find the viewfinder easier to a comfortable angle. Dioptric adjustment lever ቢ ቤ NOTES • Make sure...

XF400 XF405 Instruction Manual
Page 25
... the grip belt. • Adjust the grip belt so that you can set [£ Display Setup] > [LCD Mirror Image] in the setup menus. When the camcorder is rotated 180 degrees toward the subject, you can reach the zoom rocker with your thumb. Less than 0.01% of the LCD screen with the... the effective usage time of the battery pack. • When the LCD panel is on the recorded image and does not constitute a malfunction. Preparing the Camcorder NOTES • You can adjust the brightness of the pixels may occasionally misfire or appear as black, red, blue or green dots.
... the grip belt. • Adjust the grip belt so that you can set [£ Display Setup] > [LCD Mirror Image] in the setup menus. When the camcorder is rotated 180 degrees toward the subject, you can reach the zoom rocker with your thumb. Less than 0.01% of the LCD screen with the... the effective usage time of the battery pack. • When the LCD panel is on the recorded image and does not constitute a malfunction. Preparing the Camcorder NOTES • You can adjust the brightness of the pixels may occasionally misfire or appear as black, red, blue or green dots.

XF400 XF405 Instruction Manual
Page 26
Preparing the Camcorder To attach an optional WS-20 Wrist Strap 26 To attach an optional SS-600/SS-650 Shoulder Strap Wireless Controller First, insert the supplied CR2025 lithium button battery into the wireless controller. 1 Press the tab in the direction of the arrow and pull out the battery holder. 2 Place the lithium button battery with the + side facing up. 3 Insert the battery holder. Tab
Preparing the Camcorder To attach an optional WS-20 Wrist Strap 26 To attach an optional SS-600/SS-650 Shoulder Strap Wireless Controller First, insert the supplied CR2025 lithium button battery into the wireless controller. 1 Press the tab in the direction of the arrow and pull out the battery holder. 2 Place the lithium button battery with the + side facing up. 3 Insert the battery holder. Tab

XF400 XF405 Instruction Manual
Page 27
... LCD panel 180 degrees to the camcorder. Preparing the Camcorder 27 NOTES • When the camcorder cannot be operated at the camcorder's remote sensor when you press the buttons. • You can mount the camcorder on a tripod but do not use the wireless controller from the front of the camcorder. To use the wireless controller Point...
... LCD panel 180 degrees to the camcorder. Preparing the Camcorder 27 NOTES • When the camcorder cannot be operated at the camcorder's remote sensor when you press the buttons. • You can mount the camcorder on a tripod but do not use the wireless controller from the front of the camcorder. To use the wireless controller Point...

XF400 XF405 Instruction Manual
Page 28
...the power indicator does not illuminate. NOTES • When you turn off the camcorder Set the power switch to OFF. Basic Operation of the Camcorder Basic Operation of the Camcorder Turning the Camcorder On and Off 28 The camcorder has two basic modes: CAMERA ( ) mode for mode (A 101). Select ...the operating mode using the power switch. ) mode for To turn on the camcorder, the POWER/CHG indicator ...
...the power indicator does not illuminate. NOTES • When you turn off the camcorder Set the power switch to OFF. Basic Operation of the Camcorder Basic Operation of the Camcorder Turning the Camcorder On and Off 28 The camcorder has two basic modes: CAMERA ( ) mode for mode (A 101). Select ...the operating mode using the power switch. ) mode for To turn on the camcorder, the POWER/CHG indicator ...

XF400 XF405 Instruction Manual
Page 29
...(in the menu. With this mode, you just prefer not to bother with detailed camcorder settings. (Manual) mode Set the mode switch to N. With this mode, the camcorder takes care of the Camcorder Changing the Camcorder's Operating Mode In mode, you can further select the camera mode to match your ... again to select the menu item indicated by the orange selection frame. This operating mode is suitable if you can navigate some of the camcorder's menus and screens using the MENU button and joystick instead of using the touch screen. Joystick/SET button When making a menu selection, ...
...(in the menu. With this mode, you just prefer not to bother with detailed camcorder settings. (Manual) mode Set the mode switch to N. With this mode, the camcorder takes care of the Camcorder Changing the Camcorder's Operating Mode In mode, you can further select the camera mode to match your ... again to select the menu item indicated by the orange selection frame. This operating mode is suitable if you can navigate some of the camcorder's menus and screens using the MENU button and joystick instead of using the touch screen. Joystick/SET button When making a menu selection, ...


