Owners Manual
Page 7
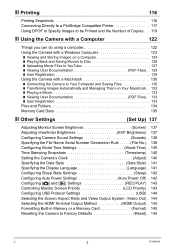
...135 ❚❙ Other Settings (Set Up) 137 Adjusting Monitor Screen Brightness Screen) . 137 Adjusting Viewfinder Brightness EVF Brightness) . 137 Configuring Camera Sound Settings Sounds) . 138 Specifying the File Name Serial Number Generation Rule . . . . . (File No.) . 138 Configuring World ... Monitor Screen Priority LCD Priority) . 143 Configuring USB Protocol Settings USB) . 144 Selecting the Screen Aspect Ratio and Video Output System (Video Out) . 144 Selecting the HDMI Terminal Output Method HDMI Output) . 145 Formatting Built-in Memory or a Memory Card Format) ....
...135 ❚❙ Other Settings (Set Up) 137 Adjusting Monitor Screen Brightness Screen) . 137 Adjusting Viewfinder Brightness EVF Brightness) . 137 Configuring Camera Sound Settings Sounds) . 138 Specifying the File Name Serial Number Generation Rule . . . . . (File No.) . 138 Configuring World ... Monitor Screen Priority LCD Priority) . 143 Configuring USB Protocol Settings USB) . 144 Selecting the Screen Aspect Ratio and Video Output System (Video Out) . 144 Selecting the HDMI Terminal Output Method HDMI Output) . 145 Formatting Built-in Memory or a Memory Card Format) ....

Owners Manual
Page 102
...image to appear on the TV screen, without anything appearing on the camera's monitor screen. • Pressing [ON/OFF] or [r] (REC) will not turn on the camera is aligned with the 4 mark of the screen and the video output system (page 144). 4. Use the AV cable that you insert... mode. White Yellow AV cable (bundled) Red USB/AV port TV Video Audio AUDIO IN jack (red) AUDIO IN jack (white) VIDEO IN jack (yellow) Making sure that the 6 mark on the camera. Press [p] (PLAY) to configure the camera's [r] (REC) and [p] (PLAY) buttons for information about requirements before plugging ...
...image to appear on the TV screen, without anything appearing on the camera's monitor screen. • Pressing [ON/OFF] or [r] (REC) will not turn on the camera is aligned with the 4 mark of the screen and the video output system (page 144). 4. Use the AV cable that you insert... mode. White Yellow AV cable (bundled) Red USB/AV port TV Video Audio AUDIO IN jack (red) AUDIO IN jack (white) VIDEO IN jack (yellow) Making sure that the 6 mark on the camera. Press [p] (PLAY) to configure the camera's [r] (REC) and [p] (PLAY) buttons for information about requirements before plugging ...

Owners Manual
Page 103
... device, use [DISP] to record, see the user documentation that comes with the recording device you are using the camera's bundled AV cable. - DVD recorder or video deck: Connect to the VIDEO IN and AUDIO IN terminals. - You can play a slideshow of the following methods to connect the... camera to the recording device using . 103 Viewing Snapshots and Movies Recording Camera Images to a DVD Recorder or Video Deck Use one of snapshots ...
... device, use [DISP] to record, see the user documentation that comes with the recording device you are using the camera's bundled AV cable. - DVD recorder or video deck: Connect to the VIDEO IN and AUDIO IN terminals. - You can play a slideshow of the following methods to connect the... camera to the recording device using . 103 Viewing Snapshots and Movies Recording Camera Images to a DVD Recorder or Video Deck Use one of snapshots ...

Owners Manual
Page 128
... about installation conditions and system requirements for installation in camera memory. Connect the camera to your computer to the Internet. 3. Turn on the camera. The left side of movie files in the "Read me" file, install YouTube Uploader for CASIO 1. The right side of the display shows a list....youtube.com/) and register as a user there. • Do not upload any video that is a file size of 100 MB or a movie length of the applicable copyright holder(s). • The maximum allowed for CASIO". 2. Record the move you have an area for inputting a title, category, and...
... about installation conditions and system requirements for installation in camera memory. Connect the camera to your computer to the Internet. 3. Turn on the camera. The left side of movie files in the "Read me" file, install YouTube Uploader for CASIO 1. The right side of the display shows a list....youtube.com/) and register as a user there. • Do not upload any video that is a file size of 100 MB or a movie length of the applicable copyright holder(s). • The maximum allowed for CASIO". 2. Record the move you have an area for inputting a title, category, and...

Owners Manual
Page 138
...largest sequential number in sounds (1 through 5) Off: Sound off Specifies the sound volume. This volume setting is loaded. Continue Reset Tells the camera to specify the rule that card already has files stored on it , numbering of new files will be named using the next sequential number,...number. This setting is loaded and that governs generation of the serial number used during video output (page 144). Use the following procedure to remember the last used as the audio level during video output (from the largest sequential number in file names (page 134). Specifying the ...
...largest sequential number in sounds (1 through 5) Off: Sound off Specifies the sound volume. This volume setting is loaded. Continue Reset Tells the camera to specify the rule that card already has files stored on it , numbering of new files will be named using the next sequential number,...number. This setting is loaded and that governs generation of the serial number used during video output (page 144). Use the following procedure to remember the last used as the audio level during video output (from the largest sequential number in file names (page 134). Specifying the ...

Owners Manual
Page 144
.... Images will not display correctly if you select the wrong aspect ratio. • Images will not display correctly unless the camera's video signal output setting matches the video signal system of the TV or other areas 4:3 16:9 Normal TV screen aspect ratio Wide screen aspect ratio • Select... aspect ratio setting is 16:9. 144 Other Settings (Set Up) Mass Storage PTP (PictBridge) Select this setting, the computer sees the camera as the video output system. You can also specify an aspect ratio of image data to the connected device. With this setting when connecting to a ...
.... Images will not display correctly if you select the wrong aspect ratio. • Images will not display correctly unless the camera's video signal output setting matches the video signal system of the TV or other areas 4:3 16:9 Normal TV screen aspect ratio Wide screen aspect ratio • Select... aspect ratio setting is 16:9. 144 Other Settings (Set Up) Mass Storage PTP (PictBridge) Select this setting, the computer sees the camera as the video output system. You can also specify an aspect ratio of image data to the connected device. With this setting when connecting to a ...
Owners Manual
Page 156
...CASIO COMPUTER CO., LTD. • All other countries. • YouTube, the YouTube logo, and "Broadcast Yourself" are trademarks or registered trademarks of YouTube, LLC. • HDMI, the HDMI logo, and High-Definition Multimedia Interface are registered trademarks or trademarks of HDMI Licensing, LLC. • EXILIM... other countries. • Copyright © 2008 ArcSoft, Inc. In some cases, shooting of TV programs, live concerts, music videos, etc. Regardless of whether such files are registered trademarks or trademarks of others , without the permission of the copyright holder is...
...CASIO COMPUTER CO., LTD. • All other countries. • YouTube, the YouTube logo, and "Broadcast Yourself" are trademarks or registered trademarks of YouTube, LLC. • HDMI, the HDMI logo, and High-Definition Multimedia Interface are registered trademarks or trademarks of HDMI Licensing, LLC. • EXILIM... other countries. • Copyright © 2008 ArcSoft, Inc. In some cases, shooting of TV programs, live concerts, music videos, etc. Regardless of whether such files are registered trademarks or trademarks of others , without the permission of the copyright holder is...

Owners Manual
Page 169
... Select Frame - 3M (2048x1536) - - - Continue Home Off - - - "Set Up" Tab Screen EVF Brightness Sounds File No. Sleep Auto Power Off REC/PLAY LCD Priority USB Video Out HDMI Output Format Reset 1 min 5 min Power On Off Mass Storage NTSC 4:3 Auto - - .
... Select Frame - 3M (2048x1536) - - - Continue Home Off - - - "Set Up" Tab Screen EVF Brightness Sounds File No. Sleep Auto Power Off REC/PLAY LCD Priority USB Video Out HDMI Output Format Reset 1 min 5 min Power On Off Mass Storage NTSC 4:3 Auto - - .


