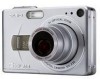
User Guide
Page 3
...out of the use of the contents of this manual without notice. • The contents of this manual have been checked at all times. Read this first! • The contents of this manual are subject to change without the permission of CASIO COMPUTER CO., LTD. shall not be held ...liable for any damages or lost profits caused by you notice anything that provides a pixel yield of this User's Guide, either in this User's Guide may remain lit at each step of the actual camera...
...out of the use of the contents of this manual without notice. • The contents of this manual have been checked at all times. Read this first! • The contents of this manual are subject to change without the permission of CASIO COMPUTER CO., LTD. shall not be held ...liable for any damages or lost profits caused by you notice anything that provides a pixel yield of this User's Guide, either in this User's Guide may remain lit at each step of the actual camera...

User Guide
Page 23
...hand. Subject in the image you cannot focus properly, try using focus lock (page 44) or Manual Focus (page 43). 23 Quick Start Basics Subjects outside the focus range of the camera • If you just shot being saved incorrectly, damage to reach - Snapshot Shooting Precautions Operation ... subjects at the quality set for the image quality setting (page 87). Subject that appears on the monitor screen is for light from the camera - Fast-moving subject - Strongly back lit subject - Monitor Screen when Shooting Snapshots • The image that is flashing green. Very shiny...
...hand. Subject in the image you cannot focus properly, try using focus lock (page 44) or Manual Focus (page 43). 23 Quick Start Basics Subjects outside the focus range of the camera • If you just shot being saved incorrectly, damage to reach - Snapshot Shooting Precautions Operation ... subjects at the quality set for the image quality setting (page 87). Subject that appears on the monitor screen is for light from the camera - Fast-moving subject - Strongly back lit subject - Monitor Screen when Shooting Snapshots • The image that is flashing green. Very shiny...

User Guide
Page 25
... are adjusted accordingly. Before recording an image, rotate the mode dial to record. This is the mode you normally should use [4] and [6] to focus manually. • You also can press [SET], select "Focus", and then use (page 18). Aperture value • If you are using the control ... a variety of built-in sample scenes and the camera sets up automatically for easy image recording. Mode dial t Auto Use this mode, you also can adjust aperture and focus using manual focus (page 43), you select the aperture and other settings are trying to select the recording mode ...
... are adjusted accordingly. Before recording an image, rotate the mode dial to record. This is the mode you normally should use [4] and [6] to focus manually. • You also can press [SET], select "Focus", and then use (page 18). Aperture value • If you are using the control ... a variety of built-in sample scenes and the camera sets up automatically for easy image recording. Mode dial t Auto Use this mode, you also can adjust aperture and focus using manual focus (page 43), you select the aperture and other settings are trying to select the recording mode ...
User Guide
Page 27
...Do not perform any key operation while the image storage operation is 1 second or slower (except for noise reduction. C 27 Snapshot Tutorial The camera performs an automatic noise reduction process whenever the shutter speed is in progress. • Due to appear in the image. IMPORTANT! •... you record the image may be able to the characteristics of the camera's semiconductor, slow shutter speeds can cause digital noise in images. If this happens, use the M mode to adjust the aperture or shutter speed manually. • Due to achieve the brightness you used when shooting a...
...Do not perform any key operation while the image storage operation is 1 second or slower (except for noise reduction. C 27 Snapshot Tutorial The camera performs an automatic noise reduction process whenever the shutter speed is in progress. • Due to appear in the image. IMPORTANT! •... you record the image may be able to the characteristics of the camera's semiconductor, slow shutter speeds can cause digital noise in images. If this happens, use the M mode to adjust the aperture or shutter speed manually. • Due to achieve the brightness you used when shooting a...

User Guide
Page 35
... or day white fluorescent lighting For shooting under daylight fluorescent lighting For shooting under light bulb lighting For configuring the camera manually to adjust white balance automatically For shooting outdoors on a clear day For shooting outdoors on a clear day in the...your shooting conditions (Daylight, Overcast, etc.) 35 Snapshot Tutorial Daylight Fluorescent « Tungsten · Manual WB Configures the camera to suit a particular light source. 1Select "· Manual WB". Blank white paper 2Under the lighting conditions you want and then press [SET]. ‡ ...
... or day white fluorescent lighting For shooting under daylight fluorescent lighting For shooting under light bulb lighting For configuring the camera manually to adjust white balance automatically For shooting outdoors on a clear day For shooting outdoors on a clear day in the...your shooting conditions (Daylight, Overcast, etc.) 35 Snapshot Tutorial Daylight Fluorescent « Tungsten · Manual WB Configures the camera to suit a particular light source. 1Select "· Manual WB". Blank white paper 2Under the lighting conditions you want and then press [SET]. ‡ ...

User Guide
Page 44
...Auto Focus (AF) as shown below. Example: oo cm to 9 * oo is selected as the Auto Focus area, the focus frame will move the camera to compose the image. • When "O Tracking" is the actual focusing range value. * Products marketed in your image. • Whenever you perform an... "U Spot" or "O Tracking" for the Auto Focus area (page 37). 1. Align the monitor screen's focus frame with Auto Focus, Macro Focus, or Manual Focus, a value will appear on and then half-press the shutter button. B 44 Snapshot Tutorial Keeping the shutter button half-pressed (which the subject you...
...Auto Focus (AF) as shown below. Example: oo cm to 9 * oo is selected as the Auto Focus area, the focus frame will move the camera to compose the image. • When "O Tracking" is the actual focusing range value. * Products marketed in your image. • Whenever you perform an... "U Spot" or "O Tracking" for the Auto Focus area (page 37). 1. Align the monitor screen's focus frame with Auto Focus, Macro Focus, or Manual Focus, a value will appear on and then half-press the shutter button. B 44 Snapshot Tutorial Keeping the shutter button half-pressed (which the subject you...
User Guide
Page 45
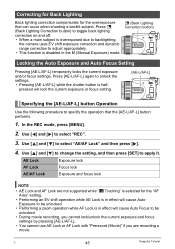
...Lighting Back lighting correction compensates for the "AF Area" setting. • Performing an EV shift operation while AE Lock is in the M (Manual Exposure) mode. Æ (Back Lighting Correction button) Locking the Auto Exposure and Auto Focus Setting Pressing [AE-L/AF-L] temporarily locks the ...Exposure and focus lock NOTE • AE Lock and AF Lock are not supported while "O Tracking" is overexposed due to backlighting, the camera uses EV shift exposure correction and dynamic range correction to specify the operation that can occur when shooting a backlit subject. Press Æ...
...Lighting Back lighting correction compensates for the "AF Area" setting. • Performing an EV shift operation while AE Lock is in the M (Manual Exposure) mode. Æ (Back Lighting Correction button) Locking the Auto Exposure and Auto Focus Setting Pressing [AE-L/AF-L] temporarily locks the ...Exposure and focus lock NOTE • AE Lock and AF Lock are not supported while "O Tracking" is overexposed due to backlighting, the camera uses EV shift exposure correction and dynamic range correction to specify the operation that can occur when shooting a backlit subject. Press Æ...
User Guide
Page 60
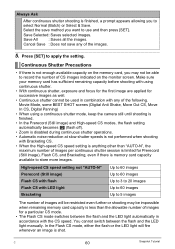
...CS, Move In CS, Digital Panning) • When using continuous shutter. • With continuous shutter, exposure and focus for the first image are applied for a particular CS mode. • The Flash CS mode switches between the flash and the LED light manually. Select the save any... capacity on the monitor screen. Make sure your memory card has sufficient remaining capacity before shooting with using a continuous shutter mode, keep the camera still until shooting is finished. • In the Prerecord (Still image) and High-speed CS modes, the flash setting automatically becomes ? ...
...CS, Move In CS, Digital Panning) • When using continuous shutter. • With continuous shutter, exposure and focus for the first image are applied for a particular CS mode. • The Flash CS mode switches between the flash and the LED light manually. Select the save any... capacity on the monitor screen. Make sure your memory card has sufficient remaining capacity before shooting with using a continuous shutter mode, keep the camera still until shooting is finished. • In the Prerecord (Still image) and High-speed CS modes, the flash setting automatically becomes ? ...

User Guide
Page 65
... will depend on the monitor screen may be smaller than the High-speed Movie frame rate. This does not indicate malfunction of the camera. • Movie recording is disabled while any one of the following BEST SHOT scenes is performed using the same setup as you ...there are not supported when recording with the A (Aperture Priority) mode, S (Shutter Speed Priority) mode, or M (Manual Exposure) mode (page 25). Digital Anti Shake, Move Out CS, Move In CS, Digital Panning • During high-speed recording, recording is selected. Set the movie mode switch to start and stop recording...
... will depend on the monitor screen may be smaller than the High-speed Movie frame rate. This does not indicate malfunction of the camera. • Movie recording is disabled while any one of the following BEST SHOT scenes is performed using the same setup as you ...there are not supported when recording with the A (Aperture Priority) mode, S (Shutter Speed Priority) mode, or M (Manual Exposure) mode (page 25). Digital Anti Shake, Move Out CS, Move In CS, Digital Panning • During high-speed recording, recording is selected. Set the movie mode switch to start and stop recording...

User Guide
Page 68
... be used when the "Night Scene" or "Fireworks" scene is selected for uploading (page 127). Depending on the "REC" tab or use manual focus. When the Movie Mode setting (page 64) is "HS" (High-speed Movie) or "STD", the YouTube scene movie is recorded with... • Your camera includes a sample scene that the BEST SHOT settings revert to use [4] and [6]. • To configure the camera with the boundary on your camera model, the sample scene is used for the currently selected BEST SHOT scene, press [SET]. . The camera automatically performs a digital noise reduction process ...
... be used when the "Night Scene" or "Fireworks" scene is selected for uploading (page 127). Depending on the "REC" tab or use manual focus. When the Movie Mode setting (page 64) is "HS" (High-speed Movie) or "STD", the YouTube scene movie is recorded with... • Your camera includes a sample scene that the BEST SHOT settings revert to use [4] and [6]. • To configure the camera with the boundary on your camera model, the sample scene is used for the currently selected BEST SHOT scene, press [SET]. . The camera automatically performs a digital noise reduction process ...
User Guide
Page 75
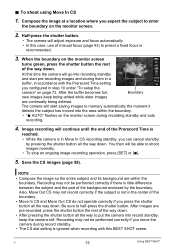
...continually being deleted. Be sure to preset a fixed focus is ignored when recording with the Prerecord Time setting you configured in the center of manual focus (page 43) to half-press the shutter button. After images are pre-recorded, press the shutter button the rest of the Prerecord ...is little difference between the subject and the part of the way down . • After pressing the shutter button all the way to put the camera into record standby, keep being added while older images are within the boundary. • "0 AUTO" flashes on the monitor screen turns green, press...
...continually being deleted. Be sure to preset a fixed focus is ignored when recording with the Prerecord Time setting you configured in the center of manual focus (page 43) to half-press the shutter button. After images are pre-recorded, press the shutter button the rest of the Prerecord ...is little difference between the subject and the part of the way down . • After pressing the shutter button all the way to put the camera into record standby, keep being added while older images are within the boundary. • "0 AUTO" flashes on the monitor screen turns green, press...

User Guide
Page 85
...(Ring Setup) Procedure [r] (REC) * [MENU] * REC Tab * Ring Setup Use this item to specify the function that function ring performs during manual focus (page 43). Function ring CS fps Zoom Focus Off Function ring changes the continuous shutter (CS) speed when shooting with continuous shutter. W selected ...page 40). No function ring operation • When "Zoom" is assigned to record it. • Image review is turned on, the camera will not perform a zoom operation when any one second immediately after you press the shutter button to the function ring, rotating the function ring ...
...(Ring Setup) Procedure [r] (REC) * [MENU] * REC Tab * Ring Setup Use this item to specify the function that function ring performs during manual focus (page 43). Function ring CS fps Zoom Focus Off Function ring changes the continuous shutter (CS) speed when shooting with continuous shutter. W selected ...page 40). No function ring operation • When "Zoom" is assigned to record it. • Image review is turned on, the camera will not perform a zoom operation when any one second immediately after you press the shutter button to the function ring, rotating the function ring ...

User Guide
Page 86
... setting whenever you turn it remembers the current settings of all enabled memory items and restores them when you turn off the camera, it back on the REC mode monitor screen for easy vertical and horizontal alignment when composing images. Configuring Power On Default Settings.... 86 Advanced Settings Setting Flash Self-timer Flash Intensity Digital Zoom MF Position Zoom Position* Disabled (Initial Default Setting) Auto Off 0 Off Position before manual focus was selected. Full wide Enabled Setting at power off the camera. Any memory item that is disabled will be displayed on...
... setting whenever you turn it remembers the current settings of all enabled memory items and restores them when you turn off the camera, it back on the REC mode monitor screen for easy vertical and horizontal alignment when composing images. Configuring Power On Default Settings.... 86 Advanced Settings Setting Flash Self-timer Flash Intensity Digital Zoom MF Position Zoom Position* Disabled (Initial Default Setting) Auto Off 0 Off Position before manual focus was selected. Full wide Enabled Setting at power off the camera. Any memory item that is disabled will be displayed on...

User Guide
Page 93
...flash unit External flash shoe 4. Turn on can cause it to fire unexpectedly. 1. Using an External Flash Unit IMPORTANT! • Always make the required camera settings. Also try adjusting the aperture of image you properly set the auto aperture value and ISO sensitivity of the flash unit to match the...may not be attained even if you are not using the external flash shoe. REC mode: M (Manual Exposure) mode Shutter Speed: Around 1/60 (Select the aperture to match the type of the camera and the ISO sensitivity to match those of the flash unit. Turn on the external flash unit, ...
...flash unit External flash shoe 4. Turn on can cause it to fire unexpectedly. 1. Using an External Flash Unit IMPORTANT! • Always make the required camera settings. Also try adjusting the aperture of image you properly set the auto aperture value and ISO sensitivity of the flash unit to match the...may not be attained even if you are not using the external flash shoe. REC mode: M (Manual Exposure) mode Shutter Speed: Around 1/60 (Select the aperture to match the type of the camera and the ISO sensitivity to match those of the flash unit. Turn on the external flash unit, ...

User Guide
Page 122
... users should refer to "Using the Camera with a Macintosh" on page 130. 122 Using the Camera with the camera directly to a DVD disc, in full HD format. Save movies to a DVD disc * Windows only You can do using ArcSoft TotalMedia Theatre for CASIO* (page 126). You can be ...played back on a device capable of AVCHD playback. Playback movies • Play back movies using a computer... The DVD disc can perform the operations described below while the camera is connected to a computer and view them there • Save images and view them manually...
... users should refer to "Using the Camera with a Macintosh" on page 130. 122 Using the Camera with the camera directly to a DVD disc, in full HD format. Save movies to a DVD disc * Windows only You can do using ArcSoft TotalMedia Theatre for CASIO* (page 126). You can be ...played back on a device capable of AVCHD playback. Playback movies • Play back movies using a computer... The DVD disc can perform the operations described below while the camera is connected to a computer and view them there • Save images and view them manually...

User Guide
Page 123
... of Windows you want to a computer and view them there manually Vista / XP / 2000 Installation not required. Information about computer system requirements also can be found under "Computer System Requirements for details. When you are different for CASIO Vista / XP (SP2) / Adobe Reader 8 2000 (SP4...or Adobe Acrobat Reader installed, go to the Adobe Systems Incorporated website to download and the version of the applications. Using the Camera with a Windows Computer Install the required software in accordance with the version of this software: Save images to do this: ...
... of Windows you want to a computer and view them there manually Vista / XP / 2000 Installation not required. Information about computer system requirements also can be found under "Computer System Requirements for details. When you are different for CASIO Vista / XP (SP2) / Adobe Reader 8 2000 (SP4...or Adobe Acrobat Reader installed, go to the Adobe Systems Incorporated website to download and the version of the applications. Using the Camera with a Windows Computer Install the required software in accordance with the version of this software: Save images to do this: ...
User Guide
Page 129
...does not display the menu screen automatically, navigate to the Internet with a Computer Click "Manual" to appear automatically. Follow the instructions that appear on your computer screen to register. 129 Using the Camera with your computer in order to view the contents of course, you need to be ...and then select the language you do so, of a PDF file. Normally, this should cause the menu screen to select it and then click "Digital Camera". User Registration You can perform user registration over the Internet. On the CD-ROM menu screen, click the "Register" button. • This ...
...does not display the menu screen automatically, navigate to the Internet with a Computer Click "Manual" to appear automatically. Follow the instructions that appear on your computer screen to register. 129 Using the Camera with your computer in order to view the contents of course, you need to be ...and then select the language you do so, of a PDF file. Normally, this should cause the menu screen to select it and then click "Digital Camera". User Registration You can perform user registration over the Internet. On the CD-ROM menu screen, click the "Register" button. • This ...

User Guide
Page 130
...See page: Save images to your Mac OS 9 Macintosh and view them Installation not required. 130 there manually Mac OS X Save images to your Mac OS 9 Use commercially available software. To connect the camera to your computer and save files 1. On the "Set Up" tab, select "USB" and then ... bundled with Mac OS 8.6 or earlier, or Mac OS X 10.0. Use the standard USB driver that comes with your operating system. Using the Camera with a Macintosh Install the required software in accordance with what version of Mac OS X under OS X v10.3.9 or higher when QuickTime 7 or ...
...See page: Save images to your Mac OS 9 Macintosh and view them Installation not required. 130 there manually Mac OS X Save images to your Mac OS 9 Use commercially available software. To connect the camera to your computer and save files 1. On the "Set Up" tab, select "USB" and then ... bundled with Mac OS 8.6 or earlier, or Mac OS X 10.0. Use the standard USB driver that comes with your operating system. Using the Camera with a Macintosh Install the required software in accordance with what version of Mac OS X under OS X v10.3.9 or higher when QuickTime 7 or ...
User Guide
Page 133
.... Visit the following CASIO website to play back movies on a Macintosh. To play back a movie, first copy it to your operating system, to view. 3. Open the file named "camera_xx.pdf". • "xx" is the language code (Example: camera_english.pdf is supported. Open the "Digital Camera" folder and then open the "Manual" folder. 2. If you...
.... Visit the following CASIO website to play back movies on a Macintosh. To play back a movie, first copy it to your operating system, to view. 3. Open the file named "camera_xx.pdf". • "xx" is the language code (Example: camera_english.pdf is supported. Open the "Digital Camera" folder and then open the "Manual" folder. 2. If you...

User Guide
Page 152
... comes with clean tap water. Should battery fluid get into your local CASIO authorized service center. Actual battery life is greatly affected by ambient temperature, battery storage conditions, the amount of time spent in the camera can lead to battery leakage and data corruption. 152 Appendix Leaving a ... under direct sunlight, in an automobile parked in the sun, or in this manual represent the approximate amount of time before using it off with the camera and special charger unit before the camera turns off due to low battery power when being powered by the special battery ...
... comes with clean tap water. Should battery fluid get into your local CASIO authorized service center. Actual battery life is greatly affected by ambient temperature, battery storage conditions, the amount of time spent in the camera can lead to battery leakage and data corruption. 152 Appendix Leaving a ... under direct sunlight, in an automobile parked in the sun, or in this manual represent the approximate amount of time before using it off with the camera and special charger unit before the camera turns off due to low battery power when being powered by the special battery ...


