User Guide
Page 6
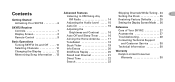
... Timer 16 Aiming the Home Antenna . . . . . 17 TuneSelect 18 Stock Ticker 19 Info Extras 20 30-Minute Replay 20 Recall Last Channel 21 Direct Tune 22 Reference Care of Your SKYFi2 27 Accessories 27 Troubleshooting 28 Contacting Technical Support and Customer Service 30 Technical Information 30 Warranty Delphi Limited Consumer Warranty 30 Search...
... Timer 16 Aiming the Home Antenna . . . . . 17 TuneSelect 18 Stock Ticker 19 Info Extras 20 30-Minute Replay 20 Recall Last Channel 21 Direct Tune 22 Reference Care of Your SKYFi2 27 Accessories 27 Troubleshooting 28 Contacting Technical Support and Customer Service 30 Technical Information 30 Warranty Delphi Limited Consumer Warranty 30 Search...

User Guide
Page 18
.... Press the "menu" button to return to the main menu and then again to return to select "Antenna Aiming." Use the scroll wheel (or remote) to confirm selection. Press the "XM" button to 3. Press the "menu" button to return The "Satellite" and "Terrestrial" to confirm 1...." or "Terrestrial." 4. To set Auto-Off: Aiming the Home Antenna 1. Press the 17 Advanced Features select the time period. method: Press the "XM" button to the main menu and then again signal bars will change. "XM" button to normal operation. For the best reception possible, aim 2....
.... Press the "menu" button to return to the main menu and then again to return to select "Antenna Aiming." Use the scroll wheel (or remote) to confirm selection. Press the "XM" button to 3. Press the "menu" button to return The "Satellite" and "Terrestrial" to confirm 1...." or "Terrestrial." 4. To set Auto-Off: Aiming the Home Antenna 1. Press the 17 Advanced Features select the time period. method: Press the "XM" button to the main menu and then again signal bars will change. "XM" button to normal operation. For the best reception possible, aim 2....

User Guide
Page 27
...without scrolling. 1. Use the scroll wheel (or remote) vehicle, or other property. Press the "XM" button to 4. Setting the Display 3. Improperly installing the antenna cable could cause leaks that can damage your vehicle or other property. or to improve visibility in personal injury..., death, and/or damage to your SKYFi2. or scrolling versus ...
...without scrolling. 1. Use the scroll wheel (or remote) vehicle, or other property. Press the "XM" button to 4. Setting the Display 3. Improperly installing the antenna cable could cause leaks that can damage your vehicle or other property. or to improve visibility in personal injury..., death, and/or damage to your SKYFi2. or scrolling versus ...

User Guide
Page 28
... SKYFi2 in your SKYFi2. • It is suitable for your SKYFi2, any XM Home Antenna (SA10006) peripherals, and any solvents, chemicals, Use the Vehicle Kit to spill on your vehicle; Antenna Extension Cable for the outside of your vehicle of extreme heat. Includes a high-gain home antenna,...use SKYFi2 on a boat. Reference • Use only a soft, dry cloth to keep SKYFi2 out of Home Adaptor Kit by Delphi (SA10046) Allows you whether direct sunlight or other sources audio cable. Vehicle Adaptor Kit by Delphi (SA10102) Extends the antenna cable by Delphi (SA10112...
... SKYFi2 in your SKYFi2. • It is suitable for your SKYFi2, any XM Home Antenna (SA10006) peripherals, and any solvents, chemicals, Use the Vehicle Kit to spill on your vehicle; Antenna Extension Cable for the outside of your vehicle of extreme heat. Includes a high-gain home antenna,...use SKYFi2 on a boat. Reference • Use only a soft, dry cloth to keep SKYFi2 out of Home Adaptor Kit by Delphi (SA10046) Allows you whether direct sunlight or other sources audio cable. Vehicle Adaptor Kit by Delphi (SA10102) Extends the antenna cable by Delphi (SA10112...

User Guide
Page 29
... OFF AIR Cause: the channel selected is positioned near a south-facing window. Make sure the vehicle antenna is mounted outside the vehicle or the home antenna is not currently broadcasting. Turn SKYFi2 off, then on, to reset this on , adaptor does not have a removable you have ...installed SKYFi2 in a with trouble-free performance check the 12V adaptor fuse by end-cap, it does not power on the display: NO SIGNAL Cause: the XM...
... OFF AIR Cause: the channel selected is positioned near a south-facing window. Make sure the vehicle antenna is mounted outside the vehicle or the home antenna is not currently broadcasting. Turn SKYFi2 off, then on, to reset this on , adaptor does not have a removable you have ...installed SKYFi2 in a with trouble-free performance check the 12V adaptor fuse by end-cap, it does not power on the display: NO SIGNAL Cause: the XM...

User Guide
Page 31
.... Antenna: 1 RF SMB connector Power: 6V, 1000 mA maximum current, P13 connector, positive polarity Audio output: 3.5 mm diameter mini-stereo jack Delphi Limited Consumer Warranty Delphi Product and Service Solutions ("Delphi") warrants all Portable XM Satellite Radio Accessory Products sold by Delphi (...duration of the Product. H x .87 in . (1.877.463.3574). Eastern Time • Technical Support: Monday-Friday, SKYFi2 Receiver: 5.20 oz. (147 g) SKYFi2 Remote Control: 1.60 oz. (45 g) 8:00 a.m.-8:00 p.m. All implied warranties, including warranties of merchantability and fitness for...
.... Antenna: 1 RF SMB connector Power: 6V, 1000 mA maximum current, P13 connector, positive polarity Audio output: 3.5 mm diameter mini-stereo jack Delphi Limited Consumer Warranty Delphi Product and Service Solutions ("Delphi") warrants all Portable XM Satellite Radio Accessory Products sold by Delphi (...duration of the Product. H x .87 in . (1.877.463.3574). Eastern Time • Technical Support: Monday-Friday, SKYFi2 Receiver: 5.20 oz. (147 g) SKYFi2 Remote Control: 1.60 oz. (45 g) 8:00 a.m.-8:00 p.m. All implied warranties, including warranties of merchantability and fitness for...

Installation Guide
Page 1
SKYFi2™ InsGtaullaidtieon Home and Vehicle Kits Contents: SKYFi2 Vehicle Adaptor Kit Setup 2 SKYFi2 Installation 6 XM Antenna Setup 11 SKYFi2 Home Adaptor Kit Setup 15 Warranty 18 Warning: This manual and the SKYFi2 Satellite Radio Receiver User Guide contain important safety and operating information. Failure to do so could result in these manuals. Please read and follow the instructions in personal injury, death, and/or damage to your SKYFi2 Receiver, accessories, and/or to your vehicle or other property.
SKYFi2™ InsGtaullaidtieon Home and Vehicle Kits Contents: SKYFi2 Vehicle Adaptor Kit Setup 2 SKYFi2 Installation 6 XM Antenna Setup 11 SKYFi2 Home Adaptor Kit Setup 15 Warranty 18 Warning: This manual and the SKYFi2 Satellite Radio Receiver User Guide contain important safety and operating information. Failure to do so could result in these manuals. Please read and follow the instructions in personal injury, death, and/or damage to your SKYFi2 Receiver, accessories, and/or to your vehicle or other property.

Installation Guide
Page 2
... cause harmful interference, and 2. Changes or modifications to the unit not expressly approved by Delphi can void your authority to the fol- SKYFi2 Vehicle Adaptor Kit components. 12V power adaptor XM Vehicle Antenna Your kit also includes: • Extra adhesive pad • Surface preparation cleaning kit • Alcohol prep pad • Cable wrap • Adhesive-backed Velcro® pads...
... cause harmful interference, and 2. Changes or modifications to the unit not expressly approved by Delphi can void your authority to the fol- SKYFi2 Vehicle Adaptor Kit components. 12V power adaptor XM Vehicle Antenna Your kit also includes: • Extra adhesive pad • Surface preparation cleaning kit • Alcohol prep pad • Cable wrap • Adhesive-backed Velcro® pads...

Installation Guide
Page 5
...XM over the wired or wireless FM antenna lead. (Some vehicles may programming on cassette slot is available in wireless FM this configuration is unplugged from the SKYFi2 Cradle. This FM modulator is turned on any nearby FM modulator configurations if a require special antenna lead adaptors.) radio. Cassette Adaptor For vehicles... with a built-in cassette Direct Connect The Delphi FM Direct ...
...XM over the wired or wireless FM antenna lead. (Some vehicles may programming on cassette slot is available in wireless FM this configuration is unplugged from the SKYFi2 Cradle. This FM modulator is turned on any nearby FM modulator configurations if a require special antenna lead adaptors.) radio. Cassette Adaptor For vehicles... with a built-in cassette Direct Connect The Delphi FM Direct ...

Installation Guide
Page 6
... by completing a test. Verify the system is most appropriate for your vehicle. Before installing the system, connect the XM Antenna, 12V power adaptor, and audio connector or cassette adaptor (if used) to the SKYFi2 Vehicle Adaptor cradle with any safety devices such as a general guideline only. If...vehicle's radio and SKYFi2 Receiver. Failure to XM Using Any FM Radio." Warning: Do not install the mount where it or SKYFi2 could result in injury to the same frequency. If you live. 2. Note: If using the wireless FM modulator or the Delphi FM Direct Adaptor, set the SKYFi2...
... by completing a test. Verify the system is most appropriate for your vehicle. Before installing the system, connect the XM Antenna, 12V power adaptor, and audio connector or cassette adaptor (if used) to the SKYFi2 Vehicle Adaptor cradle with any safety devices such as a general guideline only. If...vehicle's radio and SKYFi2 Receiver. Failure to XM Using Any FM Radio." Warning: Do not install the mount where it or SKYFi2 could result in injury to the same frequency. If you live. 2. Note: If using the wireless FM modulator or the Delphi FM Direct Adaptor, set the SKYFi2...

Installation Guide
Page 11
...: Do not install antenna inside the 11 vehicle passenger compartment. Mounting the antenna on the metal surface of the vehicle roof in the center of vehicles. Warning: Failure to properly install the antenna may result in injury to the small size of this antenna, there are many types of an area with nonmetallic rooftops. XM Antenna Setup For best...
...: Do not install antenna inside the 11 vehicle passenger compartment. Mounting the antenna on the metal surface of the vehicle roof in the center of vehicles. Warning: Failure to properly install the antenna may result in injury to the small size of this antenna, there are many types of an area with nonmetallic rooftops. XM Antenna Setup For best...

Installation Guide
Page 13
ing, use a rubber grommet to prevent damage. • For antennas mounted at the front or middle of routing the antenna cable. • Avoid kinking, crimping, twisting, or chafing the cable. If the cable comes into the vehi- Figure 6. Routing the Cable Front or ...illustrates a typical method of the roof, route the cable along the door jamb and into contact with a rough metal open- cle. (See figure 6.) In some vehicles, you may route the cable through windshield as shown. Route XM Antenna through the same grommet that carries power window and power lock wires.
ing, use a rubber grommet to prevent damage. • For antennas mounted at the front or middle of routing the antenna cable. • Avoid kinking, crimping, twisting, or chafing the cable. If the cable comes into the vehi- Figure 6. Routing the Cable Front or ...illustrates a typical method of the roof, route the cable along the door jamb and into contact with a rough metal open- cle. (See figure 6.) In some vehicles, you may route the cable through windshield as shown. Route XM Antenna through the same grommet that carries power window and power lock wires.

Installation Guide
Page 14
Always use the weather seal at the rear of the trunk to force it through the grommet, do not try to reduce water leaks. • Use pre-existing wiring channels when possible. instead, route the cable under the weather seal near the bottom of the door. • For antennas mounted at the lowest part of the roof, route the cable into the trunk as shown. Rear Mounting Option Figure 7. 14 If the antenna cable does not fit easi- ly through ; Route XM Antenna wiring as shown in figure 7.
Always use the weather seal at the rear of the trunk to force it through the grommet, do not try to reduce water leaks. • Use pre-existing wiring channels when possible. instead, route the cable under the weather seal near the bottom of the door. • For antennas mounted at the lowest part of the roof, route the cable into the trunk as shown. Rear Mounting Option Figure 7. 14 If the antenna cable does not fit easi- ly through ; Route XM Antenna wiring as shown in figure 7.

Installation Guide
Page 15
... only the appropriate input devices to use only the AC power adaptor that came with 25 ft. Figure 8. SKYFi2 Home Adaptor Kit (SA10103) Setup Your Delphi XM SKYFi2 Home Kit contains the following components: SKYFi2 Home Stand XM High-gain Indoor/Outdoor Home Antenna with your SKYFi2 Home Adaptor Kit. cable 6V AC power adaptor Audio cable Hooking up Your 15...
... only the appropriate input devices to use only the AC power adaptor that came with 25 ft. Figure 8. SKYFi2 Home Adaptor Kit (SA10103) Setup Your Delphi XM SKYFi2 Home Kit contains the following components: SKYFi2 Home Stand XM High-gain Indoor/Outdoor Home Antenna with your SKYFi2 Home Adaptor Kit. cable 6V AC power adaptor Audio cable Hooking up Your 15...

Installation Guide
Page 16
... with the SKYFi2 Home Adaptor Kit and provides an additional 50 feet of cable length to hear the XM Preview channel. You should point through a window. 4. Note: The Delphi SA10006 Antenna Extension Cable (sold separately) is facing south. Connect cables as shown. Tune to power, antenna, and home stereo as illustrated in figure 9. 3. Position the XM Antenna so...
... with the SKYFi2 Home Adaptor Kit and provides an additional 50 feet of cable length to hear the XM Preview channel. You should point through a window. 4. Note: The Delphi SA10006 Antenna Extension Cable (sold separately) is facing south. Connect cables as shown. Tune to power, antenna, and home stereo as illustrated in figure 9. 3. Position the XM Antenna so...

Installation Guide
Page 17
... the proper position to receive the best possible signal, press the "menu" button to return to aim the antenna. The "satellite" and "terrestrial" signal bars will remain on the SKYFi2 Receiver. 2. Aiming the XM Home Antenna change. again, so you have plenty of time to normal operation. 3. the strongest signal strength (at least two...
... the proper position to receive the best possible signal, press the "menu" button to return to aim the antenna. The "satellite" and "terrestrial" signal bars will remain on the SKYFi2 Receiver. 2. Aiming the XM Home Antenna change. again, so you have plenty of time to normal operation. 3. the strongest signal strength (at least two...

