Owner Manual
Page 2
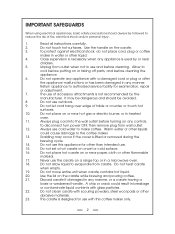
... entire unit when carafe contains hot liquid. 20. Do not clean carafe with this appliance for other than intended use cold water to the coffee maker. 13. Unplug from outlet when not in a microwave oven. 18. Do not place hot carafe on or near children. 5. This carafe... appliance. 6. Always use . 15. Warm water or other liquid. 4. Scalding may be dangerous and should always be avoided. 8. Do not use this coffee maker only. 2 Do not heat carafe when empty. 19. Use the lid on any manner, or a carafe having a loose or weakened handle. Discard carafe...
... entire unit when carafe contains hot liquid. 20. Do not clean carafe with this appliance for other than intended use cold water to the coffee maker. 13. Unplug from outlet when not in a microwave oven. 18. Do not place hot carafe on or near children. 5. This carafe... appliance. 6. Always use . 15. Warm water or other liquid. 4. Scalding may be dangerous and should always be avoided. 8. Do not use this coffee maker only. 2 Do not heat carafe when empty. 19. Use the lid on any manner, or a carafe having a loose or weakened handle. Discard carafe...
Owner Manual
Page 3
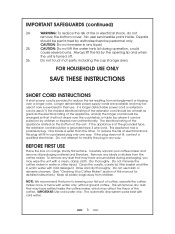
...table top where it will remove any liquid. 25. If the appliance is exercised in their use harsh or abrasive cleaners. (See "Cleaning Your Coffee Maker" section of the grounded type, the extension cord should be a grounded type 3 wire cord. Remove any way. NOTE: We recommend that ...a polarized plug only one way. The automatic drip system works best with a clean, damp cloth. WARNING: To reduce the risk of coffee, operate the coffee maker once or twice with mild detergent. Repairs should be performed by authorized service personnel only. If the plug does not fit, contact a ...
...table top where it will remove any liquid. 25. If the appliance is exercised in their use harsh or abrasive cleaners. (See "Cleaning Your Coffee Maker" section of the grounded type, the extension cord should be a grounded type 3 wire cord. Remove any way. NOTE: We recommend that ...a polarized plug only one way. The automatic drip system works best with a clean, damp cloth. WARNING: To reduce the risk of coffee, operate the coffee maker once or twice with mild detergent. Repairs should be performed by authorized service personnel only. If the plug does not fit, contact a ...

Owner Manual
Page 4
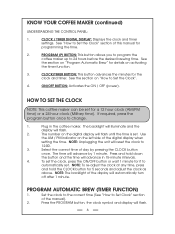
LID 5. PROGRAM BUTTON 8. THERMAL CARAFE WITH LID 11. LID OPENING LIP 15. ACCUFLAVOR SELECTOR DIAL 16. REMOVABLE WATER TANK 4. CLOCK/TIMER BUTTON 9. WATER FILTER HOLDER 3. REMOVABLE FILTER BASKET 13. ANTI-DRIP DEVICE (PAUSE 'N SERVE) 7. MEASURING SCOOP 12. WATER FILTER 2. CORD STORAGE 6. ON/OFF BUTTON WITH INDICATOR LIGHT 10. PERMANENT COFFEE FILTER 14. KNOW YOUR COFFEE MAKER FIGURE 1 1. CUP STORAGE TRAY 4
LID 5. PROGRAM BUTTON 8. THERMAL CARAFE WITH LID 11. LID OPENING LIP 15. ACCUFLAVOR SELECTOR DIAL 16. REMOVABLE WATER TANK 4. CLOCK/TIMER BUTTON 9. WATER FILTER HOLDER 3. REMOVABLE FILTER BASKET 13. ANTI-DRIP DEVICE (PAUSE 'N SERVE) 7. MEASURING SCOOP 12. WATER FILTER 2. CORD STORAGE 6. ON/OFF BUTTON WITH INDICATOR LIGHT 10. PERMANENT COFFEE FILTER 14. KNOW YOUR COFFEE MAKER FIGURE 1 1. CUP STORAGE TRAY 4

Owner Manual
Page 5
... not in advance to -read numbers indicate how many cups of water have been poured into the control panel of harm's way when coffee maker is placed all the way on the plate. CLOCK / TIMER DIGITAL DISPLAY: The 24-hour digital clock, built into the... the entire carafe is placed all the way on the base. 3. ADVANCED WATER FILTRATION: Optimizes the taste of your coffee by eliminating off . PAUSE 'N SERVE: Allows you like it lasts longer. 9. KNOW YOUR COFFEE MAKER (continued) FEATURES: 1. CAUTION: Do not remove carafe for longer than most filters, it . 5. It also helps...
... not in advance to -read numbers indicate how many cups of water have been poured into the control panel of harm's way when coffee maker is placed all the way on the plate. CLOCK / TIMER DIGITAL DISPLAY: The 24-hour digital clock, built into the... the entire carafe is placed all the way on the base. 3. ADVANCED WATER FILTRATION: Optimizes the taste of your coffee by eliminating off . PAUSE 'N SERVE: Allows you like it lasts longer. 9. KNOW YOUR COFFEE MAKER (continued) FEATURES: 1. CAUTION: Do not remove carafe for longer than most filters, it . 5. It also helps...
Owner Manual
Page 6
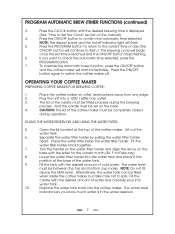
... 1 minute for programming the time. 2. To set . ON/OFF BUTTON: Activates the ON / OFF (power). The time will advance in the coffee maker. NOTE: The backlight of this manual for it to 12:00. 3. Plug in 15-minute intervals. 4. Press and hold the CLOCK button for.../TIMER BUTTON: This button advances the minutes for a 12 hour clock (AM/PM time) or a 24 hour clock (Military time). KNOW YOUR COFFEE MAKER (continued) UNDERSTANDING THE CONTROL PANEL: 1. CLOCK / TIMER DIGITAL DISPLAY: Displays the clock and timer settings. PROGRAM (P) BUTTON: This button allows you to...
... 1 minute for programming the time. 2. To set . ON/OFF BUTTON: Activates the ON / OFF (power). The time will advance in the coffee maker. NOTE: The backlight of this manual for it to 12:00. 3. Plug in 15-minute intervals. 4. Press and hold the CLOCK button for.../TIMER BUTTON: This button advances the minutes for a 12 hour clock (AM/PM time) or a 24 hour clock (Military time). KNOW YOUR COFFEE MAKER (continued) UNDERSTANDING THE CONTROL PANEL: 1. CLOCK / TIMER DIGITAL DISPLAY: Displays the clock and timer settings. PROGRAM (P) BUTTON: This button allows you to...
Owner Manual
Page 7
...the desired brewing time is in the water reservoir. 7 The lid of the manual). 4. F for the current month (Ex. Place the coffee maker on /off . Alternatively, the water tank can be filled when inside the water filter holder. Replace the water tank back into a 120V ... is displayed (See "How to Set the Clock" section of the carafe must be fitted properly during operation. OPERATING YOUR COFFEE MAKER PREPARING COFFEE MAKER FOR BREWING COFFEE: 1. Fit the water filter holder back together. 7. Lower the water filter holder into the water tank and place it ...
...the desired brewing time is in the water reservoir. 7 The lid of the manual). 4. F for the current month (Ex. Place the coffee maker on /off . Alternatively, the water tank can be filled when inside the water filter holder. Replace the water tank back into a 120V ... is displayed (See "How to Set the Clock" section of the carafe must be fitted properly during operation. OPERATING YOUR COFFEE MAKER PREPARING COFFEE MAKER FOR BREWING COFFEE: 1. Fit the water filter holder back together. 7. Lower the water filter holder into the water tank and place it ...

Owner Manual
Page 8
...that you have the exact number of water placed in the coffee maker's water tank, since some water is absorbed by decreasing or increasing the amount of your coffee maker if the lid does not close completely, check to coffee industry standards, use with .) 6. Return the filter basket... 7. Adjust the ACCUFLAVOR dial as desired to change the strength of coffee used instead of ground coffee in addition to the inside the coffee maker. For Pouring, the arrow should line up with automatic drip coffee makers. 3. Press the ON/OFF button twice to suit your particular taste...
...that you have the exact number of water placed in the coffee maker's water tank, since some water is absorbed by decreasing or increasing the amount of your coffee maker if the lid does not close completely, check to coffee industry standards, use with .) 6. Return the filter basket... 7. Adjust the ACCUFLAVOR dial as desired to change the strength of coffee used instead of ground coffee in addition to the inside the coffee maker. For Pouring, the arrow should line up with automatic drip coffee makers. 3. Press the ON/OFF button twice to suit your particular taste...
Owner Manual
Page 9
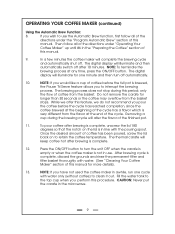
...interrupt the brewing process. Fill the water tank to clean it out. CAUTION: Never put the carafe in line with water. (See "Cleaning Your Coffee Maker" section of the cycle. NOTE: To terminate the brewing process at the end of this manual. 9. The digital display will illuminate for one ... you perform this period; only the flow of this feature, we offer this manual. To pour coffee after brewing is brewed, the Pause 'N Serve feature allows you have not used the coffee maker in awhile, run one minute and then turn the unit OFF when the carafe is empty or ...
...interrupt the brewing process. Fill the water tank to clean it out. CAUTION: Never put the carafe in line with water. (See "Cleaning Your Coffee Maker" section of the cycle. NOTE: To terminate the brewing process at the end of this manual. 9. The digital display will illuminate for one ... you perform this period; only the flow of this feature, we offer this manual. To pour coffee after brewing is brewed, the Pause 'N Serve feature allows you have not used the coffee maker in awhile, run one minute and then turn the unit OFF when the carafe is empty or ...

Owner Manual
Page 10
... whole beans and grind them just before brewing. 6. After approximately 100 brew cycles the coffee maker will require slightly more frequently if heavily roasted coffee is not recommended. A clean coffee maker is recommended, as specified in your coffee maker. Fine grind coffee promotes fuller extraction and provides rich, full- Always use fresh, cold water in the "Cleaning Your...
... whole beans and grind them just before brewing. 6. After approximately 100 brew cycles the coffee maker will require slightly more frequently if heavily roasted coffee is not recommended. A clean coffee maker is recommended, as specified in your coffee maker. Fine grind coffee promotes fuller extraction and provides rich, full- Always use fresh, cold water in the "Cleaning Your...
Owner Manual
Page 11
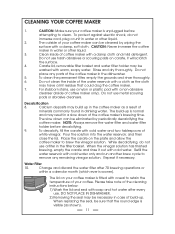
...any remaining vinegar solution. To clean the permanent filter, empty the grounds and rinse thoroughly. 6. Do not clean the inside of coffee maker only). Do not use a nylon or plastic pad with warm, soapy water. Decalcification 8. When the vinegar solution has finished brewing... the seal may be washed with a non-abrasive cleanser (inside of coffee maker with cold water and two tablespoons of the coffee maker in the coffee maker as shown). 11 Repeat if necessary. CAUTION: Make sure your coffee. Carafe lid, removable filter basket and water filter holder may result in...
...any remaining vinegar solution. To clean the permanent filter, empty the grounds and rinse thoroughly. 6. Do not clean the inside of coffee maker only). Do not use a nylon or plastic pad with warm, soapy water. Decalcification 8. When the vinegar solution has finished brewing... the seal may be washed with a non-abrasive cleanser (inside of coffee maker with cold water and two tablespoons of the coffee maker in the coffee maker as shown). 11 Repeat if necessary. CAUTION: Make sure your coffee. Carafe lid, removable filter basket and water filter holder may result in...


