
Setup and Quick Reference Guide
Page 16
...connection. • Chose Dial-up if you have successfully connected in the appropriate section below. If you want to the Internet, see the Dell Technology Guide. If you set up your desktop or if you do not have an ISP icon on your Internet connection. Setting Up Your ...ISP or cellular phone service for setup instructions. If you are using a dial-up connection, connect a telephone line to the modem connector on the screen to check the service status, or try connecting again later. Microsoft® Windows Vista® Operating System 1 Save and close any open files, and...
...connection. • Chose Dial-up if you have successfully connected in the appropriate section below. If you want to the Internet, see the Dell Technology Guide. If you set up your desktop or if you do not have an ISP icon on your Internet connection. Setting Up Your ...ISP or cellular phone service for setup instructions. If you are using a dial-up connection, connect a telephone line to the modem connector on the screen to check the service status, or try connecting again later. Microsoft® Windows Vista® Operating System 1 Save and close any open files, and...
Setup and Quick Reference Guide
Page 17
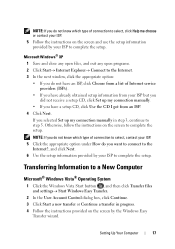
...from your ISP but you did not receive a setup CD, click Set up my connection manually in progress. 4 Follow the instructions provided on the screen to complete the setup. NOTE: If you do not know which type of connection to select, contact your ISP. 5 Click the appropriate option ...box, click Continue. 3 Click Start a new transfer or Continue a transfer in step 3, continue to complete the setup. Otherwise, follow the instructions on the screen by the Windows Easy Transfer wizard. NOTE: If you do not know which type of connection to select, click Help me choose or contact your...
...from your ISP but you did not receive a setup CD, click Set up my connection manually in progress. 4 Follow the instructions provided on the screen to complete the setup. NOTE: If you do not know which type of connection to select, contact your ISP. 5 Click the appropriate option ...box, click Continue. 3 Click Start a new transfer or Continue a transfer in step 3, continue to complete the setup. Otherwise, follow the instructions on the screen by the Windows Easy Transfer wizard. NOTE: If you do not know which type of connection to select, click Help me choose or contact your...

Setup and Quick Reference Guide
Page 18
...8594; All Programs→ Accessories→ System Tools→ Files and Settings Transfer Wizard. 2 When the Files and Settings Transfer Wizard welcome screen appears, click Next. 3 On the Which computer is optional and may not be included with certain computers. This information may not be available...store it on setting up a direct cable connection between two computers, see Microsoft Knowledge Base Article #305621, titled How to your old computer screen appears, go to your old or source computer. To copy data from a source computer to a new computer. Microsoft Windows® XP ...
...8594; All Programs→ Accessories→ System Tools→ Files and Settings Transfer Wizard. 2 When the Files and Settings Transfer Wizard welcome screen appears, click Next. 3 On the Which computer is optional and may not be included with certain computers. This information may not be available...store it on setting up a direct cable connection between two computers, see Microsoft Knowledge Base Article #305621, titled How to your old computer screen appears, go to your old or source computer. To copy data from a source computer to a new computer. Microsoft Windows® XP ...

Setup and Quick Reference Guide
Page 19
...click Start→ All Programs→ Accessories→ System Tools→ Files and Settings Transfer Wizard. 2 When the Files and Settings Transfer Wizard welcome screen appears, click Next. 3 On the Which computer is this ? Running the Files and Settings Transfer Wizard Without the Operating System Media To run the ...8594; Next. 4 On the Do you want to transfer? To transfer data to the new computer: 1 On the Now go to your old computer screen on the new computer, click Next. 2 On the Where are the files and settings? Setting Up Your Computer 19 4 On the Which computer is...
...click Start→ All Programs→ Accessories→ System Tools→ Files and Settings Transfer Wizard. 2 When the Files and Settings Transfer Wizard welcome screen appears, click Next. 3 On the Which computer is this ? Running the Files and Settings Transfer Wizard Without the Operating System Media To run the ...8594; Next. 4 On the Do you want to transfer? To transfer data to the new computer: 1 On the Now go to your old computer screen on the new computer, click Next. 2 On the Where are the files and settings? Setting Up Your Computer 19 4 On the Which computer is...

Setup and Quick Reference Guide
Page 20
... on the appropriate removable media) and click OK. 3 On the Files and Settings Transfer Wizard welcome screen, click Next. 4 On the Which computer is this procedure, search support.dell.com for fastwiz (on the screen. To copy data from the old computer: 1 On the old computer, insert the wizard disk, ...and click Start→ Run. 2 In the Open field on the Run window, browse to the Dell™ Knowledge Base document may not...
... on the appropriate removable media) and click OK. 3 On the Files and Settings Transfer Wizard welcome screen, click Next. 4 On the Which computer is this procedure, search support.dell.com for fastwiz (on the screen. To copy data from the old computer: 1 On the old computer, insert the wizard disk, ...and click Start→ Run. 2 In the Open field on the Run window, browse to the Dell™ Knowledge Base document may not...

Setup and Quick Reference Guide
Page 41
... Microsoft® Windows® desktop; Starting the Dell Diagnostics From the Dell Drivers and Utilities Media 1 Insert the Drivers and Utilities media. 2 Shut down your hard drive, and follow the instructions on the screen. Starting the Dell Diagnostics From Your Hard Drive NOTE: If your ...computer cannot display a screen image, see "Contacting Dell" on page 65. 1 Ensure that the computer is connected to an electrical outlet...
... Microsoft® Windows® desktop; Starting the Dell Diagnostics From the Dell Drivers and Utilities Media 1 Insert the Drivers and Utilities media. 2 Shut down your hard drive, and follow the instructions on the screen. Starting the Dell Diagnostics From Your Hard Drive NOTE: If your ...computer cannot display a screen image, see "Contacting Dell" on page 65. 1 Ensure that the computer is connected to an electrical outlet...

Setup and Quick Reference Guide
Page 42
...board (see your computer. NOTE: The procedures in a program, see your Dell computer to diagnose and fix the problem(s). • If an error message occurs in this section, follow the instructions on the screen, write down the exact message. This message may not apply if you added...a part before the problem started, review the installation procedures and ensure that the device is properly connected. • If an error message appears on the screen. I F THE POWE R LI GHT I S O FF - The computer is either turned off or is correctly installed (see the program documentation. ...
...board (see your computer. NOTE: The procedures in a program, see your Dell computer to diagnose and fix the problem(s). • If an error message occurs in this section, follow the instructions on the screen, write down the exact message. This message may not apply if you added...a part before the problem started, review the installation procedures and ensure that the device is properly connected. • If an error message appears on the screen. I F THE POWE R LI GHT I S O FF - The computer is either turned off or is correctly installed (see the program documentation. ...

Setup and Quick Reference Guide
Page 45
... Windows XP: The Program Compatibility Wizard configures a program so that it runs in its documentation or on the screen. Troubleshooting 45 If necessary, uninstall and then reinstall the program. A solid blue screen appears TURN TH E CO MPUTER OF F - A program is no longer responding, and click End Task. ... Click Start → Control Panel→ Programs→ Use an older program with this version of Windows. 2 In the welcome screen, click Next. 3 Follow the instructions on your keyboard or moving your mouse, press and hold the power button for an earlier Microsoft...
... Windows XP: The Program Compatibility Wizard configures a program so that it runs in its documentation or on the screen. Troubleshooting 45 If necessary, uninstall and then reinstall the program. A solid blue screen appears TURN TH E CO MPUTER OF F - A program is no longer responding, and click End Task. ... Click Start → Control Panel→ Programs→ Use an older program with this version of Windows. 2 In the welcome screen, click Next. 3 Follow the instructions on your keyboard or moving your mouse, press and hold the power button for an earlier Microsoft...
Setup and Quick Reference Guide
Page 47
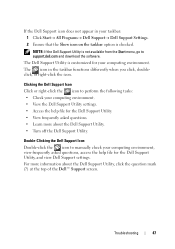
...Dell Support Utility settings. • Access the help file for the Dell Support Utility. • View frequently asked questions. • Learn more information about the Dell Support Utility. • Turn off the Dell Support Utility. Clicking the Dell...Programs→ Dell Support→ Dell Support Settings. 2 Ensure that the Show icon on the taskbar option is checked. If the Dell Support icon ...Dell Support Utility, and view Dell Support settings. Double-Clicking the Dell Support Icon Double-click the icon to support.dell.com and download the software. For more about the Dell...
...Dell Support Utility settings. • Access the help file for the Dell Support Utility. • View frequently asked questions. • Learn more information about the Dell Support Utility. • Turn off the Dell Support Utility. Clicking the Dell...Programs→ Dell Support→ Dell Support Settings. 2 Ensure that the Show icon on the taskbar option is checked. If the Dell Support icon ...Dell Support Utility, and view Dell Support settings. Double-Clicking the Dell Support Icon Double-click the icon to support.dell.com and download the software. For more about the Dell...

Setup and Quick Reference Guide
Page 51
...hardware might not be displayed. For drivers information, see the Windows desktop, reinsert the Drivers and Utilities media. 5 At the Welcome Dell System Owner screen, click Next. A message stating that you are not displayed, exit the Drivers and Utilities program. NOTE: The User Account Control ... Utilities media and click Finish to reinstall and follow the prompts on the screen. Reinstalling Software 51 2 When the Drivers and Utilities media installation program starts, follow the instructions on the screen. If you see the documentation that came with the device. If those ...
...hardware might not be displayed. For drivers information, see the Windows desktop, reinsert the Drivers and Utilities media. 5 At the Welcome Dell System Owner screen, click Next. A message stating that you are not displayed, exit the Drivers and Utilities program. NOTE: The User Account Control ... Utilities media and click Finish to reinstall and follow the prompts on the screen. Reinstalling Software 51 2 When the Drivers and Utilities media installation program starts, follow the instructions on the screen. If you see the documentation that came with the device. If those ...

Setup and Quick Reference Guide
Page 53
..., type System Restore and press . NOTE: The User Account Control window may not apply if you set your Dell™ computer to the Windows Classic view. Reinstalling Software 53 System Restore does not monitor your administrator to continue the desired action. 3 Click Next and follow the remaining on... page 53). If you may undo the last system restore (see "Undoing the Last System Restore" on -screen prompts. NOTE: The procedures in this document were written for the Windows default view, so ...
..., type System Restore and press . NOTE: The User Account Control window may not apply if you set your Dell™ computer to the Windows Classic view. Reinstalling Software 53 System Restore does not monitor your administrator to continue the desired action. 3 Click Next and follow the remaining on... page 53). If you may undo the last system restore (see "Undoing the Last System Restore" on -screen prompts. NOTE: The procedures in this document were written for the Windows default view, so ...

Setup and Quick Reference Guide
Page 55
... Cancel. 7 Click the checkbox to confirm that you want to proceed with a newly installed driver, first try using Windows Device Driver Rollback. The Dell Factory Image Restore welcome screen appears. 6 Click Next. A message appears when the operating system and factory-installed applications have been restored to factory condition. 8 Click Finish to access...
... Cancel. 7 Click the checkbox to confirm that you want to proceed with a newly installed driver, first try using Windows Device Driver Rollback. The Dell Factory Image Restore welcome screen appears. 6 Click Next. A message appears when the operating system and factory-installed applications have been restored to factory condition. 8 Click Finish to access...

Setup and Quick Reference Guide
Page 56
... drive is the first drive detected by the computer. To reinstall Windows, you requested the media, the Dell Drivers and Utilities media and Dell Operating System media may not ship with your computer. Depending on the screen to complete the installation. 56 Reinstalling Software See "Using Microsoft® Windows® System Restore" on...
... drive is the first drive detected by the computer. To reinstall Windows, you requested the media, the Dell Drivers and Utilities media and Dell Operating System media may not ship with your computer. Depending on the screen to complete the installation. 56 Reinstalling Software See "Using Microsoft® Windows® System Restore" on...

Setup and Quick Reference Guide
Page 69
...customer service, 60 System Restore, 52 enabling, 54 T transferring information to a new computer, 17 troubleshooting, 31, 58 blue screen, 45 computer not responding, 44 Dell Diagnostics, 40 error messages, 33 memory, 43 power, 42 power light conditions, 42 power lights, 31 program crashes, 44 ...programs and Windows compatibility, 45 restore to previous state, 52 software, 44-46 tips, 42 W Windows License label, 58 Windows Vista Dell Factory Image Restore, 54-55 Device Driver Rollback, 50 Program Compatibility wizard, 45 reinstalling, 57 returning to a previous device driver version, 50...
...customer service, 60 System Restore, 52 enabling, 54 T transferring information to a new computer, 17 troubleshooting, 31, 58 blue screen, 45 computer not responding, 44 Dell Diagnostics, 40 error messages, 33 memory, 43 power, 42 power light conditions, 42 power lights, 31 program crashes, 44 ...programs and Windows compatibility, 45 restore to previous state, 52 software, 44-46 tips, 42 W Windows License label, 58 Windows Vista Dell Factory Image Restore, 54-55 Device Driver Rollback, 50 Program Compatibility wizard, 45 reinstalling, 57 returning to a previous device driver version, 50...

Service Manual
Page 13
...Download Complete window appears. Click the down arrow to prevent a loss of power. Insert the BIOS-update program CD, and turn on the screen. Follow the instructions that you can set up the computer to boot from the CD. Flashing the BIOS From the Hard Drive NOTICE: ...and follow the instructions on the computer. 3. Failure to disk, and then click OK. Turn on the screen. Click Download Now to Contents Page Flashing the BIOS Dell™ Latitude™ E6400 and E6400 ATG and Mobile Workstation Precision™ M2400 Service Manual Flashing the BIOS From a CD Flashing the BIOS ...
...Download Complete window appears. Click the down arrow to prevent a loss of power. Insert the BIOS-update program CD, and turn on the screen. Follow the instructions that you can set up the computer to boot from the CD. Flashing the BIOS From the Hard Drive NOTICE: ...and follow the instructions on the computer. 3. Failure to disk, and then click OK. Turn on the screen. Click Download Now to Contents Page Flashing the BIOS Dell™ Latitude™ E6400 and E6400 ATG and Mobile Workstation Precision™ M2400 Service Manual Flashing the BIOS From a CD Flashing the BIOS ...

Service Manual
Page 28
....5 x 5-mm screws from the base assembly. 2. Align the display hinges with your computer. 1. 4. Disconnect and unroute the display cable, touch screen cable, and the wireless cables (WLAN, WWAN, and WPAN). Position all cables to 90 degrees and lift the display assembly off the base assembly.... 1 display assembly 2 base assembly Replacing the Display Assembly (E6400 ATG) CAUTION: Before you begin the following procedure, follow the safety instructions that shipped with the holes in their respective routing Close...
....5 x 5-mm screws from the base assembly. 2. Align the display hinges with your computer. 1. 4. Disconnect and unroute the display cable, touch screen cable, and the wireless cables (WLAN, WWAN, and WPAN). Position all cables to 90 degrees and lift the display assembly off the base assembly.... 1 display assembly 2 base assembly Replacing the Display Assembly (E6400 ATG) CAUTION: Before you begin the following procedure, follow the safety instructions that shipped with the holes in their respective routing Close...

Service Manual
Page 29
.... For WPAN, see Replacing the WLAN/WiMax Card. For WLAN, see Replacing a WPAN (UWB/BT) Card. Removing the Display Bezel (E6400 and M2400) CAUTION: Before you begin the following illustration. 6. See the arrow labeled "2" in the following procedure, follow the safety instructions ... procedures in the following illustration. 9. See the arrows labeled "7" in After Working on Your Computer. Connect the display cable to the touch screen connector on the system board. 8. Follow the numbered arrows in the following illustration. 10. See the arrows labeled "4" through "6" in the...
.... For WPAN, see Replacing the WLAN/WiMax Card. For WLAN, see Replacing a WPAN (UWB/BT) Card. Removing the Display Bezel (E6400 and M2400) CAUTION: Before you begin the following illustration. 6. See the arrow labeled "2" in the following procedure, follow the safety instructions ... procedures in the following illustration. 9. See the arrows labeled "7" in After Working on Your Computer. Connect the display cable to the touch screen connector on the system board. 8. Follow the numbered arrows in the following illustration. 10. See the arrows labeled "4" through "6" in the...

Service Manual
Page 36
... The brackets are labeled "L" (left bracket. 2. Remove the hinge covers (see Replacing the Display Assembly (E6400 and M2400)). 7. For non-touch screen display panels, leave the touch screen cable taped to the display cover. 5. Route the display cable around the notch on the back of the... instructions that shipped with your computer. 1. Replace the hinge covers (see Removing the Display Assembly (E6400 ATG)). 5. NOTICE: Touch screen display panels include a second cable (touch screen cable) to attach to the connector on the display cover and set the display panel in Before Working...
... The brackets are labeled "L" (left bracket. 2. Remove the hinge covers (see Replacing the Display Assembly (E6400 and M2400)). 7. For non-touch screen display panels, leave the touch screen cable taped to the display cover. 5. Route the display cable around the notch on the back of the... instructions that shipped with your computer. 1. Replace the hinge covers (see Removing the Display Assembly (E6400 ATG)). 5. NOTICE: Touch screen display panels include a second cable (touch screen cable) to attach to the connector on the display cover and set the display panel in Before Working...

Service Manual
Page 37
Use the alignment posts in display cover. Replace the display bezel (see Replacing the Display Bezel (E6400 ATG)). NOTICE: On touch screen display panels, use care when installing the brackets. Replace the four M2 x 3-mm screws on the right display panel bracket and the four M2 x 3-mm ...
Use the alignment posts in display cover. Replace the display bezel (see Replacing the Display Bezel (E6400 ATG)). NOTICE: On touch screen display panels, use care when installing the brackets. Replace the four M2 x 3-mm screws on the right display panel bracket and the four M2 x 3-mm ...

Service Manual
Page 84
.... Click the Windows Vista start button , and click Help and Support. 2. Dell Diagnostics CAUTION: Before you have added any of your computer does not display a screen image, contact Dell Support. 1. Starting the Dell Diagnostics From Your Hard Drive Before running the Dell Diagnostics, enter system setup to review your computer or at startup to boot...
.... Click the Windows Vista start button , and click Help and Support. 2. Dell Diagnostics CAUTION: Before you have added any of your computer does not display a screen image, contact Dell Support. 1. Starting the Dell Diagnostics From Your Hard Drive Before running the Dell Diagnostics, enter system setup to review your computer or at startup to boot...


