
Dell™ Technology Guide
Page 83
..., click Continue; FOR MORE INFORMATION: Your computer may appear. For information about these levels, see support.dell.com. RAID Level 0 NOTICE: RAID level 0 provides no redundancy. For Windows® XP: Click Start → My Computer. 2 Right-click Local Disk (C:). 3 Click Properties→ Tools&#...this section. Perform regular backups to protect your administrator to continue the desired action. 4 Click to check Scan for and attempt recovery of independent disks (RAID) is a disk storage configuration that increases performance or data redundancy. If you are four basic RAID...
..., click Continue; FOR MORE INFORMATION: Your computer may appear. For information about these levels, see support.dell.com. RAID Level 0 NOTICE: RAID level 0 provides no redundancy. For Windows® XP: Click Start → My Computer. 2 Right-click Local Disk (C:). 3 Click Properties→ Tools&#...this section. Perform regular backups to protect your administrator to continue the desired action. 4 Click to check Scan for and attempt recovery of independent disks (RAID) is a disk storage configuration that increases performance or data redundancy. If you are four basic RAID...

Dell™ Technology Guide
Page 268
... want to proceed with Factory Image Restore, click Cancel. 7 Click the check box to confirm that you received your hard drive to select Dell Factory Tools, then Dell Factory Image Restore. These options restore your computer-including data files-are permanently deleted from the hard drive. The restore process begins and may... screen appears. Any programs or files added since you want to continue reformatting the hard drive and restoring the system software to complete. The System Recovery Options window appears. 3 Select a keyboard layout and click Next. 4 To access the...
... want to proceed with Factory Image Restore, click Cancel. 7 Click the check box to confirm that you received your hard drive to select Dell Factory Tools, then Dell Factory Image Restore. These options restore your computer-including data files-are permanently deleted from the hard drive. The restore process begins and may... screen appears. Any programs or files added since you want to continue reformatting the hard drive and restoring the system software to complete. The System Recovery Options window appears. 3 Select a keyboard layout and click Next. 4 To access the...

Dell™ Technology Guide
Page 286
... Center Icon Click or right-click the icon to access online backup and recovery service offered by Dell for your computer. • About Your System - Click to access: • Dell Support Center. • Dell Support Center Alerts. • Dell Support Center User Settings. • Learn more about your computer. • Drivers & Downloads - Click to contact...
... Center Icon Click or right-click the icon to access online backup and recovery service offered by Dell for your computer. • About Your System - Click to access: • Dell Support Center. • Dell Support Center Alerts. • Dell Support Center User Settings. • Learn more about your computer. • Drivers & Downloads - Click to contact...
Dell™ Technology Guide
Page 289
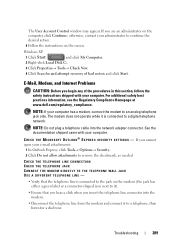
...appear. otherwise, contact your administrator to a telephone, then listen for and attempt recovery of the procedures in this section, follow the safety instructions shipped with your computer.... For additional safety best practices information, see the Regulatory Compliance Homepage at www.dell.com/regulatory_compliance. Troubleshooting 289 NOTE: Do not plug a telephone cable into the... it to continue the desired action. 4 Follow the instructions on the computer, click Continue; Windows XP 1 Click Start and click My Computer. 2 Right-click Local Disk C:. 3 Click Properties→...
...appear. otherwise, contact your administrator to a telephone, then listen for and attempt recovery of the procedures in this section, follow the safety instructions shipped with your computer.... For additional safety best practices information, see the Regulatory Compliance Homepage at www.dell.com/regulatory_compliance. Troubleshooting 289 NOTE: Do not plug a telephone cable into the... it to continue the desired action. 4 Follow the instructions on the computer, click Continue; Windows XP 1 Click Start and click My Computer. 2 Right-click Local Disk C:. 3 Click Properties→...
Setup Guide
Page 5
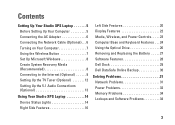
... Button 7 Set Up Microsoft Windows 8 Create System Recovery Media (Recommended 8 Connecting to the Internet (Optional 9 Setting Up the TV Tuner (Optional 12 Setting Up the 5.1 Audio Connections (Optional 13 Using Your Studio XPS Laptop 14 Device Status Lights 14 Right Side Features ...16 Left Side Features 20 Display Features 22 Media, Wireless, and Power Controls 23 Computer Base and Keyboard Features 24 Using the Optical Drive 26 Removing and Replacing the Battery 27 Software Features 28 Dell Dock 29 Dell...
... Button 7 Set Up Microsoft Windows 8 Create System Recovery Media (Recommended 8 Connecting to the Internet (Optional 9 Setting Up the TV Tuner (Optional 12 Setting Up the 5.1 Audio Connections (Optional 13 Using Your Studio XPS Laptop 14 Device Status Lights 14 Right Side Features ...16 Left Side Features 20 Display Features 22 Media, Wireless, and Power Controls 23 Computer Base and Keyboard Features 24 Using the Optical Drive 26 Removing and Replacing the Battery 27 Software Features 28 Dell Dock 29 Dell...

Setup Guide
Page 6
Contents Using Support Tools 37 Dell Support Center 37 My Dell Downloads 38 System Messages 38 Hardware Troubleshooter 40 Dell Diagnostics 41 Restoring Your Operating System 45 System Restore 46 Dell DataSafe Local Backup 47 System Recovery Media 49 Dell Factory Image Restore 50 Getting Help 52 Technical Support and Customer Service 53 DellConnect 53 Online...
Contents Using Support Tools 37 Dell Support Center 37 My Dell Downloads 38 System Messages 38 Hardware Troubleshooter 40 Dell Diagnostics 41 Restoring Your Operating System 45 System Restore 46 Dell DataSafe Local Backup 47 System Recovery Media 49 Dell Factory Image Restore 50 Getting Help 52 Technical Support and Customer Service 53 DellConnect 53 Online...
Setup Guide
Page 10
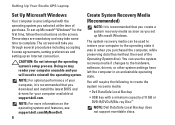
NOTE: For more information on the screen. Setting Up Your Studio XPS Laptop Set Up Microsoft Windows Your computer is preconfigured with a minimum capacity of 8 GB or DVD-R/DVD+R/Blu-ray Disc™ NOTE: Dell DataSafe Local Backup does not support rewritable discs. The screens will take some ...drivers for your computer available at the time of your computer unusable and you will require the following to create the system recovery media: • Dell DataSafe Local Backup • USB key with the operating system you set up an Internet connection. These steps are mandatory...
NOTE: For more information on the screen. Setting Up Your Studio XPS Laptop Set Up Microsoft Windows Your computer is preconfigured with a minimum capacity of 8 GB or DVD-R/DVD+R/Blu-ray Disc™ NOTE: Dell DataSafe Local Backup does not support rewritable discs. The screens will take some ...drivers for your computer available at the time of your computer unusable and you will require the following to create the system recovery media: • Dell DataSafe Local Backup • USB key with the operating system you set up an Internet connection. These steps are mandatory...
Setup Guide
Page 11
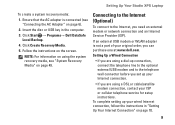
..." on page 6). 2. Ensure that the AC adapter is not a part of your original order, you are using the system recovery media, see "Connecting the AC Adapter" on page 49. Follow the instructions on page 10. 9 Setting Up a Wired Connection • If you ... instructions. To complete setting up your Internet connection. • If you can purchase one at www.dell.com. Setting Up Your Studio XPS Laptop To create a system recovery media: 1. Click Start → Programs→ Dell DataSafe Local Backup. 4. Insert the disc or USB key in "Setting Up Your Internet Connection" on...
..." on page 6). 2. Ensure that the AC adapter is not a part of your original order, you are using the system recovery media, see "Connecting the AC Adapter" on page 49. Follow the instructions on page 10. 9 Setting Up a Wired Connection • If you ... instructions. To complete setting up your Internet connection. • If you can purchase one at www.dell.com. Setting Up Your Studio XPS Laptop To create a system recovery media: 1. Click Start → Programs→ Dell DataSafe Local Backup. 4. Insert the disc or USB key in "Setting Up Your Internet Connection" on...

Setup Guide
Page 32
... a password‑protected account. To schedule backups: 1. Using Your Studio XPS Laptop Dell DataSafe Online Backup NOTE: Dell DataSafe Online may not be available in all regions. Double-click the Dell DataSafe Online icon on the taskbar. 2. NOTE: A broadband connection is an automated backup and recovery service that appear on your data and other important files...
... a password‑protected account. To schedule backups: 1. Using Your Studio XPS Laptop Dell DataSafe Online Backup NOTE: Dell DataSafe Online may not be available in all regions. Double-click the Dell DataSafe Online icon on the taskbar. 2. NOTE: A broadband connection is an automated backup and recovery service that appear on your data and other important files...

Setup Guide
Page 39
The home page also provides links to access: Self Help (Troubleshooting, Security, System Performance, Network/Internet, Backup/ Recovery, and Windows operating system) Alerts (technical support alerts relevant to your computer's model number, service tag, express service code...click the icon in the taskbar. Using Support Tools Dell Support Center The Dell Support Center helps you find the service, support, and system-specific information you need. The Dell Support Center home page displays your computer) Assistance from Dell (Technical Support with DellConnect™, Customer Service, ...
The home page also provides links to access: Self Help (Troubleshooting, Security, System Performance, Network/Internet, Backup/ Recovery, and Windows operating system) Alerts (technical support alerts relevant to your computer's model number, service tag, express service code...click the icon in the taskbar. Using Support Tools Dell Support Center The Dell Support Center helps you find the service, support, and system-specific information you need. The Dell Support Center home page displays your computer) Assistance from Dell (Technical Support with DellConnect™, Customer Service, ...

Setup Guide
Page 47
... files before using any of System Restore and DataSafe Local Backup when installing the factory image on a newly installed hard drive Dell Factory Image Restore to restore your computer to the operating state it was in when you received your computer Operating System disc to... 45 Option Use System Restore as the first solution Dell DataSafe Local Backup when System Restore does not resolve your problem System recovery media when operating system failure prevents the use of the following options: CAUTION: Using Dell Factory Image Restore or the Operating System disc permanently ...
... files before using any of System Restore and DataSafe Local Backup when installing the factory image on a newly installed hard drive Dell Factory Image Restore to restore your computer to the operating state it was in when you received your computer Operating System disc to... 45 Option Use System Restore as the first solution Dell DataSafe Local Backup when System Restore does not resolve your problem System recovery media when operating system failure prevents the use of the following options: CAUTION: Using Dell Factory Image Restore or the Operating System disc permanently ...

Setup Guide
Page 49
... Local Backup. You can use Dell Factory Image Restore (see "Dell Factory Image Restore" on page 50) to the operating state it is recommended that you to an earlier operating state • Create system recovery media Dell DataSafe Local Backup Basic To restore the factory ...image while preserving the data files: 1. Turn on your computer. Dell DataSafe Local Backup allows you backup your computer. NOTE: Do not disconnect...
... Local Backup. You can use Dell Factory Image Restore (see "Dell Factory Image Restore" on page 50) to the operating state it is recommended that you to an earlier operating state • Create system recovery media Dell DataSafe Local Backup Basic To restore the factory ...image while preserving the data files: 1. Turn on your computer. Dell DataSafe Local Backup allows you backup your computer. NOTE: Do not disconnect...

Setup Guide
Page 50
... and restore your computer based on your computer and try again. 5. Select Dell DataSafe Restore and Emergency Backup from the System Recovery Options menu and follow the instructions on the taskbar. 2. Upgrading to wait until you ordered it at support.dell.com. NOTE: The restoration process might take an hour or more information...
... and restore your computer based on your computer and try again. 5. Select Dell DataSafe Restore and Emergency Backup from the System Recovery Options menu and follow the instructions on the taskbar. 2. Upgrading to wait until you ordered it at support.dell.com. NOTE: The restoration process might take an hour or more information...

Setup Guide
Page 51
... to wait until you backup your data files before using the system recovery media: 1. Use the system recovery media in when you purchased the computer while preserving the data files on your computer. When the DELL™ logo appears, press immediately. Follow the instructions on your computer.... • Hard drive failure that you see the Microsoft® Windows® desktop; Insert the system recovery disc or USB key and restart the computer....
... to wait until you backup your data files before using the system recovery media: 1. Use the system recovery media in when you purchased the computer while preserving the data files on your computer. When the DELL™ logo appears, press immediately. Follow the instructions on your computer.... • Hard drive failure that you see the Microsoft® Windows® desktop; Insert the system recovery disc or USB key and restart the computer....

Setup Guide
Page 53
To access the recovery options, log on as a local user. Click Dell Factory Image Restore. Restoring Your Operating System 8. A message appears when the operating system and factory-installed applications have been restored to ...want to continue reformatting the hard drive and restoring the system software to select Dell Factory Tools, then Dell Factory Image Restore. 7. Click Next. The Dell Factory Image Restore welcome screen appears. The Confirm Data Deletion screen appears. The System Recovery Options window appears. 4. Select a keyboard layout and click Next. 5. ...
To access the recovery options, log on as a local user. Click Dell Factory Image Restore. Restoring Your Operating System 8. A message appears when the operating system and factory-installed applications have been restored to ...want to continue reformatting the hard drive and restoring the system software to select Dell Factory Tools, then Dell Factory Image Restore. 7. Click Next. The Dell Factory Image Restore welcome screen appears. The Confirm Data Deletion screen appears. The System Recovery Options window appears. 4. Select a keyboard layout and click Next. 5. ...

Setup Guide
Page 62
... additional memory, or a new hard drive reinstall or replace a worn or defective part See: "System Recovery Media" on page 49 "Dell Diagnostics" on page 41 "My Dell Downloads" on page 38 support.dell.com the Service Manual at support.dell.com/manuals NOTE: In some countries, opening and replacing parts of your computer may void...
... additional memory, or a new hard drive reinstall or replace a worn or defective part See: "System Recovery Media" on page 49 "Dell Diagnostics" on page 41 "My Dell Downloads" on page 38 support.dell.com the Service Manual at support.dell.com/manuals NOTE: In some countries, opening and replacing parts of your computer may void...

Setup Guide
Page 78
Index processor 62 products information and purchasing 55 R resources, finding more 60 restoring factory image 50 S setup, before you begin 5 shipping products for return or repair 56 software features 28 software problems 34 solving problems 31 specifications 62 support email addresses 54 support sites worldwide 54 76 System Messages 38 system recovery media 8 T technical support 53 U USB PowerShare 18 V ventilation, ensuring 5 W warranty returns 56 Windows Program Compatibility Wizard 35 setup 8 wired network network cable, connecting 6 wireless network connection 10
Index processor 62 products information and purchasing 55 R resources, finding more 60 restoring factory image 50 S setup, before you begin 5 shipping products for return or repair 56 software features 28 software problems 34 solving problems 31 specifications 62 support email addresses 54 support sites worldwide 54 76 System Messages 38 system recovery media 8 T technical support 53 U USB PowerShare 18 V ventilation, ensuring 5 W warranty returns 56 Windows Program Compatibility Wizard 35 setup 8 wired network network cable, connecting 6 wireless network connection 10


