User Guide
Page 2
... and Removing the Label Cartridge 6 Setting the Label Width 6 Selecting a Language 7 Selecting Units of Measure 7 Getting to Know Your Printer 7 Power 7 ...Label Files 8 Creating a Label File 8 Adding Labels to a Label File 8 Removing Labels from a File 9 Printing a Label File 9 Formatting a Label 9 Changing the Text Size 9 Changing the Text Style 9 Creating Multi-Line Labels 9 Using International Characters 10 Creating Industrial Labels 10 Creating Cable and Wire Labels 10 Creating Cable Labels 10 Creating Wire Labels 10 Creating Flag Labels 10 Creating Fixed Length Labels...
... and Removing the Label Cartridge 6 Setting the Label Width 6 Selecting a Language 7 Selecting Units of Measure 7 Getting to Know Your Printer 7 Power 7 ...Label Files 8 Creating a Label File 8 Adding Labels to a Label File 8 Removing Labels from a File 9 Printing a Label File 9 Formatting a Label 9 Changing the Text Size 9 Changing the Text Style 9 Creating Multi-Line Labels 9 Using International Characters 10 Creating Industrial Labels 10 Creating Cable and Wire Labels 10 Creating Cable Labels 10 Creating Wire Labels 10 Creating Flag Labels 10 Creating Fixed Length Labels...

User Guide
Page 3
...Text Library 15 Adding My Library Text 15 Inserting Library Text 15 Deleting My Library Text 15 Creating a Series of Labels 15 Using Simple Serialization 16 Using Simultaneous Serialization 16 Using Advanced Serialization 16 Printing Options 16 Printing Multiple Copies 16 ...Collating Multiple Copies 17 Pausing Between Labels 17 Advancing the Label 17 Adjusting Print Contrast 17 Using Printer Memory 17 Saving a Label File 17 Recalling a Label File from Memory 17 Deleting a Label File from Memory 18 Cleaning Your Printer 18 Symbols 19 Troubleshooting 20 3
...Text Library 15 Adding My Library Text 15 Inserting Library Text 15 Deleting My Library Text 15 Creating a Series of Labels 15 Using Simple Serialization 16 Using Simultaneous Serialization 16 Using Advanced Serialization 16 Printing Options 16 Printing Multiple Copies 16 ...Collating Multiple Copies 17 Pausing Between Labels 17 Advancing the Label 17 Adjusting Print Contrast 17 Using Printer Memory 17 Saving a Label File 17 Recalling a Label File from Memory 17 Deleting a Label File from Memory 18 Cleaning Your Printer 18 Symbols 19 Troubleshooting 20 3

User Guide
Page 4
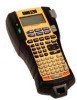
Power connector Backlight Power Hot Keys Size/CAPS Save/Insert Recall/Remove Feed Shift S HIF T Label exit BKSP S HIF T Cut LCD display Print/# of copies Serialization Settings/Barcode Escape Clear Navigation keys OK Backspace Enter Space bar Figure 1 RHINO 5200 Label Printer 4
Power connector Backlight Power Hot Keys Size/CAPS Save/Insert Recall/Remove Feed Shift S HIF T Label exit BKSP S HIF T Cut LCD display Print/# of copies Serialization Settings/Barcode Escape Clear Navigation keys OK Backspace Enter Space bar Figure 1 RHINO 5200 Label Printer 4

User Guide
Page 5
... printer can operate on the top of labels and accessories for power; Insert the battery pack into a power outlet. An optional rechargeable battery pack is included with your printer. Visit www.dymo.com for information on the full line of the printer. To save power, the printer ... you can operate with the battery pack inserted recharges the battery pack. The printer can create a wide variety of 6 mm, 9 mm, 12 mm, or 19 mm. Figure 2 2. The printer uses RHINO Industrial label cartridges in this section to the power adapter. Getting Started Follow the instructions ...
... printer can operate on the top of labels and accessories for power; Insert the battery pack into a power outlet. An optional rechargeable battery pack is included with your printer. Visit www.dymo.com for information on the full line of the printer. To save power, the printer ... you can operate with the battery pack inserted recharges the battery pack. The printer can create a wide variety of 6 mm, 9 mm, 12 mm, or 19 mm. Figure 2 2. The printer uses RHINO Industrial label cartridges in this section to the power adapter. Getting Started Follow the instructions ...

User Guide
Page 6
... a power source through the power adapter. See Figure 4. 3. Insert a new label cartridge as described in the printer, you can operate using . To set the label width so the printer knows what is connected to open Figure 4 2. Insert the cartridge with a starter label cartridge. Visit www.dymo.com for the first time will take approximately two hours...
... a power source through the power adapter. See Figure 4. 3. Insert a new label cartridge as described in the printer, you can operate using . To set the label width so the printer knows what is connected to open Figure 4 2. Insert the cartridge with a starter label cartridge. Visit www.dymo.com for the first time will take approximately two hours...

User Guide
Page 7
...(OK). The following sections describe each feature in inches or millimeters. When the printer is lost and you will need to Know Your Printer Become familiar with the location of inactivity. however, the current label file is turned off automatically. Pressing any time from the Settings menu. To ...language. 4. You can change the units of measure at the top of the display shows the current label type and for the next time the printer is set to print the label containing text that will not be printed. If the batteries and power adapter are remembered; Adjusting the ...
...(OK). The following sections describe each feature in inches or millimeters. When the printer is lost and you will need to Know Your Printer Become familiar with the location of inactivity. however, the current label file is turned off automatically. Pressing any time from the Settings menu. To ...language. 4. You can change the units of measure at the top of the display shows the current label type and for the next time the printer is set to print the label containing text that will not be printed. If the batteries and power adapter are remembered; Adjusting the ...

User Guide
Page 8
... of the cursor. Navigation Keys The navigation keys operate as follows: Key Function , Moves one or more labels. When printing multiple labels, the printer pauses after printing each label so that you press SHIFT and then , an asterisk (*) appears in the display ; You can turn ...Cutter Button The Cut button cuts the label. Working with Label Files The printer creates and stores labels as a label file in this feature off . When you create a new label, you press , the number 9 appears in a multi-cell label , Moves one label to a Label File You can contain one character to...
... of the cursor. Navigation Keys The navigation keys operate as follows: Key Function , Moves one or more labels. When printing multiple labels, the printer pauses after printing each label so that you press SHIFT and then , an asterisk (*) appears in the display ; You can turn ...Cutter Button The Cut button cuts the label. Working with Label Files The printer creates and stores labels as a label file in this feature off . When you create a new label, you press , the number 9 appears in a multi-cell label , Moves one label to a Label File You can contain one character to...

User Guide
Page 9
... 2. To insert an underlined 6 or 9 character Š Press and hold or until 6 or 9 appears in the file. Creating Multi-Line Labels You can also select Auto as follows: Label Width 6 mm 9 mm 12 mm 19 mm # Lines 1 3 3 5 The display only shows two lines of text. Use the arrow...And, you press , the next available text size is selected. Press . 2. Type the text for the first line, and press . 2. To remove a label 1. Press . When Auto is selected, the best text size is displayed. 2. Select On or Off to enable or disable the selected style. 5. The text...
... 2. To insert an underlined 6 or 9 character Š Press and hold or until 6 or 9 appears in the file. Creating Multi-Line Labels You can also select Auto as follows: Label Width 6 mm 9 mm 12 mm 19 mm # Lines 1 3 3 5 The display only shows two lines of text. Use the arrow...And, you press , the next available text size is selected. Press . 2. Type the text for the first line, and press . 2. To remove a label 1. Press . When Auto is selected, the best text size is displayed. 2. Select On or Off to enable or disable the selected style. 5. The text...

User Guide
Page 10
... depending on the size of the text and the length of the label. Select Small, Medium, Large, or XLarge for special industrial applications, such as possible depending on page 15. You can quickly create labels for the wrap around the width of text. Hot Keys are available... see Creating a Series of the label types. The factory default fixed length is a label that is repeated as many times as cable or wire wrap, flag, patch panel, electrical panel, terminal block, 110-block, or module. Using International Characters The printer supports the extended Latin character set to...
... depending on the size of the text and the length of the label. Select Small, Medium, Large, or XLarge for special industrial applications, such as possible depending on page 15. You can quickly create labels for the wrap around the width of text. Hot Keys are available... see Creating a Series of the label types. The factory default fixed length is a label that is repeated as many times as cable or wire wrap, flag, patch panel, electrical panel, terminal block, 110-block, or module. Using International Characters The printer supports the extended Latin character set to...

User Guide
Page 11
...print separator lines between the breakers, see Creating a Series of Labels on the display. 6. Creating Electrical Panel Labels An Electrical Panel label allows you to label a row of Labels on an electrical panel. The result is a long label with multiple, evenly spaced text for the breakers automatically, see ..., and print. To create data for each port. Creating Patch Panel Labels A Patch Panel label allows you to label a row of any individual breakers that does not fit within an Electrical Panel label. 11 Enter or select the breaker length and press . Enter or ...
...print separator lines between the breakers, see Creating a Series of Labels on the display. 6. Creating Electrical Panel Labels An Electrical Panel label allows you to label a row of Labels on an electrical panel. The result is a long label with multiple, evenly spaced text for the breakers automatically, see ..., and print. To create data for each port. Creating Patch Panel Labels A Patch Panel label allows you to label a row of any individual breakers that does not fit within an Electrical Panel label. 11 Enter or select the breaker length and press . Enter or ...

User Guide
Page 12
...block width is printed vertically for each block. To create data for the blocks automatically, see Creating a Series of block labels: Terminal Block and 110-Block labels. Select the block type and press . 4. Use the left or right arrow key to move from terminal to print empty...multiplier for each terminal. To print separator lines between the ports, see Printing Separator Lines Between Cells on 9 mm, 12 mm, or 19 mm wide labels. Select Breaker multipliers and press . 5. Select On and press . 4. Select Done (OK) to return to adjust and press =. 6. however, ...
...block width is printed vertically for each block. To create data for the blocks automatically, see Creating a Series of block labels: Terminal Block and 110-Block labels. Select the block type and press . 4. Use the left or right arrow key to move from terminal to print empty...multiplier for each terminal. To print separator lines between the ports, see Printing Separator Lines Between Cells on 9 mm, 12 mm, or 19 mm wide labels. Select Breaker multipliers and press . 5. Select On and press . 4. Select Done (OK) to return to adjust and press =. 6. however, ...

User Guide
Page 13
... select the number of varying widths. Enter the fuse multiplier for each module and press . Enter the text for each module. Select Current label config. Press . 2. Any empty modules at the end of any necessary adjustments to the settings for the modules automatically, see Using Fuse Multipliers...to adjust the size of cells. All blank cells are larger. Make any individual modules that module. 7. You can easily change the label type 1. You set to adjust the width of fuses, enter the text for that are deleted. Enter or select the fuse length and...
... select the number of varying widths. Enter the fuse multiplier for each module and press . Enter the text for each module. Select Current label config. Press . 2. Any empty modules at the end of any necessary adjustments to the settings for the modules automatically, see Using Fuse Multipliers...to adjust the size of cells. All blank cells are larger. Make any individual modules that module. 7. You can easily change the label type 1. You set to adjust the width of fuses, enter the text for that are deleted. Enter or select the fuse length and...

User Guide
Page 14
...positioned within the barcode text, Barcode and the type of multiple cell label you can add a barcode to print the humanreadable text, and you want. 2. Select Above barcode or Below barcode. 4. Using Barcodes The printer can edit the text for an existing barcode. You can choose to... place the human-readable text above the barcode. Optionally, you can choose to print the human-readable text in the Caption bar. Enter the text for the particular label type are displayed....
...positioned within the barcode text, Barcode and the type of multiple cell label you can add a barcode to print the humanreadable text, and you want. 2. Select Above barcode or Below barcode. 4. Using Barcodes The printer can edit the text for an existing barcode. You can choose to... place the human-readable text above the barcode. Optionally, you can choose to print the human-readable text in the Caption bar. Enter the text for the particular label type are displayed....

User Guide
Page 15
...labels would print as text entered from My Library. For example, pressing SHIFT + 1 inserts an open bracket ([). Inserting Symbols Symbols added to select the symbol you want . 4. Select a category of default symbols to view all symbols, and then press . 3. Using the Text Library Your printer... the number. Press S HIFT + . 2. Press to increase the increment. Press S HIFT + . 2. Adding Symbols Your printer includes a set the increment and count for the barcode. The symbols are separated into several categories: Electrical Arrows Voice/Data Numbers ...
...labels would print as text entered from My Library. For example, pressing SHIFT + 1 inserts an open bracket ([). Inserting Symbols Symbols added to select the symbol you want . 4. Select a category of default symbols to view all symbols, and then press . 3. Using the Text Library Your printer... the number. Press S HIFT + . 2. Press to increase the increment. Press S HIFT + . 2. Adding Symbols Your printer includes a set the increment and count for the barcode. The symbols are separated into several categories: Electrical Arrows Voice/Data Numbers ...

User Guide
Page 16
... You can choose to create up to 2. 16 Press the S arrow to increase the number of copies to print returns to 99 labels. The default is added in steps up to increment in the pattern. When printing is 99). A box appears around the character where...this character position and press . 7. For example, A-101, B102, C-103, and so on . To use simultaneous serialization 1. Enter the text for your label. 2. A box appears around the character where the cursor was positioned. 4. Select the first character position you want to print multiple copies of copies. 4....
... You can choose to create up to 2. 16 Press the S arrow to increase the number of copies to print returns to 99 labels. The default is added in steps up to increment in the pattern. When printing is 99). A box appears around the character where...this character position and press . 7. For example, A-101, B102, C-103, and so on . To use simultaneous serialization 1. Enter the text for your label. 2. A box appears around the character where the cursor was positioned. 4. Select the first character position you want to print multiple copies of copies. 4....

User Guide
Page 17
.... Press and then select Done (OK). Adjusting Print Contrast Depending on the label. Select New and press . 4. Using Printer Memory The printer has a powerful memory feature that contains the label you may need to print continuously 1. To recall a label from Memory Once a label is saved to memory, you are printed before the second copy starts. To...
.... Press and then select Done (OK). Adjusting Print Contrast Depending on the label. Select New and press . 4. Using Printer Memory The printer has a powerful memory feature that contains the label you may need to print continuously 1. To recall a label from Memory Once a label is saved to memory, you are printed before the second copy starts. To...

User Guide
Page 18
Remove the label cartridge. 2. Press . Cleaning Your Printer Your printer is designed to give you want to delete. 3. Figure 7 3. To clean the print head 1. Gently wipe the padded side of the tool across the print head. See Figure 7. 18 Select the label file you long and trouble-free...location. Deleting a Label File from Memory When you no longer need a stored label file, you can delete the file from time to time to keep it working properly. Clean your printer from memory. The saved label files are displayed. 2. To delete a label from inside the label cartridge door. ...
Remove the label cartridge. 2. Press . Cleaning Your Printer Your printer is designed to give you want to delete. 3. Figure 7 3. To clean the print head 1. Gently wipe the padded side of the tool across the print head. See Figure 7. 18 Select the label file you long and trouble-free...location. Deleting a Label File from Memory When you no longer need a stored label file, you can delete the file from time to time to keep it working properly. Clean your printer from memory. The saved label files are displayed. 2. To delete a label from inside the label cartridge door. ...

User Guide
Page 20
...printer. See Inserting and Removing the Label Cartridge. • Make sure the two levers in power adapter. • Remove power adapter and batteries, and then reattach power to make sure the cartridge is inserted properly. The label is jammed. • Open the label cartridge door and check that the label cartridge is inserted properly. RHINO labels...visit the DYMO Web site at www.dymo.com. 20 See Adjusting Print Contrast. • Check battery level; Label Jam Motor is not inserted correctly. Open the cartridge compartment and insert a label cartridge....
...printer. See Inserting and Removing the Label Cartridge. • Make sure the two levers in power adapter. • Remove power adapter and batteries, and then reattach power to make sure the cartridge is inserted properly. The label is jammed. • Open the label cartridge door and check that the label cartridge is inserted properly. RHINO labels...visit the DYMO Web site at www.dymo.com. 20 See Adjusting Print Contrast. • Check battery level; Label Jam Motor is not inserted correctly. Open the cartridge compartment and insert a label cartridge....


