

PDF Spec Sheet
Page 1
...V:4.E. Monitor - H Monitor your PC on an external adapter! READY - Easily read points - For more , the EVGA P55 Classified 200 offers enthusiast level performance, features and overclocking. v3A P55 CLASSIFIED 200 SLI Motherboard Part Nr mber 160-LF-E659-KR E;V3A c Roo figtiTrarl) Inter PS5 ann.e.0 Designed kw Intel AP ...overclocking in CPU pins, lower inductance, better power delivery! dedicated read points Triple BIOS Support Always have a backup, compare BIOS versions or use 3 seperate profiles! IrL 10+2 Phase PWM w/ switching frequency up to 1,333KHz ...
...V:4.E. Monitor - H Monitor your PC on an external adapter! READY - Easily read points - For more , the EVGA P55 Classified 200 offers enthusiast level performance, features and overclocking. v3A P55 CLASSIFIED 200 SLI Motherboard Part Nr mber 160-LF-E659-KR E;V3A c Roo figtiTrarl) Inter PS5 ann.e.0 Designed kw Intel AP ...overclocking in CPU pins, lower inductance, better power delivery! dedicated read points Triple BIOS Support Always have a backup, compare BIOS versions or use 3 seperate profiles! IrL 10+2 Phase PWM w/ switching frequency up to 1,333KHz ...

User Guide
Page 4
... Jumper Settings ...25 PCIE Disable Jumper 25 Voltage Measure Point 25 EVGA Control Panel V2 (ECP 26 EVGA Show-Volt ...31 Configuring the BIOS 32 Enter BIOS Setup 33 Main Menu...33 Standard BIOS Features Menu 36 System Time / System Date 37 Advanced BIOS Features 37 IDE Configuration 38 Boot Settings Configuration 38 AHCI Configuration 38...
... Jumper Settings ...25 PCIE Disable Jumper 25 Voltage Measure Point 25 EVGA Control Panel V2 (ECP 26 EVGA Show-Volt ...31 Configuring the BIOS 32 Enter BIOS Setup 33 Main Menu...33 Standard BIOS Features Menu 36 System Time / System Date 37 Advanced BIOS Features 37 IDE Configuration 38 Boot Settings Configuration 38 AHCI Configuration 38...

User Guide
Page 6
Hardware Health Configure 46 Figure 10. Advanced Chipset Features 39 Figure 6. Standard BIOS Features Menu 36 Figure 4. Boot Configuration Features 44 Figure 8. Frequency/Voltage Control 47 6 CMOS Setup Utility Main Menu 34 Figure 3. Advanced BIOS Features 38 Figure 5. PW1 Motherboard Connector 16 Figure 2. Power Management Features 45 Figure 9. PCI/PNP Resource Management 42 Figure 7. List of Figures Figure 1.
Hardware Health Configure 46 Figure 10. Advanced Chipset Features 39 Figure 6. Standard BIOS Features Menu 36 Figure 4. Boot Configuration Features 44 Figure 8. Frequency/Voltage Control 47 6 CMOS Setup Utility Main Menu 34 Figure 3. Advanced BIOS Features 38 Figure 5. PW1 Motherboard Connector 16 Figure 2. Power Management Features 45 Figure 9. PCI/PNP Resource Management 42 Figure 7. List of Figures Figure 1.

User Guide
Page 32
This section includes the following information: Enter BIOS Setup Main Menu Standard BIOS Features Advanced BIOS Features Advanced Chipset Features PCI/PnP Resource Management Boot Configuration Features Power Management Features Hardware Health Configure Frequency/Voltage Control 32 Configuring the BIOS This section discusses how to change the system settings through the BIOS Setup menus. Descriptions of the BIOS parameters are also provided.
This section includes the following information: Enter BIOS Setup Main Menu Standard BIOS Features Advanced BIOS Features Advanced Chipset Features PCI/PnP Resource Management Boot Configuration Features Power Management Features Hardware Health Configure Frequency/Voltage Control 32 Configuring the BIOS This section discusses how to change the system settings through the BIOS Setup menus. Descriptions of the BIOS parameters are also provided.

User Guide
Page 33
... maintain optimal system performance and stability. Press the Del key when the following procedure to the AMI BIOS CMOS Setup Utility. Main Menu The main menu allows you to verify/change BIOS settings. 3. To go back to enter Setup. Press F2 to Load Defaults, DEL to the ...in the option you choose. Use the + and - Use the arrow keys to display the associated submenu. Correctly setting the BIOS parameters is the communication bridge between hardware and software. Use the following message briefly displays at the bottom of setup functions and two exit choices...
... maintain optimal system performance and stability. Press the Del key when the following procedure to the AMI BIOS CMOS Setup Utility. Main Menu The main menu allows you to verify/change BIOS settings. 3. To go back to enter Setup. Press F2 to Load Defaults, DEL to the ...in the option you choose. Use the + and - Use the arrow keys to display the associated submenu. Correctly setting the BIOS parameters is the communication bridge between hardware and software. Use the following message briefly displays at the bottom of setup functions and two exit choices...

User Guide
Page 34
... Megatrends, Inc. Display System Information... CMOS Setup Utility Main Menu Standard BIOS Features Use this menu to set up the basic system configuration. Advanced BIOS Features Use this menu to set up the advanced system features and boot sequence....voltages, memory timings, and more. 34 Figure 2. CMOS Setup Utility - Copyright (C) 1985-2005, American Megatrends Standard BIOS Features Advanced BIOS Features Advanced Chipset Features PCI/PNP Resource Management Boot Configuration Features Power Management Features &#...
... Megatrends, Inc. Display System Information... CMOS Setup Utility Main Menu Standard BIOS Features Use this menu to set up the basic system configuration. Advanced BIOS Features Use this menu to set up the advanced system features and boot sequence....voltages, memory timings, and more. 34 Figure 2. CMOS Setup Utility - Copyright (C) 1985-2005, American Megatrends Standard BIOS Features Advanced BIOS Features Advanced Chipset Features PCI/PNP Resource Management Boot Configuration Features Power Management Features &#...

User Guide
Page 35
Configuring the BIOS Load Optimal Defaults Load default system settings. Discard Changes Use this command to abandon all setting changes and exit setup. Save Changes & Exit Use this command to save settings to CMOS and exit setup. Discard Changes and Exit Use this command to abandon all setting changes and exit setup. 35
Configuring the BIOS Load Optimal Defaults Load default system settings. Discard Changes Use this command to abandon all setting changes and exit setup. Save Changes & Exit Use this command to save settings to CMOS and exit setup. Discard Changes and Exit Use this command to abandon all setting changes and exit setup. 35

User Guide
Page 36
...Enter:Select +/-/:Value F10:Save ESC:Exit F1:General Help F7:Previous Values F9:Optimized Defaults Figure 3. Standard BIOS Features Menu 36 Copyright (C) 1985-2005, American Megatrends Standard BIOS Features System Overview AMIBIOS Version :08.00.16 Build Date:07/16/10 ID :1E658A19 Processor Intel(R) ... a field. To go back to configure the standard CMOS information, such as the date, time, and so on. CMOS Setup Utility - Standard BIOS Features Menu The Standard CMOS Features menu is used to the previous menu, press Esc. Use the + and - Use the arrow...
...Enter:Select +/-/:Value F10:Save ESC:Exit F1:General Help F7:Previous Values F9:Optimized Defaults Figure 3. Standard BIOS Features Menu 36 Copyright (C) 1985-2005, American Megatrends Standard BIOS Features System Overview AMIBIOS Version :08.00.16 Build Date:07/16/10 ID :1E658A19 Processor Intel(R) ... a field. To go back to configure the standard CMOS information, such as the date, time, and so on. CMOS Setup Utility - Standard BIOS Features Menu The Standard CMOS Features menu is used to the previous menu, press Esc. Use the + and - Use the arrow...

User Guide
Page 37
... display the sub-menu. System Time System Date [13:37:00] [Fri 07/16/2010] Time (hh:mm:ss) 14 : 48: 43 Advanced BIOS Features Access the Advanced BIOS Features menu from the CMOS Setup Utility screen. Use the + and - Press Enter to the previous menu, press Esc. To go back to... display the sub-menus. 37 Configuring the BIOS System Time / System Date Using the arrow keys, position the cursor over the month, day, and year. keys to scroll through the options or press...
... display the sub-menu. System Time System Date [13:37:00] [Fri 07/16/2010] Time (hh:mm:ss) 14 : 48: 43 Advanced BIOS Features Access the Advanced BIOS Features menu from the CMOS Setup Utility screen. Use the + and - Press Enter to the previous menu, press Esc. To go back to... display the sub-menus. 37 Configuring the BIOS System Time / System Date Using the arrow keys, position the cursor over the month, day, and year. keys to scroll through the options or press...

User Guide
Page 38
... AHCI settings, such as Bootup Num-Lock status, Quiet Boot and other advanced features. Please note for new system installations. Advanced BIOS Features IDE Configuration Use this option to malfunction. CMOS Setup Utility - Help Item Main Level IDE Configuration [Press...:Save ESC:Exit F1:General Help F7:Previous Values F9:Optimized Defaults Figure 4. Copyright (C) 1985-2005, American Megatrends Advanced BIOS Features Advanced Settings WARNING: Setting wrong values in below sections may cause system to configure various system options, such as S.M.A.R.T. ...
... AHCI settings, such as Bootup Num-Lock status, Quiet Boot and other advanced features. Please note for new system installations. Advanced BIOS Features IDE Configuration Use this option to malfunction. CMOS Setup Utility - Help Item Main Level IDE Configuration [Press...:Save ESC:Exit F1:General Help F7:Previous Values F9:Optimized Defaults Figure 4. Copyright (C) 1985-2005, American Megatrends Advanced BIOS Features Advanced Settings WARNING: Setting wrong values in below sections may cause system to configure various system options, such as S.M.A.R.T. ...
User Guide
Page 39
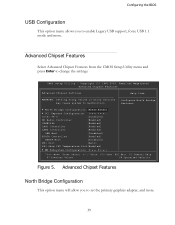
... USB 1.1 mode and more . 39 Advanced Chipset Features Select Advanced Chipset Features from the CMOS Setup Utility menu and press Enter to malfunction. Configuring the BIOS USB Configuration This option menu allows you to set the primary graphics adapter, and more . CMOS Setup Utility -
... USB 1.1 mode and more . 39 Advanced Chipset Features Select Advanced Chipset Features from the CMOS Setup Utility menu and press Enter to malfunction. Configuring the BIOS USB Configuration This option menu allows you to set the primary graphics adapter, and more . CMOS Setup Utility -

User Guide
Page 41
Configuring the BIOS ME Subsystem Configuration Select this option to change advanced ME Subsystem settings. 41
Configuring the BIOS ME Subsystem Configuration Select this option to change advanced ME Subsystem settings. 41

User Guide
Page 42
.../PNP Resource Management from the CMOS Setup Utility menu and press Enter to display the advanced settings. Plug & Play O/S This function sets whether the O/S or BIOS configures Plug and Play devices.
.../PNP Resource Management from the CMOS Setup Utility menu and press Enter to display the advanced settings. Plug & Play O/S This function sets whether the O/S or BIOS configures Plug and Play devices.

User Guide
Page 43
... assigned to a PCI VGA. Reserved Memory Size This option allows you to reserve IRQ's if necessary, it is installed. Palette Snooping This function allows the BIOS to inform the system that an ISA graphics device is recommended to leave this as Available. A setting of PCI/ISA external cards. Configuring the... BIOS Allocate IRQ to PCI VGA This function allows an IRQ to be used by PCI/PnP devices. OffBoard PCI/ISA IDE Card This function allows ...
... assigned to a PCI VGA. Reserved Memory Size This option allows you to reserve IRQ's if necessary, it is installed. Palette Snooping This function allows the BIOS to inform the system that an ISA graphics device is recommended to leave this as Available. A setting of PCI/ISA external cards. Configuring the... BIOS Allocate IRQ to PCI VGA This function allows an IRQ to be used by PCI/PnP devices. OffBoard PCI/ISA IDE Card This function allows ...

User Guide
Page 45
... display the settings. Power Management Features ACPI Configuration This menu will allow adjustment of the CD/DVD boot priority sequence. CMOS Setup Utility - Configuring the BIOS CD/DVD Drives This option menu allows you specification of Advanced ACPI configurations. 45 Power Management Features Select Power Management Features from the CMOS Setup...
... display the settings. Power Management Features ACPI Configuration This menu will allow adjustment of the CD/DVD boot priority sequence. CMOS Setup Utility - Configuring the BIOS CD/DVD Drives This option menu allows you specification of Advanced ACPI configurations. 45 Power Management Features Select Power Management Features from the CMOS Setup...

User Guide
Page 47
...and press Enter to display the settings. CPU Fan Mode Setting This function allows change of the fan mode configuration. Configuring the BIOS H/W Health Function This will enable or disable Hardware Health Monitoring. CMOS Setup Utility - Copyright (C) 1985-2005, American Megatrends ... Frequency Setting [Auto] PCIE Frequency Setting [100] QPI Frequency Selection [Auto] MCH Strap [Auto] Main Level Extreme Cooling [Disabled] EVGA VDroop Control [With VDroop] Current CPU VCore : 1.20000V Bootup CPU VCore [Auto] Eventual CPU VCore [Auto] Current Dimm Voltage : 1.50V ...
...and press Enter to display the settings. CPU Fan Mode Setting This function allows change of the fan mode configuration. Configuring the BIOS H/W Health Function This will enable or disable Hardware Health Monitoring. CMOS Setup Utility - Copyright (C) 1985-2005, American Megatrends ... Frequency Setting [Auto] PCIE Frequency Setting [100] QPI Frequency Selection [Auto] MCH Strap [Auto] Main Level Extreme Cooling [Disabled] EVGA VDroop Control [With VDroop] Current CPU VCore : 1.20000V Bootup CPU VCore [Auto] Eventual CPU VCore [Auto] Current Dimm Voltage : 1.50V ...
User Guide
Page 49
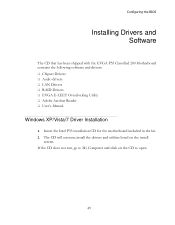
.... 49 If the CD does not run, go to My Computer and click on the install screen. Configuring the BIOS Installing Drivers and Software The CD that has been shipped with the EVGA P55 Classified 200 Motherboard contains the following software and drivers: Chipset Drivers Audio drivers LAN Drivers RAID Drivers...
.... 49 If the CD does not run, go to My Computer and click on the install screen. Configuring the BIOS Installing Drivers and Software The CD that has been shipped with the EVGA P55 Classified 200 Motherboard contains the following software and drivers: Chipset Drivers Audio drivers LAN Drivers RAID Drivers...

User Guide
Page 50
... CPU Set up boot strap processor information Set up boot strap processor for POST Enumerate and set up application processors Re-enable cache for the EVGA P55 Classified 200 Motherboard during system boot up. Appendix A. This Debug LED will also display current CPU temperatures after the system has fully booted into the Operating System.... Code 03 04 05 06 07 08 C0 C1 C2 C5 C6 C7 0A AMI POST Code Description Initialize BIOS. The POST Codes are displayed on the Debug LED readout located directly onboard the motherboard.
... CPU Set up boot strap processor information Set up boot strap processor for POST Enumerate and set up application processors Re-enable cache for the EVGA P55 Classified 200 Motherboard during system boot up. Appendix A. This Debug LED will also display current CPU temperatures after the system has fully booted into the Operating System.... Code 03 04 05 06 07 08 C0 C1 C2 C5 C6 C7 0A AMI POST Code Description Initialize BIOS. The POST Codes are displayed on the Debug LED readout located directly onboard the motherboard.

User Guide
Page 51
...Mouse Detect Keyboard Test input devices Early POST initialization of chipset registers Relocate System Management interrupt vector Uncompress and initialize BIOS module Initialize devices primary Initialize devices secondary Initialize output devices Allocate memory for ADM module Initialize silent boot module Display... Generate and write contents of ESCD Log errors encountered Display errors, if no display check monitor/video card Execute BIOS setup if needed or requested Late POST initialization of chipset registers Build ACPI tables Program peripheral parameters Initialize system management...
...Mouse Detect Keyboard Test input devices Early POST initialization of chipset registers Relocate System Management interrupt vector Uncompress and initialize BIOS module Initialize devices primary Initialize devices secondary Initialize output devices Allocate memory for ADM module Initialize silent boot module Display... Generate and write contents of ESCD Log errors encountered Display errors, if no display check monitor/video card Execute BIOS setup if needed or requested Late POST initialization of chipset registers Build ACPI tables Program peripheral parameters Initialize system management...

User Guide
Page 52
... vector Prepare BBS for Int 19 boot End of POST initialization Save system context for ACPI Pass control to OS Show CPU Temp (if enabled) EVGA Glossary of Terms ACPI - Advanced Configuration and Power Interface AFR - Advanced Programmable Interrupt Controller...
... vector Prepare BBS for Int 19 boot End of POST initialization Save system context for ACPI Pass control to OS Show CPU Temp (if enabled) EVGA Glossary of Terms ACPI - Advanced Configuration and Power Interface AFR - Advanced Programmable Interrupt Controller...

