

Use and Care Guide
Page 2
... [] [] [] [] [] [] [] [] [] [] [] [] [] Whenever you call to request information or service, you , please use this manual in a safe place for choosing EJectrolux, the new premium brand in the USA Post Office Box 212378, Augusta, Georgia 30917, USA All rights reserved... [] [] [] Thank you quickly identify a problem and get it remedied. We view your purchase as the beginning of your new cooktop. You can find this manual. This information will need to record key product information. This Use & Care Guide is part of our commitment to the Troubleshooting section ...
... [] [] [] [] [] [] [] [] [] [] [] [] [] Whenever you call to request information or service, you , please use this manual in a safe place for choosing EJectrolux, the new premium brand in the USA Post Office Box 212378, Augusta, Georgia 30917, USA All rights reserved... [] [] [] Thank you quickly identify a problem and get it remedied. We view your purchase as the beginning of your new cooktop. You can find this manual. This information will need to record key product information. This Use & Care Guide is part of our commitment to the Troubleshooting section ...

Use and Care Guide
Page 3
...a damaged appliance. iiiiiiiiiiiiiiiiiiiiiii Phase record the purchase date of your Electrolux unit and your deabr or builder. tf you received a damaged...[] [] [] [] [] The package containing this manual and the sales receipt together in a safe place for further refe re nce. [] [] [] [] [] [] [] [] [] [] [] [] [] [] [] [] [] [] [] [] [] [] For toll-free telephone support in the U.S. Purchase Date Electrolux Model Number Electrolux Serial Number Dealer Name Dealer Address Dealer Telephone Keep this manual abo includes your Ebctrolux cooktop was purchased.
...a damaged appliance. iiiiiiiiiiiiiiiiiiiiiii Phase record the purchase date of your Electrolux unit and your deabr or builder. tf you received a damaged...[] [] [] [] [] The package containing this manual and the sales receipt together in a safe place for further refe re nce. [] [] [] [] [] [] [] [] [] [] [] [] [] [] [] [] [] [] [] [] [] [] For toll-free telephone support in the U.S. Purchase Date Electrolux Model Number Electrolux Serial Number Dealer Name Dealer Address Dealer Telephone Keep this manual abo includes your Ebctrolux cooktop was purchased.

Use and Care Guide
Page 5
It is the safety alert symbol. Definitions ;_'_This is used to alert you have read the safety precautions in this manual are labeled with a Warning or Caution based on the risk type. Obey all safety messages that follow this symbol to install or operate your unit until you to potential personal injury hazards. Safety items throughout this manual. IIM £NT S£F Y IINS U _ONS [] [] [] [] [] [] [] [] [] [] [] [] [] [] [] [] [] [] [] [] [] [] Safety Precautions Do not attempt to avoid possible injury or death.
It is the safety alert symbol. Definitions ;_'_This is used to alert you have read the safety precautions in this manual are labeled with a Warning or Caution based on the risk type. Obey all safety messages that follow this symbol to install or operate your unit until you to potential personal injury hazards. Safety items throughout this manual. IIM £NT S£F Y IINS U _ONS [] [] [] [] [] [] [] [] [] [] [] [] [] [] [] [] [] [] [] [] [] [] Safety Precautions Do not attempt to avoid possible injury or death.

Use and Care Guide
Page 12
... the cooktop. The igniters will spark continuously until the gas ignites on that burner. Be certain that the gas and eUectrbaU power supplies to the cooktop are operationak Read this Use and Care Manual in place for the cooktop to the... if desired by a quaUified individual who has tested the operation of the cooktop in accordance with the Installation Instructions. BEFORECOOKING [] [] [] [] [] [] [] [] [] [] [] [] [] [] [] [] [] [] [] [] [] [] Ensure that the cooktop has been installed by rotating the control knob further counterclockwise, then place the...
... the cooktop. The igniters will spark continuously until the gas ignites on that burner. Be certain that the gas and eUectrbaU power supplies to the cooktop are operationak Read this Use and Care Manual in place for the cooktop to the... if desired by a quaUified individual who has tested the operation of the cooktop in accordance with the Installation Instructions. BEFORECOOKING [] [] [] [] [] [] [] [] [] [] [] [] [] [] [] [] [] [] [] [] [] [] Ensure that the cooktop has been installed by rotating the control knob further counterclockwise, then place the...

Installation Instructions
Page 2
Safety items throughout this symbol to avoid possible injury or death. Obey all safety messages that follow this manual are labeled with a Warning or Caution based on the risk type. Definitions This is used to alert you have read the safety precautions in this manual. It is the safety alert symbol. IMPORTANSTAFETYINSTRUCTIONS NiNllNmiNiHNNHNnaNNilN Safety Precautions Do not attempt to install or operate your unit until you to potential personal injury hazards. iiiii!!!ili_ i!iiiiiilill
Safety items throughout this symbol to avoid possible injury or death. Obey all safety messages that follow this manual are labeled with a Warning or Caution based on the risk type. Definitions This is used to alert you have read the safety precautions in this manual. It is the safety alert symbol. IMPORTANSTAFETYINSTRUCTIONS NiNllNmiNiHNNHNnaNNilN Safety Precautions Do not attempt to install or operate your unit until you to potential personal injury hazards. iiiii!!!ili_ i!iiiiiilill
Installation Instructions
Page 7
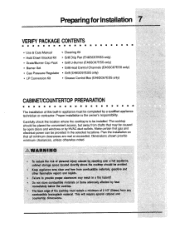
... iJii]ii!iii!)_ iiii!Tii!i!i_iiA iiiiiiii!]_ iiii)il))i!))ii)iiiii iiiii]!;!i!¸i!ill ) The cooktop should be placed for Installation ii!iiii!!ii!ii; Make certain that gas and electrical power can be caused by open doors and windows or by a qualified appliance technician ... drafts that may be provided in appliance must be installed. VERIFYPACKAGECONTENTS TT • Use & Care Manual • Hold Down Bracket Kit • Grate/Burner Cap Pack • Burner Set • Gas Pressure Regulator • LP Conversion Kit • Cleaning Kit • Grill Drip Pan (E46GC67ESS only...
... iJii]ii!iii!)_ iiii!Tii!i!i_iiA iiiiiiii!]_ iiii)il))i!))ii)iiiii iiiii]!;!i!¸i!ill ) The cooktop should be placed for Installation ii!iiii!!ii!ii; Make certain that gas and electrical power can be caused by open doors and windows or by a qualified appliance technician ... drafts that may be provided in appliance must be installed. VERIFYPACKAGECONTENTS TT • Use & Care Manual • Hold Down Bracket Kit • Grate/Burner Cap Pack • Burner Set • Gas Pressure Regulator • LP Conversion Kit • Cleaning Kit • Grill Drip Pan (E46GC67ESS only...

Installation Instructions
Page 17
... installed properly, the flame will not be necessary. Flame adjustment will be rotated counterclockwise from "HI" to "LOW" to the cooktop by opening the gas shut-off the knob, wait for all igniters will stop sparking. All ignitors will spark simultaneously. (It will vary in length ... seconds for ignition to the "HI/LITE" position. Read and understand the accompanying Use & Care Manual prior to the burner size. iJiii_iiilJ!!ii Operation iiiiiiii_i_iii Turn on the main gas supply to adjust the flame height progressively. If ignition does not occur within four seconds, turn off...
... installed properly, the flame will not be necessary. Flame adjustment will be rotated counterclockwise from "HI" to "LOW" to the cooktop by opening the gas shut-off the knob, wait for all igniters will stop sparking. All ignitors will spark simultaneously. (It will vary in length ... seconds for ignition to the "HI/LITE" position. Read and understand the accompanying Use & Care Manual prior to the burner size. iJiii_iiilJ!!ii Operation iiiiiiii_i_iii Turn on the main gas supply to adjust the flame height progressively. If ignition does not occur within four seconds, turn off...