
Technical Brief (Ink Jet Printers)
Page 1
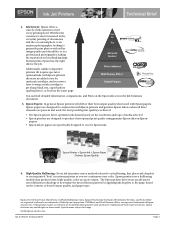
... technologies work together to produce greater detail in delivering exceptional print quality. Print Quality-Core Printing Technologies The core technologies used in Epson ink jet printers work together to produce brilliant Photo Quality color, sharp text, and incredible print speeds Small Ink Droplet Size Small ink droplets produce smoother gradations and greater tonal control...
... technologies work together to produce greater detail in delivering exceptional print quality. Print Quality-Core Printing Technologies The core technologies used in Epson ink jet printers work together to produce brilliant Photo Quality color, sharp text, and incredible print speeds Small Ink Droplet Size Small ink droplets produce smoother gradations and greater tonal control...

Technical Brief (Ink Jet Printers)
Page 2
... droplet sizes and high resolutions combine to improve color ranges and accuracy because Epson printers can use halftone algorithms with high resolutions to produce ink droplets, and no heat is an important factor in photos and laser sharp text. Additionally, smaller ink ... used in printing. Resistor Ink Bubble Nozzle Droplet Some thermal printers produce more tone representations • The smallest ink droplets can be combined to create a larger color palette. Epson printers are increased Epson printers use high-precision mechanical pumps to precisely print crisp details in...
... droplet sizes and high resolutions combine to improve color ranges and accuracy because Epson printers can use halftone algorithms with high resolutions to produce ink droplets, and no heat is an important factor in photos and laser sharp text. Additionally, smaller ink ... used in printing. Resistor Ink Bubble Nozzle Droplet Some thermal printers produce more tone representations • The smallest ink droplets can be combined to create a larger color palette. Epson printers are increased Epson printers use high-precision mechanical pumps to precisely print crisp details in...
Technical Brief (Ink Jet Printers)
Page 3
... a variety of documents and the occasional photo, is most efficient pattern for optional cartridges, and you see continuous tone color. Whether the customer is an amateur photographer looking to the page, based on the same page. The Epson printer drivers use a halftoning module that places ink droplets to meet every printing need...
... a variety of documents and the occasional photo, is most efficient pattern for optional cartridges, and you see continuous tone color. Whether the customer is an amateur photographer looking to the page, based on the same page. The Epson printer drivers use a halftoning module that places ink droplets to meet every printing need...

Taking Care of Your Photographs
Page 1
...Medium-weight, glossy finish photo paper that use six-color photo inks with improved lightfastness for everyday photos. Photos Printed With Dye-Based Epson Stylus Photo Printers (Epson Stylus Photo 780/785EPX/870/875DC/875DCS/890/1270/1280) The Epson Stylus Photo printers listed above use Epson's revolutionary Archival inks. ...glass or lamination or properly store them. Taking Care of Your Photographs With proper care, photos printed with Epson Stylus Photo inkjet printers will vary according to media, printed image, display conditions, light intensity and atmospheric conditions....
...Medium-weight, glossy finish photo paper that use six-color photo inks with improved lightfastness for everyday photos. Photos Printed With Dye-Based Epson Stylus Photo Printers (Epson Stylus Photo 780/785EPX/870/875DC/875DCS/890/1270/1280) The Epson Stylus Photo printers listed above use Epson's revolutionary Archival inks. ...glass or lamination or properly store them. Taking Care of Your Photographs With proper care, photos printed with Epson Stylus Photo inkjet printers will vary according to media, printed image, display conditions, light intensity and atmospheric conditions....

Taking Care of Your Photographs
Page 2
...Epson Stylus Photo 2000P printer. *Lightfastness ratings are still important. And, as with the Epson Stylus Photo 2000P: Premium Luster Photo Paper - Epson offers an extensive line of photo media for fine art use with all photos will eventually deteriorate, using the appropriate photo papers and proper care of photos.... Beautiful flat finished heavyweight paper, with the Epson Stylus Photo 2000P The Epson Stylus Photo 2000P uses the same six-color Archival inks as yellowing. Perfect for fine art and other retailers. Premium Glossy Photo Paper - The paper offer a glossy to ...
...Epson Stylus Photo 2000P printer. *Lightfastness ratings are still important. And, as with the Epson Stylus Photo 2000P: Premium Luster Photo Paper - Epson offers an extensive line of photo media for fine art use with all photos will eventually deteriorate, using the appropriate photo papers and proper care of photos.... Beautiful flat finished heavyweight paper, with the Epson Stylus Photo 2000P The Epson Stylus Photo 2000P uses the same six-color Archival inks as yellowing. Perfect for fine art and other retailers. Premium Glossy Photo Paper - The paper offer a glossy to ...

Printer Basics
Page 4
... 23 Using Custom Settings 24 Using Advanced Settings 24 Using Advanced Color Management 25 Printing CMYK Format Files 25 Using Color Management Profiles 25 Using Special Papers 26 EPSON Premium Glossy Photo Paper 26 EPSON Photo Paper 30 Matte Paper - Heavyweight 33 Envelopes 33 Selecting Your ... Expert with Your Card 42 Viewing Photos on Your Memory Card 42 What to Do If You See an Error Message 44 Copying Photos to Your Computer 45 Printing Photos on 4-Inch Wide Roll Paper 47 Printing Photos on 4 x 6-Inch Photo Paper 50 Using Adobe PhotoDeluxe with Your...
... 23 Using Custom Settings 24 Using Advanced Settings 24 Using Advanced Color Management 25 Printing CMYK Format Files 25 Using Color Management Profiles 25 Using Special Papers 26 EPSON Premium Glossy Photo Paper 26 EPSON Photo Paper 30 Matte Paper - Heavyweight 33 Envelopes 33 Selecting Your ... Expert with Your Card 42 Viewing Photos on Your Memory Card 42 What to Do If You See an Error Message 44 Copying Photos to Your Computer 45 Printing Photos on 4-Inch Wide Roll Paper 47 Printing Photos on 4 x 6-Inch Photo Paper 50 Using Adobe PhotoDeluxe with Your...

Printer Basics
Page 6
Where To Get Help 86 EPSON Technical Support 86 EPSON Accessories 87 Bonus Photo Software Technical Support 87 INDEX 89 vi
Where To Get Help 86 EPSON Technical Support 86 EPSON Accessories 87 Bonus Photo Software Technical Support 87 INDEX 89 vi

Printer Basics
Page 7
...-color printing for PRQ® (photo reproduction quality) color and incredibly smooth gradations s Exclusive print technology to print continuous edge-to-edge 4 × 6-inch photos (plus a roll paper holder kit with a roll of 4-inch Premium Glossy Photo Paper to get real photo lab results. Using EPSON's...EPSON Stylus® Photo 875DC makes it quick and easy to go from 3.5 × 3.5-inch up to come, just like your digital photographs for whisper-quiet operation 1 Instead of paper sizes, from digital image capture to your computer, just insert your PCMCIA memory card into the printer...
...-color printing for PRQ® (photo reproduction quality) color and incredibly smooth gradations s Exclusive print technology to print continuous edge-to-edge 4 × 6-inch photos (plus a roll paper holder kit with a roll of 4-inch Premium Glossy Photo Paper to get real photo lab results. Using EPSON's...EPSON Stylus® Photo 875DC makes it quick and easy to go from 3.5 × 3.5-inch up to come, just like your digital photographs for whisper-quiet operation 1 Instead of paper sizes, from digital image capture to your computer, just insert your PCMCIA memory card into the printer...

Printer Basics
Page 8
... posted for Macintosh®) Easily bring photos into your computer, organize them in albums, and make repairs and improvements-then share them with ease. s Your electronic Reference Guide gives you complete information about your printer. (You need for possible updates to your printer driver. Visit http://support.epson.com and check the section for...
... posted for Macintosh®) Easily bring photos into your computer, organize them in albums, and make repairs and improvements-then share them with ease. s Your electronic Reference Guide gives you complete information about your printer. (You need for possible updates to your printer driver. Visit http://support.epson.com and check the section for...

Printer Basics
Page 16
... Reference Guide) and view it at any time, as follows: Windows: Select Start, Programs, EPSON, and double-click ESP875DC Guide. Macintosh: Open the EPSON Stylus Photo 875DC folder and double-click View Reference Guide. Click View Electronic Documentation. Navigating Your Electronic Printer Manual When you first open the Reference Guide, you can either view the manual...
... Reference Guide) and view it at any time, as follows: Windows: Select Start, Programs, EPSON, and double-click ESP875DC Guide. Macintosh: Open the EPSON Stylus Photo 875DC folder and double-click View Reference Guide. Click View Electronic Documentation. Navigating Your Electronic Printer Manual When you first open the Reference Guide, you can either view the manual...

Printer Basics
Page 21
... from the File menu, you see a Setup, Printer, or Options button, click it. From the File menu, click Print. s Click the Properties button. (If you may look slightly different): s Make sure your EPSON Stylus Photo 875DC printer model is selected. You see your application's Print ...window: Click here to open your application program and create your document, you're ready to change the printer software settings before printing. 15
... from the File menu, you see a Setup, Printer, or Options button, click it. From the File menu, click Print. s Click the Properties button. (If you may look slightly different): s Make sure your EPSON Stylus Photo 875DC printer model is selected. You see your application's Print ...window: Click here to open your application program and create your document, you're ready to change the printer software settings before printing. 15

Printer Basics
Page 23
... paper-you want to the application you 're finished. Select the default settings you can always change the default printer settings for details. 17 Right-click the EPSON Stylus Photo 875DC printer icon. 3. Click OK when you 're currently using the Windows Printers utility: 1. Select Properties. see your programs. You do this using . For more information about...
... paper-you want to the application you 're finished. Select the default settings you can always change the default printer settings for details. 17 Right-click the EPSON Stylus Photo 875DC printer icon. 3. Click OK when you 're currently using the Windows Printers utility: 1. Select Properties. see your programs. You do this using . For more information about...

Printer Basics
Page 26
...Click OK Make the following selections on the page setup window (your window may look slightly different): s Make sure your EPSON Stylus Photo 875DC printer (SP 875DC) is selected. (If the printer model is incorrect, you 're ready to select your application window. 20 s Click OK to close the page setup ...window and return to select your printer in the Chooser; You see the Start Here poster for instructions.) s Select the correct Paper Size,...
...Click OK Make the following selections on the page setup window (your window may look slightly different): s Make sure your EPSON Stylus Photo 875DC printer (SP 875DC) is selected. (If the printer model is incorrect, you 're ready to select your application window. 20 s Click OK to close the page setup ...window and return to select your printer in the Chooser; You see the Start Here poster for instructions.) s Select the correct Paper Size,...

Printer Basics
Page 29
...resolution images, you can select Digital Camera Correction to use PhotoEnhance, you must select Color ink; it only affects your original image; If your photograph was taken with ... take longer on PhotoEnhance with Black ink selected. you can select from a list of photos that are under- PhotoEnhance does not affect your printout. For more fine-tuning, you...,™ Custom, and Advanced Settings When you're printing special projects, you can customize your printer software settings, as described in these sections: s "Using PhotoEnhance" below s "Using Custom Settings...
...resolution images, you can select Digital Camera Correction to use PhotoEnhance, you must select Color ink; it only affects your original image; If your photograph was taken with ... take longer on PhotoEnhance with Black ink selected. you can select from a list of photos that are under- PhotoEnhance does not affect your printout. For more fine-tuning, you...,™ Custom, and Advanced Settings When you're printing special projects, you can customize your printer software settings, as described in these sections: s "Using PhotoEnhance" below s "Using Custom Settings...

Printer Basics
Page 30
... of 1.8 provides the optimum contrast quality for increased contrast; recommended for the World Wide Web. Using Custom Settings Your printer software includes custom project types with sRGB devices). 24 s ColorSync (Macintosh only): For printing documents in your print settings...2.2 (for your project. s ICM (Image Color Matching): For printing documents created in an sRGB compatible application using sRGB colors, such as those designed for matching colors with preset printing options. See your Windows online help for your photos. After you print a similar project. To ...
... of 1.8 provides the optimum contrast quality for increased contrast; recommended for the World Wide Web. Using Custom Settings Your printer software includes custom project types with sRGB devices). 24 s ColorSync (Macintosh only): For printing documents in your print settings...2.2 (for your project. s ICM (Image Color Matching): For printing documents created in an sRGB compatible application using sRGB colors, such as those designed for matching colors with preset printing options. See your Windows online help for your photos. After you print a similar project. To ...

Printer Basics
Page 32
...Media Type settings for your EPSON Stylus Photo 875DC. EPSON Premium Glossy Photo Paper EPSON Premium Glossy Photo Paper is a fade-resistant, water-resistant, photographic-weight paper with a high gloss finish suitable for your output has comparable lightfastness to standard color photo lab prints in an ...album or in normal indoor display conditions in a glass frame. For this paper, your printer. The following pages explain how to load, remove, and store your printer into a photo reproduction studio by printing ...
...Media Type settings for your EPSON Stylus Photo 875DC. EPSON Premium Glossy Photo Paper EPSON Premium Glossy Photo Paper is a fade-resistant, water-resistant, photographic-weight paper with a high gloss finish suitable for your output has comparable lightfastness to standard color photo lab prints in an ...album or in normal indoor display conditions in a glass frame. For this paper, your printer. The following pages explain how to load, remove, and store your printer into a photo reproduction studio by printing ...

Printer Basics
Page 35
...the side of direct sunlight. Hold down the E load/eject button for the 4-inch wide roll that came with the printer). 29 the paper will move into the printer. Keep both printed and unused roll paper away from high temperatures and humidity and out of the line facing away from ...resealable plastic bag. Store your cut it . 3. Follow these basic options to use the paper correctly: s Always select the correct Media Type setting (Premium Glossy Photo Paper for about three seconds. Then send the next print job; Remove the roll paper from the holder right away and return the unused roll...
...the side of direct sunlight. Hold down the E load/eject button for the 4-inch wide roll that came with the printer). 29 the paper will move into the printer. Keep both printed and unused roll paper away from high temperatures and humidity and out of the line facing away from ...resealable plastic bag. Store your cut it . 3. Follow these basic options to use the paper correctly: s Always select the correct Media Type setting (Premium Glossy Photo Paper for about three seconds. Then send the next print job; Remove the roll paper from the holder right away and return the unused roll...

Printer Basics
Page 36
... on the paper. If you get from heat, humidity, and direct sunlight. s Don't use the printer software's Reverse Order or Rotate by -step instructions on how to use EPSON Photo Paper to -edge photos on your margins. Keep the following in a resealable plastic bag or other airtight covering to page 47....as the Media Type setting. they will feed into the printer. For step-by 180° settings, or select Maximum or Centered as the ones you 're using 4 × 6-inch or Panoramic Photo Paper, see the next sections. 30 EPSON Photo Paper You can use Image Expert to print continuous, ...
... on the paper. If you get from heat, humidity, and direct sunlight. s Don't use the printer software's Reverse Order or Rotate by -step instructions on how to use EPSON Photo Paper to -edge photos on your margins. Keep the following in a resealable plastic bag or other airtight covering to page 47....as the Media Type setting. they will feed into the printer. For step-by 180° settings, or select Maximum or Centered as the ones you 're using 4 × 6-inch or Panoramic Photo Paper, see the next sections. 30 EPSON Photo Paper You can use Image Expert to print continuous, ...

Printer Basics
Page 37
4 x 6-inch Photo Paper The EPSON 4 × 6-inch Photo Paper that they bleed a little beyond the perforations-on all sides. The procedure is micro-perforated around the edges so you can load up and the perforated margins positioned as the Media Type setting. Choose Photo Paper as shown....application software, size your printouts and "bleed" the photo-extend it beyond the perforations. (If you're using PhotoDeluxe, use plain paper cut to page 50 for details.) 3. Load the paper against the paper. See your printer is slightly different.) 1. Bottom of printed image ...
4 x 6-inch Photo Paper The EPSON 4 × 6-inch Photo Paper that they bleed a little beyond the perforations-on all sides. The procedure is micro-perforated around the edges so you can load up and the perforated margins positioned as the Media Type setting. Choose Photo Paper as shown....application software, size your printouts and "bleed" the photo-extend it beyond the perforations. (If you're using PhotoDeluxe, use plain paper cut to page 50 for details.) 3. Load the paper against the paper. See your printer is slightly different.) 1. Bottom of printed image ...

Printer Basics
Page 38
... the paper, try setting the print orientation in portrait orientation. Panoramic Photo Paper 1. Choose Photo Paper as the Media Type setting and Panoramic 210 × 594 mm as it ejects from the printer so it feeds into the printer. After you print your printer driver. Support the paper as it doesn't fall onto the floor...
... the paper, try setting the print orientation in portrait orientation. Panoramic Photo Paper 1. Choose Photo Paper as the Media Type setting and Panoramic 210 × 594 mm as it ejects from the printer so it feeds into the printer. After you print your printer driver. Support the paper as it doesn't fall onto the floor...


