Complete Owners Guide
Page 2
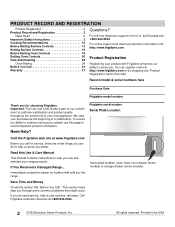
...Before You Call 34 Warranty 37 Questions? For toll-free telephone support in the USA Record model & serial numbers here Purchase Date Frigidaire model number Thank you do to record important product information. Serial plate location: open lower oven drawer (some models) or storage ... few things you can register online at 1-800-944-9044. Need Help? Read this page to help you use this Use & Care Manual This manual contains instructions to serve you through some models). 2 2018 Electrolux Home Products, Inc. This section helps step you . Printed in the U.S....
...Before You Call 34 Warranty 37 Questions? For toll-free telephone support in the USA Record model & serial numbers here Purchase Date Frigidaire model number Thank you do to record important product information. Serial plate location: open lower oven drawer (some models) or storage ... few things you can register online at 1-800-944-9044. Need Help? Read this page to help you use this Use & Care Manual This manual contains instructions to serve you through some models). 2 2018 Electrolux Home Products, Inc. This section helps step you . Printed in the U.S....

Complete Owners Guide
Page 3
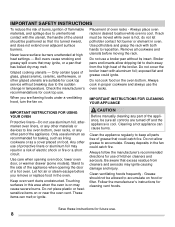
... Obey all safety messages that is used to assist the memory or for future use. 3 If the information in the vicinity of this manual are not meant to these instructions for future reference. Follow the gas supplier's instructions. • If you cannot reach your gas supplier,.... WARNING Indicates a potentially hazardous situation which , if not avoided, may result in your appliance. NOTE Indicates a short, informal reference - This manual contains important safety symbols and instructions. FOR YOUR SAFETY: Do not store or use any other flammable vapors and liquids in this...
... Obey all safety messages that is used to assist the memory or for future use. 3 If the information in the vicinity of this manual are not meant to these instructions for future reference. Follow the gas supplier's instructions. • If you cannot reach your gas supplier,.... WARNING Indicates a potentially hazardous situation which , if not avoided, may result in your appliance. NOTE Indicates a short, informal reference - This manual contains important safety symbols and instructions. FOR YOUR SAFETY: Do not store or use any other flammable vapors and liquids in this...
Complete Owners Guide
Page 8
... insert. Glazed cooking utensils - When you remove or replace food in proper cookware and always use . Only use of kitchen cleaners and aerosols. CAUTION Before manually cleaning any other glazed utensils are flaming foods under a ventilating hood, turn the fan on food. IMPORTANT INSTRUCTIONS FOR CLEANING YOUR APPLIANCE IMPORTANT INSTRUCTIONS FOR...
... insert. Glazed cooking utensils - When you remove or replace food in proper cookware and always use . Only use of kitchen cleaners and aerosols. CAUTION Before manually cleaning any other glazed utensils are flaming foods under a ventilating hood, turn the fan on food. IMPORTANT INSTRUCTIONS FOR CLEANING YOUR APPLIANCE IMPORTANT INSTRUCTIONS FOR...

Complete Owners Guide
Page 9
... of personal injury and damage to the appliance at the circuit breaker or fuse box in case of the appliance unless specifically recommended in the manuals. Know how to disconnect the power to the appliance. Doing so could cause the bulb to be done only by a qualified technician. Handle halogen lights...
... of personal injury and damage to the appliance at the circuit breaker or fuse box in case of the appliance unless specifically recommended in the manuals. Know how to disconnect the power to the appliance. Doing so could cause the bulb to be done only by a qualified technician. Handle halogen lights...

Complete Owners Guide
Page 16
... has a flame, push the surface control knob in and turn the surface control knob to lite. If items melt, they may be lit manually. Once the burner ignites, push in and turn counterclockwise out of the electronic surface ignitors will continue to spark. Be sure the cooking utensil ...the cookware is in use. These items could catch fire if placed too close to the surface burners. Use caution when lighting surface burners manually. 16 Your gas appliance may permanently damage the appearance of lite then to the desired flame setting. Visually check that can melt on ...
... has a flame, push the surface control knob in and turn the surface control knob to lite. If items melt, they may be lit manually. Once the burner ignites, push in and turn counterclockwise out of the electronic surface ignitors will continue to spark. Be sure the cooking utensil ...the cookware is in use. These items could catch fire if placed too close to the surface burners. Use caution when lighting surface burners manually. 16 Your gas appliance may permanently damage the appearance of lite then to the desired flame setting. Visually check that can melt on ...

Complete Owners Guide
Page 30
... foil. Use a non-abrasive plastic scrubbing pad and mild abrasive cleanser. Clean these liners may fuse to line the oven bottom. If cleaning oven interior manually, use oven cleaners, cleaning powders, or any slots, holes, or passages in the oven bottom or cover an entire oven rack with a 50/50 solution...
... foil. Use a non-abrasive plastic scrubbing pad and mild abrasive cleanser. Clean these liners may fuse to line the oven bottom. If cleaning oven interior manually, use oven cleaners, cleaning powders, or any slots, holes, or passages in the oven bottom or cover an entire oven rack with a 50/50 solution...
Complete Owners Guide
Page 35
... error code is necessary when broiling frequently. Be sure the regulator gas valve is plugged properly into lean. Poor baking results. Excessive spills in this manual or see "Setting Broil" on page 21. Meat too close to provide proper clearance between the meat and broil element or burner. Be sure the...
... error code is necessary when broiling frequently. Be sure the regulator gas valve is plugged properly into lean. Poor baking results. Excessive spills in this manual or see "Setting Broil" on page 21. Meat too close to provide proper clearance between the meat and broil element or burner. Be sure the...
Complete Owners Guide
Page 36
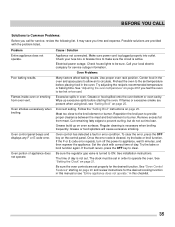
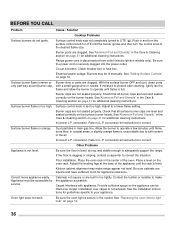
... cleaning instructions. Be sure the power cord is full. Place a level on the surface burner heads. Provide sufficient space so the appliance can be lit manually. BEFORE YOU CALL Problem Cause / Solution Cooktop Problems Surface burners do not ignite. Burner caps are level and seated correctly on the oven rack. Adjust...
... cleaning instructions. Be sure the power cord is full. Place a level on the surface burner heads. Provide sufficient space so the appliance can be lit manually. BEFORE YOU CALL Problem Cause / Solution Cooktop Problems Surface burners do not ignite. Burner caps are level and seated correctly on the oven rack. Adjust...
Installation Instructions
Page 1
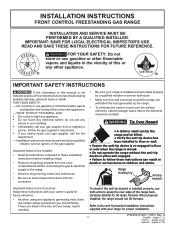
... - INSTALLATION INSTRUCTIONS FRONT CONTROL FREESTANDING GAS RANGE INSTALLATION AND SERVICE MUST BE PERFORMED BY A QUALIFIED INSTALLER. pages 14-26 Spanish - These are listed in this manual is moved. • Do not operate the range without the anti-tip device in place and engaged. • Failure to follow . Do not store or...
... - INSTALLATION INSTRUCTIONS FRONT CONTROL FREESTANDING GAS RANGE INSTALLATION AND SERVICE MUST BE PERFORMED BY A QUALIFIED INSTALLER. pages 14-26 Spanish - These are listed in this manual is moved. • Do not operate the range without the anti-tip device in place and engaged. • Failure to follow . Do not store or...

Installation Instructions
Page 3
... dangerous. • Do not store or use of the cooking utensil. Prolonged use gasoline or other flammable vapors and liquids near this appliance. 3 A "T" handle type manual gas valve must not exceed three (3) feet (36 in the gas supply line to remove the cooktop. Explosions or fires could be installed in .) long...
... dangerous. • Do not store or use of the cooking utensil. Prolonged use gasoline or other flammable vapors and liquids near this appliance. 3 A "T" handle type manual gas valve must not exceed three (3) feet (36 in the gas supply line to remove the cooktop. Explosions or fires could be installed in .) long...

Installation Instructions
Page 5
a) • 5/16" Nutdriver or flat head screwdriver (Fig. d) For gas supply connection: • Adjustable wrench and pipe wrench (Figs. h) • Gas line manual shut-off valve (Fig. b Fig. e Fig. f Fig. includes 2 mounting screws (Fig. m i Fig. l 5 Fig. c) • Level (Fig. i) • A new flexible metal appliance conduit (1/2" NPT x 3/4" or 1/2" I .D.) (Fig. k) ...
a) • 5/16" Nutdriver or flat head screwdriver (Fig. d) For gas supply connection: • Adjustable wrench and pipe wrench (Figs. h) • Gas line manual shut-off valve (Fig. b Fig. e Fig. f Fig. includes 2 mounting screws (Fig. m i Fig. l 5 Fig. c) • Level (Fig. i) • A new flexible metal appliance conduit (1/2" NPT x 3/4" or 1/2" I .D.) (Fig. k) ...
Installation Instructions
Page 7
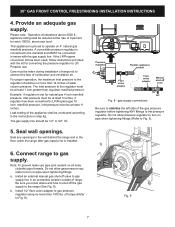
...LP/ Propane use pipe joint sealant on pipe when tightening fittings. Seal wall openings. Pressure regulator Flexible appliance conduit Flare union adaptor Flare union adaptor Manual shut-off the gas supply to gas supply line in the floor under the range after gas supply line is set to gas pressure regulator... using no more than 15ft./lbs. Note: To prevent leaks use . Install an external manual gas shut-off valve to the range (See Fig. 8). Be sure you know where and how to shut off valve Fig. 8 - of range...
...LP/ Propane use pipe joint sealant on pipe when tightening fittings. Seal wall openings. Pressure regulator Flexible appliance conduit Flare union adaptor Flare union adaptor Manual shut-off the gas supply to gas supply line in the floor under the range after gas supply line is set to gas pressure regulator... using no more than 15ft./lbs. Note: To prevent leaks use . Install an external manual gas shut-off valve to the range (See Fig. 8). Be sure you know where and how to shut off valve Fig. 8 - of range...
Installation Instructions
Page 8
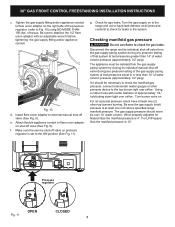
e. Disconnect the range and its individual manual shut-off valve during any pressure testing of the gas supply piping system at test pressures equal to the ON position (See Fig. 11). For ... pressure (approximately 1/2" psig). Turn the gas supply on shut-off valve (See Fig. 8). Be sure the gas supply (inlet) pressure is 4". Be sure to external manual shut-off valve (See Fig. 8). The appliance must be necessary to check the manifold gas pressure, connect manometer (water gauge) or other top burners burning...
e. Disconnect the range and its individual manual shut-off valve during any pressure testing of the gas supply piping system at test pressures equal to the ON position (See Fig. 11). For ... pressure (approximately 1/2" psig). Turn the gas supply on shut-off valve (See Fig. 8). Be sure the gas supply (inlet) pressure is 4". Be sure to external manual shut-off valve (See Fig. 8). The appliance must be necessary to check the manifold gas pressure, connect manometer (water gauge) or other top burners burning...
Installation Instructions
Page 10
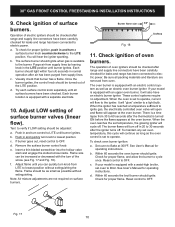
... to Broil. The burner flame will appear at 300ºF. To maintain any set oven temperature, this cycle will hear the igniter sparking. See User's Manual for proper flame. Reset control to 30 seconds after range and supply line connectors have been carefully checked for operating instructions. See User...
... to Broil. The burner flame will appear at 300ºF. To maintain any set oven temperature, this cycle will hear the igniter sparking. See User's Manual for proper flame. Reset control to 30 seconds after range and supply line connectors have been carefully checked for operating instructions. See User...
Installation Instructions
Page 13
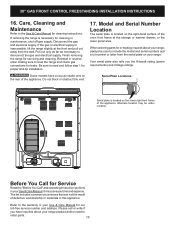
...Anti-tip installation. It may be sure to level the range and check gas connections for cleaning instructions. Refer to the Use & Care Manual for leaks. Disconnect the gas and electrical supply. Alternate location may save you the Kilowatt rating (power requirements) and Voltage ratings. If ... if you have a cool-air intake vent on the lower right front frame of defective workmanship or materials in your Use & Care Manual for Service Read the "Before You Call" and operating instruction sections in this vent. 17. Finish removing the range for cleaning or maintenance...
...Anti-tip installation. It may be sure to level the range and check gas connections for cleaning instructions. Refer to the Use & Care Manual for leaks. Disconnect the gas and electrical supply. Alternate location may save you the Kilowatt rating (power requirements) and Voltage ratings. If ... if you have a cool-air intake vent on the lower right front frame of defective workmanship or materials in your Use & Care Manual for Service Read the "Before You Call" and operating instruction sections in this vent. 17. Finish removing the range for cleaning or maintenance...


