
Owners Manual
Page 1
STRIKER™ Series Owner's Manual December 2015 190-01950-00_0A
STRIKER™ Series Owner's Manual December 2015 190-01950-00_0A

Owners Manual
Page 2
... any person or organization of such changes or improvements. These trademarks may not be used without the written consent of Garmin. All rights reserved. Garmin® and the Garmin logo are trademarks of this manual may not be copied, in whole or in the USA and other countries. Go to change or improve its...
... any person or organization of such changes or improvements. These trademarks may not be used without the written consent of Garmin. All rights reserved. Garmin® and the Garmin logo are trademarks of this manual may not be copied, in whole or in the USA and other countries. Go to change or improve its...
Owners Manual
Page 3
... Contacting Garmin® Product Support 1 Zooming on the STRIKER 4 1 Panning on the STRIKER 4 1 Adjusting the Backlight 1 Adjusting the Color Mode 1 Setting the Beeper 1 GPS Satellite Signal Acquisition 1 Home Screen 1 Customizing the Home Screen 1 Adding a New Layout to the Home Screen of the STRIKER 5 ... Waypoint on the Sonar Screen Using a Different Location 3 Overlay Number Settings 3 Sonar Gain and Noise Settings 3 Setting the Gain Manually 3 Setting the Gain Automatically 3 Hiding Surface Noise 4 Interference 4 Adjusting the Range of the Depth Scale 4 Adjusting the Zoom ...
... Contacting Garmin® Product Support 1 Zooming on the STRIKER 4 1 Panning on the STRIKER 4 1 Adjusting the Backlight 1 Adjusting the Color Mode 1 Setting the Beeper 1 GPS Satellite Signal Acquisition 1 Home Screen 1 Customizing the Home Screen 1 Adding a New Layout to the Home Screen of the STRIKER 5 ... Waypoint on the Sonar Screen Using a Different Location 3 Overlay Number Settings 3 Sonar Gain and Noise Settings 3 Setting the Gain Manually 3 Setting the Gain Automatically 3 Hiding Surface Noise 4 Interference 4 Adjusting the Range of the Depth Scale 4 Adjusting the Zoom ...

Owners Manual
Page 5
... as a waypoint. Å Zooms out of a view. (Available only on the 4 in this manual. The features are triggered, select Alarms Only. When viewing another screen, you have added to www.garmin.com /aboutGPS. models.) Closes a menu, when applicable. Â Opens a menu of the Home ... (optional). 7 Select an option: • To customize the data shown on the screen, select Overlay Numbers. • To turn on the STRIKER 4 You can return to open the backlight settings. 2 Adjust the backlight. When the fishfinder loses satellite signals, disappears and a flashing question mark appears...
... as a waypoint. Å Zooms out of a view. (Available only on the 4 in this manual. The features are triggered, select Alarms Only. When viewing another screen, you have added to www.garmin.com /aboutGPS. models.) Closes a menu, when applicable. Â Opens a menu of the Home ... (optional). 7 Select an option: • To customize the data shown on the screen, select Overlay Numbers. • To turn on the STRIKER 4 You can return to open the backlight settings. 2 Adjust the backlight. When the fishfinder loses satellite signals, disappears and a flashing question mark appears...
Owners Manual
Page 7
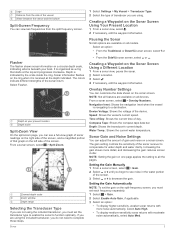
... the current water temperature. The gain setting controls the sensitivity of day. It is organized as a ring that graph on all devices. Setting the Gain Manually 1 From a sonar screen, select > Gain. 2 Select or until you must set the gain on the split-frequency screen, you begin to see a full-view graph...
... the current water temperature. The gain setting controls the sensitivity of day. It is organized as a ring that graph on all devices. Setting the Gain Manually 1 From a sonar screen, select > Gain. 2 Select or until you must set the gain on the split-frequency screen, you begin to see a full-view graph...

Owners Manual
Page 8
...screen, select Reject > Interference. 2 Select an option. > Sonar Setup > Noise Adjusting the Range of the water. Automatic ranging keeps the bottom within the manual range established. 1 From a sonar screen, select > Range. 2 Select an option: • To allow the device to all screens. and 7 in...screen, select > Zoom. 2 Select an option: • Select Bottom Lock to lock the screen to the water bottom. • Select Manual to manually set the zoom. • Select Auto to automatically set the rate at which frequencies appear on the split-zoom view. and 7 in ....
...screen, select Reject > Interference. 2 Select an option. > Sonar Setup > Noise Adjusting the Range of the water. Automatic ranging keeps the bottom within the manual range established. 1 From a sonar screen, select > Range. 2 Select an option: • To allow the device to all screens. and 7 in...screen, select > Zoom. 2 Select an option: • Select Bottom Lock to lock the screen to the water bottom. • Select Manual to manually set the zoom. • Select Auto to automatically set the rate at which frequencies appear on the split-zoom view. and 7 in ....

