
Use & Care
Page 2
... Do not use broken, cracked, or loose cutting blades. 14. Injury can result if moving parts. 6. Do not leave blender unattended while it is switched ON, switch OFF immediately and tighten jar onto cutting assembly. 19. Unplug cord from wall outlet. 21...2 IMPORTANT SAFEGUARDS When using electric appliances, basic safety precautions should turn the control to the blender. To protect against risk of injury, never place cutting assembly blades on cutting assembly firmly. Read all instructions. 2. Screw on base without jar properly attached. 15. Close supervision...
... Do not use broken, cracked, or loose cutting blades. 14. Injury can result if moving parts. 6. Do not leave blender unattended while it is switched ON, switch OFF immediately and tighten jar onto cutting assembly. 19. Unplug cord from wall outlet. 21...2 IMPORTANT SAFEGUARDS When using electric appliances, basic safety precautions should turn the control to the blender. To protect against risk of injury, never place cutting assembly blades on cutting assembly firmly. Read all instructions. 2. Screw on base without jar properly attached. 15. Close supervision...
Use & Care
Page 3
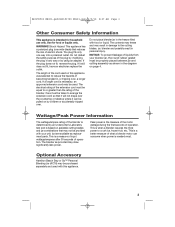
...to crush ice, frozen fruit, etc. Optional Accessory Hamilton Beach Stay or Go™ Personal Blending Jar (AC16) may draw significantly less power. The blender as shown in , or tripping over, a longer cord. Peak power is based on available cutting blades and jar combinations that it still does not ...in the freezer filled with your blender jar, the round rubber gasket must be equal to or greater than the rating of liquids from your unit, but are available as replacement parts. Care must be properly placed between jar and cutting assembly as provided may be provided ...
...to crush ice, frozen fruit, etc. Optional Accessory Hamilton Beach Stay or Go™ Personal Blending Jar (AC16) may draw significantly less power. The blender as shown in , or tripping over, a longer cord. Peak power is based on available cutting blades and jar combinations that it still does not ...in the freezer filled with your blender jar, the round rubber gasket must be equal to or greater than the rating of liquids from your unit, but are available as replacement parts. Care must be properly placed between jar and cutting assembly as provided may be provided ...

Use & Care
Page 4
Care should be taken when handling the cutting assembly as the blades are very sharp. Wipe blender base with a damp cloth or sponge. Filler Cap Lid Jar Dispenser Assembly Spout Cap Gasket Cutting Assembly Spout Cap Storage (bottom of blender) Base Control Knob Control Knob Setting Dispense Smoothie Milkshake Icy Drink Blender Speed 1 2 3 4 4 DO NOT IMMERSE BASE IN WATER. 840155503 ENv01.qxd:840153700 ENv01.qxd 7/9/10 8:37 AM Page 4 Parts and Features BEFORE FIRST USE: After unpacking blender, wash everything except blender base in hot, soapy water. Dry thoroughly.
Care should be taken when handling the cutting assembly as the blades are very sharp. Wipe blender base with a damp cloth or sponge. Filler Cap Lid Jar Dispenser Assembly Spout Cap Gasket Cutting Assembly Spout Cap Storage (bottom of blender) Base Control Knob Control Knob Setting Dispense Smoothie Milkshake Icy Drink Blender Speed 1 2 3 4 4 DO NOT IMMERSE BASE IN WATER. 840155503 ENv01.qxd:840153700 ENv01.qxd 7/9/10 8:37 AM Page 4 Parts and Features BEFORE FIRST USE: After unpacking blender, wash everything except blender base in hot, soapy water. Dry thoroughly.

Use & Care
Page 5
... blending is securely seated. 840155503 ENv01.qxd:840153700 ENv01.qxd 7/9/10 8:37 AM Page 5 How to Assemble IMPORTANT: Your blender jar and cutting assembly are subject to tighten. 4. OPTIONAL: When dispenser is not needed, replace dispenser with filler cap on blender base, making sure it is complete, lift the jar straight up . When spout cap is damaged...
... blending is securely seated. 840155503 ENv01.qxd:840153700 ENv01.qxd 7/9/10 8:37 AM Page 5 How to Assemble IMPORTANT: Your blender jar and cutting assembly are subject to tighten. 4. OPTIONAL: When dispenser is not needed, replace dispenser with filler cap on blender base, making sure it is complete, lift the jar straight up . When spout cap is damaged...

Use & Care
Page 6
... NOT remove seal rings from cutting assembly. 5. Wipe blender base and cord with a damp cloth or sponge. Reassemble cutting assembly and gasket onto jar, and replace jar onto blender base. To clean jar, unscrew cutting assembly from jar. 4. Flush soapy water through dispenser until cleaned. Flush clean water through dispenser until cleaned. Do not wash cutting assembly or gasket in the dishwasher...
... NOT remove seal rings from cutting assembly. 5. Wipe blender base and cord with a damp cloth or sponge. Reassemble cutting assembly and gasket onto jar, and replace jar onto blender base. To clean jar, unscrew cutting assembly from jar. 4. Flush soapy water through dispenser until cleaned. Flush clean water through dispenser until cleaned. Do not wash cutting assembly or gasket in the dishwasher...

Use & Care
Page 7
.... • Make sure gasket is in place on cutting assembly. • Make sure gasket is pushed down tightly on jar. Dispenser leaks. • Make sure seal rings are in place on dispenser adapter. • Tighten dispenser cap (located above dispenser body). Does not dispense. • Make sure blender is recommended. Wash dispenser and parts in "Blending Specific Foods" section...
.... • Make sure gasket is in place on cutting assembly. • Make sure gasket is pushed down tightly on jar. Dispenser leaks. • Make sure seal rings are in place on dispenser adapter. • Tighten dispenser cap (located above dispenser body). Does not dispense. • Make sure blender is recommended. Wash dispenser and parts in "Blending Specific Foods" section...


