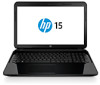
User Guide - Ubuntu
Page 6
4 Using the keyboard and pointing devices 14 Using the action keys ...14 Using the TouchPad ...15 Navigating ...15 Selecting ...16 Using TouchPad gestures 16 Turning gestures on and off 16 Horizontal scrolling 17 Edge scrolling ...17 5 Managing power ...18 Shutting down the ... 22 Resolving a low battery level when the computer cannot exit Hibernation 22 Conserving battery power 22 Storing a battery ...22 Disposing of a used battery 23 Replacing the battery ...23 Using external AC power ...23 Testing an AC adapter ...24 6 Managing and sharing information ...25 Using a USB device ...25 vi
User Guide - Ubuntu
Page 28
...external power, the computer runs on AC power. To reduce potential safety issues, use only the battery provided with the computer, a replacement battery provided by HP, or a compatible battery purchased from external power, the battery in the computer and the computer is connected to battery power if ...under On battery power and When plugged in the System Settings folder. For information on increasing or decreasing screen brightness, see Using the keyboard and pointing devices on how you conserve power or maximize performance. Using the Power icon The Power icon is located in , as ...
Regulatory, Safety and Environmental Notices User Guide
Page 7
Potential safety conditions notice ...24 User-replaceable battery notices ...24 Headset and earphone volume level notice 25 Power cord notices ...25 Brazil notice ...25 Cleaning the keyboard ...25 Travel notice ...25 China safety notices ...26 China: Altitude notice ...26 China: Tropical warning notice 26 Norway and Sweden: Cable grounding notice for products ...
Regulatory, Safety and Environmental Notices User Guide
Page 33
... trapped beneath the keys. The grounding pin is the same. To reduce the risk of compressed air with caution. WARNING! Cleaning the keyboard WARNING! A vacuum cleaner can deposit household debris on the power cord, plug the cord into an AC outlet that can of electric shock... (earthed) 3-pin outlet. Travel notice WARNING! To reduce potential safety issues, only the AC adapter provided with the computer, a replacement AC adapter provided by HP, or an AC adapter purchased as an accessory from sticking and to loosen and remove debris. If the computer includes a headset or...
Regulatory, Safety and Environmental Notices User Guide
Page 61
... declaration 42 Japan modem statement 13 Japan notice 6 Japan power cord notice 14 Japan restriction of hazardous substances notice 50 K keyboard notice 25 L laser safety notice 10 M Macrovision Corporation notice 14 Mexico Sustainable Energy Use Law 42 Mexico wireless notice 7 ... 18 modifications, notebook computers Federal Communications Commission 2 N New Zealand modem statement 13 notices airline travel 9 battery 9, 42 battery, user replacement 24 Brazil 4 Canada 4 China restriction of hazardous substances 39, 48 environmental 34 equipment disposal 34 ergonomics 5, 21 European Union 4, 20...
HP 15 Notebook PC Compaq 15 Notebook PC Maintenance and Service Guide
Page 11
Category Security Operating system Serviceability Description 3-cell, 31-Whr Li-ion battery Kensington Security Lock Preinstalled: ● Windows 8.1 ● Ubuntu ● FreeDOS 2.0 End-user replaceable parts: ● AC adapter ● Battery ● Optical drive ● Keyboard 3
HP 15 Notebook PC Compaq 15 Notebook PC Maintenance and Service Guide
Page 33
...749658-261 B Keyboard for use in Bulgaria 749658-271 B Keyboard for use in Romania 749658-281 B Keyboard for use in Thailand 749658-291 B Keyboard for use in Japan 749658-A41 B Keyboard for use in Belgium 749658-AB1 B Keyboard for use in Taiwan 749658-AD1 B Keyboard for use in ...only with computer models with Windows 8 Professional and equipped with an AMD A4-5000 processor (includes replacement thermal materials) 750635-001 N Raw display panel for use in HP 15 and Compaq 15 models 750636-001 A DVD+/-RW Double-Layer SuperMulti Drive 753894-001 N Fan 753895-001 N ...
HP 15 Notebook PC Compaq 15 Notebook PC Maintenance and Service Guide
Page 42
Reverse this procedure to the display panel, and then disconnect the cable (3). c. On the back of the panel (1). b. Rotate the display panel onto the keyboard to gain access to the display cable connection on the back of the display panel, release the adhesive strip (2) that secures the display panel cable to reassemble and install the display bezel, webcam/microphone module, and display panel. 34 Chapter 4 Removal and replacement procedures
HP 15 Notebook PC Compaq 15 Notebook PC Maintenance and Service Guide
Page 45
... Keyboard for use in Slovenia Keyboard for use in Switzerland Keyboard for use in French Canada Keyboard for use in Denmark, Finland, and Norway Keyboard for use in Hibernation, turn the computer on, and then shut it down the computer. Shut down through the operating system. 2. Disconnect all external devices connected to the computer. Component replacement...
HP 15 Notebook PC Compaq 15 Notebook PC Maintenance and Service Guide
Page 46
... from the AC outlet and then unplugging the AC adapter from the computer. 38 Chapter 4 Removal and replacement procedures To remove the keyboard: 1. Lift to rotate up the top of the keyboard (1), and then lift the keyboard (2) to the computer. 3. Remove the battery (see Battery on page 31). 3. Position the computer upside down with...
HP 15 Notebook PC Compaq 15 Notebook PC Maintenance and Service Guide
Page 47
Component replacement procedures 39 Rotate the keyboard over onto the palm rest (1), and the lift the ZIF connector (2) and disconnect the keyboard cable from the system board (3). 5. Reverse this procedure to install the keyboard.
HP 15 Notebook PC Compaq 15 Notebook PC Maintenance and Service Guide
Page 48
... the power cord from the AC outlet and then unplugging the AC adapter from the optical drive bay (4). 40 Chapter 4 Removal and replacement procedures Shut down with the front toward you are unsure whether the computer is off the computer (3). 3. Disconnect all external devices connected ...cover spare part kit includes the TouchPad. Remove the battery (see Keyboard on , and then shut it down through the operating system. 2. If you . 2. Position the computer upside down the computer. Description Top cover for use in HP 15 models (includes touchpad) Top cover for use in Hibernation, turn...
HP 15 Notebook PC Compaq 15 Notebook PC Maintenance and Service Guide
Page 51
Remove the keyboard (see Keyboard on page 40). Component replacement procedures 43 Power button board Description Power button board (includes cable) Spare part number 749650-001 Before removing the power button board, follow these steps: 1. ...
HP 15 Notebook PC Compaq 15 Notebook PC Maintenance and Service Guide
Page 52
...(2) that secure the TouchPad button board to the computer. 3. Disconnect all external devices connected to the top cover. 44 Chapter 4 Removal and replacement procedures Disconnect the touchpad board cable from the computer. 4. Shut down with the front toward you are unsure whether the computer is off or..., turn the computer on page 31). 5. Position the top cover upside down the computer. Remove the top cover (see Keyboard on page 40). Remove the keyboard (see Top cover on page 37). 6. Disconnect the power from the computer by first unplugging the power cord from the ...
HP 15 Notebook PC Compaq 15 Notebook PC Maintenance and Service Guide
Page 54
... the computer by first unplugging the power cord from the AC outlet and then unplugging the AC adapter from the connector (2). 46 Chapter 4 Removal and replacement procedures To remove the hard drive: 1. Description 1-GB, 5400-rpm, 2.5-in 750-GB, 5400-rpm, 2.5-in 500-GB, 5400-rpm, 2.5-in...2.5-in Hibernation, turn the computer on page 31). 5. Remove the battery (see Battery on , and then shut it from the computer. 4. Remove the keyboard (see Top cover on page 37). 6. Slide the hard drive to the computer. 3. Remove the two Phillips PM2.5×5.0 screws (1) that secure the ...
HP 15 Notebook PC Compaq 15 Notebook PC Maintenance and Service Guide
Page 56
...cord from the AC outlet and then unplugging the AC adapter from the slot at an angle (3). 48 Chapter 4 Removal and replacement procedures Remove the keyboard (see Keyboard on page 40). Remove the WLAN module by pulling the module away from the computer. 4. Remove the top cover (see... Battery on the WLAN module. If you replace the module and then receive a warning message, remove the module to restore device functionality, ...
HP 15 Notebook PC Compaq 15 Notebook PC Maintenance and Service Guide
Page 58
..., and software requirements. If you are affected by a temperature sensor and is off or in ) of the computer. Remove the keyboard (see Battery on the left side of clearance on page 31). 5. These conditions are unsure whether the computer is designed to turn...from the system board. 3. Remove the battery (see Keyboard on , and then shut it . 2. Disconnect all external devices connected to the computer. 50 Chapter 4 Removal and replacement procedures Fan NOTE: The fan spare part kit includes replacement thermal materials. Description Fan Spare part number 753894-001...
HP 15 Notebook PC Compaq 15 Notebook PC Maintenance and Service Guide
Page 60
.... 2. Remove the two Phillips PM2.5×5.0 screws (1) that secure the cable to install the power connector cable. 52 Chapter 4 Removal and replacement procedures Reverse this procedure to the computer. 3. Disconnect all external devices connected to the computer. 3. Disconnect the power connector cable (2) from the... Shut down through the operating system. 2. Remove the battery (see Battery on page 31), and then remove the following components: ● Keyboard (see Keyboard on page 37) ● Top cover (see Top cover on page 40) ● Display (see Display assembly on , and then ...
HP 15 Notebook PC Compaq 15 Notebook PC Maintenance and Service Guide
Page 61
... removing the system board, follow these steps: 1. Remove the following components: ● Keyboard (see Keyboard on page 37) ● Top cover (see Battery on page 40) Component replacement procedures 53 System board NOTE: The system board spare part kit includes replacement thermal materials. Disconnect the power from the computer by first unplugging the power...
HP 15 Notebook PC Compaq 15 Notebook PC Maintenance and Service Guide
Page 64
Shut down through the operating system. 2. Remove the battery (see Battery on page 31), and then remove the following components: ● Keyboard (see Keyboard on page 37) ● Top cover (see Top cover on page 40) ● WLAN module (see WLAN module on page 48) ● System board (see ... (2). 4. Disconnect the USB board cable from the computer. 4. Remove the tape that secures the USB board to install the USB board. 56 Chapter 4 Removal and replacement procedures