End User License Agreement
Page 2
... or supplements to the original Software Product provided by the Microsoft License Agreement. 2. TRANSFER. Any transfer must first be governed by HP unless HP provides other terms will also terminate upon conditions set forth elsewhere in this EULA. 5. Restrictions. TERM. CONSENT TO USE OF DATA. ...you may only be an indirect transfer, such as other form, may no longer use . entirely by HP or its affiliates may not reverse engineer, decompile, or disassemble the Software Product, except and only to the extent that formed the basis for commercial timesharing or bureau ...
... or supplements to the original Software Product provided by the Microsoft License Agreement. 2. TRANSFER. Any transfer must first be governed by HP unless HP provides other terms will also terminate upon conditions set forth elsewhere in this EULA. 5. Restrictions. TERM. CONSENT TO USE OF DATA. ...you may only be an indirect transfer, such as other form, may no longer use . entirely by HP or its affiliates may not reverse engineer, decompile, or disassemble the Software Product, except and only to the extent that formed the basis for commercial timesharing or bureau ...

Service Guide
Page 64
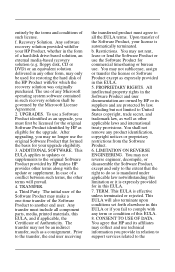
... assembly procedures. Apply pressure only at the points designated in mind during disassembly and reassembly can damage plastic parts. Use care when handling the plastic parts. NOTE: As you must keep in the maintenance instructions. 56 Chapter 4 Removal ...
... assembly procedures. Apply pressure only at the points designated in mind during disassembly and reassembly can damage plastic parts. Use care when handling the plastic parts. NOTE: As you must keep in the maintenance instructions. 56 Chapter 4 Removal ...

Service Guide
Page 71
... (1-year warranty) 3-cell, 31 WHr, 2.8 Ah Li-ion battery Spare part number 631243-001 634089-001 628668-001 628670-001 659083-001 628664-001 Before disassembling the computer, follow these steps: 1. Disconnect the power from the computer by inserting it down on a flat surface, with the battery bay toward you hear...
... (1-year warranty) 3-cell, 31 WHr, 2.8 Ah Li-ion battery Spare part number 631243-001 634089-001 628668-001 628670-001 659083-001 628664-001 Before disassembling the computer, follow these steps: 1. Disconnect the power from the computer by inserting it down on a flat surface, with the battery bay toward you hear...
Service Guide
Page 72
... in the SIM slot, it down the computer. Remove the SIM: 1. Remove the battery (see Battery on , and then shut it must be removed before disassembling the computer. Shut down through the operating system. 2. Be sure that the SIM is off or in the SIM slot after reassembling the computer. SIM...
... in the SIM slot, it down the computer. Remove the SIM: 1. Remove the battery (see Battery on , and then shut it must be removed before disassembling the computer. Shut down through the operating system. 2. Be sure that the SIM is off or in the SIM slot after reassembling the computer. SIM...

Service Guide
Page 77
...of the computer (4), and then lift the door off or in the Plastics Kit, spare part number 641832-001 for HP ProBook 6460b models and 642804-001 for HP EliteBook 8460p/w models. Reverse the removal procedures to disengage the door from the computer. 4. Slide the release latch (3) to ... from the AC outlet, and then unplugging the AC adapter from the computer. 4. Bottom door The bottom door is off the computer (5). Before disassembling the computer, follow these steps: 1. Remove the battery (see Battery on page 63). Remove the bottom door: 1. Slide the release latch (1)...
...of the computer (4), and then lift the door off or in the Plastics Kit, spare part number 641832-001 for HP ProBook 6460b models and 642804-001 for HP EliteBook 8460p/w models. Reverse the removal procedures to disengage the door from the computer. 4. Slide the release latch (3) to ... from the AC outlet, and then unplugging the AC adapter from the computer. 4. Bottom door The bottom door is off the computer (5). Before disassembling the computer, follow these steps: 1. Remove the battery (see Battery on page 63). Remove the bottom door: 1. Slide the release latch (1)...

Service Guide
Page 83
... 75 Hard Drive Adapter Kit Spare part number 633252-001 634919-001 627731-001 635225-001 669684-001 643916-001 643917-001 643921-001 Before disassembling the computer, follow these steps: 1. If necessary, lift the smart card reader out of the way. 3. Shut down , with the battery bay toward you are...
... 75 Hard Drive Adapter Kit Spare part number 633252-001 634919-001 627731-001 635225-001 669684-001 643916-001 643917-001 643921-001 Before disassembling the computer, follow these steps: 1. If necessary, lift the smart card reader out of the way. 3. Shut down , with the battery bay toward you are...

Service Guide
Page 152
...for the display assembly. When you remove these components, handle them carefully. This section provides disassembly instructions for recycling purposes are general disassembly instructions. This HP product contains mercury in the backlight in general household waste. For disposal or recycling information, contact...from one computer model to the backlight (1) and the liquid crystal display (LCD) panel (2). Disposal of mercury may be disassembled to gain access to another. 144 Chapter 9 Recycling The backlight contains mercury. NOTE: The procedures provided in your local ...
...for the display assembly. When you remove these components, handle them carefully. This section provides disassembly instructions for recycling purposes are general disassembly instructions. This HP product contains mercury in the backlight in general household waste. For disposal or recycling information, contact...from one computer model to the backlight (1) and the liquid crystal display (LCD) panel (2). Disposal of mercury may be disassembled to gain access to another. 144 Chapter 9 Recycling The backlight contains mercury. NOTE: The procedures provided in your local ...

Service Guide
Page 153
Lift up and out on the left and right inside edges (1) and the top and bottom inside edges (2) of the display bezel until the bezel disengages from the display assembly. 3. Remove the display bezel (3). Display 145 Perform the following steps to the display assembly. 2. Remove all screw covers (1) and screws (2) that secure the display bezel to disassemble the display assembly: 1.
Lift up and out on the left and right inside edges (1) and the top and bottom inside edges (2) of the display bezel until the bezel disengages from the display assembly. 3. Remove the display bezel (3). Display 145 Perform the following steps to the display assembly. 2. Remove all screw covers (1) and screws (2) that secure the display bezel to disassemble the display assembly: 1.
Reference Guide
Page 40
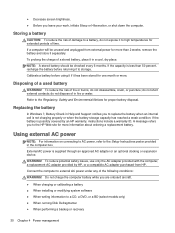
... down the computer. Storing a battery CAUTION: To reduce the risk of damage to a battery, do not disassemble, crush, or puncture; If the battery is possibly covered by HP, or a compatible AC adapter purchased from external power for proper battery disposal. External AC power is less than... external contacts; To reduce potential safety issues, use only the AC adapter provided with the computer, a replacement AC adapter provided by an HP warranty, instructions include a warranty ID. ● Decrease screen brightness. ● Before you to replace the battery when an internal cell ...
... down the computer. Storing a battery CAUTION: To reduce the risk of damage to a battery, do not disassemble, crush, or puncture; If the battery is possibly covered by HP, or a compatible AC adapter purchased from external power for proper battery disposal. External AC power is less than... external contacts; To reduce potential safety issues, use only the AC adapter provided with the computer, a replacement AC adapter provided by an HP warranty, instructions include a warranty ID. ● Decrease screen brightness. ● Before you to replace the battery when an internal cell ...


