
Reference Guide
Page 2
Reproduction, adaptation, or translation of this manual, including, but not limited to, the implied warranties of merchantability and fitness for home and other limited viewing uses only ... by Macrovision Corporation. Pentium® and the Intel Inside logo are reserved. The programs that control this product are copyrighted and all rights are U.S. Reproduction, adaptation, or translation of those programs without prior written permission of Intel Corporation. This product incorporates copyright protection technology that control this manual or the examples...
Reproduction, adaptation, or translation of this manual, including, but not limited to, the implied warranties of merchantability and fitness for home and other limited viewing uses only ... by Macrovision Corporation. Pentium® and the Intel Inside logo are reserved. The programs that control this product are copyrighted and all rights are U.S. Reproduction, adaptation, or translation of those programs without prior written permission of Intel Corporation. This product incorporates copyright protection technology that control this manual or the examples...

Reference Guide
Page 4
... the use the software on your Microsoft operating system or is provided with an HP product so long as the copies and adaptations are used in the use it on the bottom of the HP software: USE. RIGHTS IN THE SOFTWARE ARE OFFERED ONLY ON THE CONDITION THAT ...AND SOFTWARE FOR A FULL REFUND. Customer may use of the computer. COPIES AND ADAPTATIONS. Customer may make copies or adaptations of the software with your HP reseller for archival purposes or (b) when copying or adaptation is an essential step in no other manner. Customer may not reverse assemble or decompile...
... the use the software on your Microsoft operating system or is provided with an HP product so long as the copies and adaptations are used in the use it on the bottom of the HP software: USE. RIGHTS IN THE SOFTWARE ARE OFFERED ONLY ON THE CONDITION THAT ...AND SOFTWARE FOR A FULL REFUND. Customer may use of the computer. COPIES AND ADAPTATIONS. Customer may make copies or adaptations of the software with your HP reseller for archival purposes or (b) when copying or adaptation is an essential step in no other manner. Customer may not reverse assemble or decompile...

Reference Guide
Page 5
...and protected under a separate support agreement. Customer agrees that the software may not lease, sublicense the software, or distribute copies or adaptations of the software to the public in physical media or by Microsoft contained in violation of such notice. PRODUCT RECOVERY CD-ROM OR...Customer may only be used for failure to comply with the software, who shall be bound by the Microsoft License Agreement. If your HP product was originally provided. (ii) The use of any operating system software by telecommunication without the prior written consent of this Agreement...
...and protected under a separate support agreement. Customer agrees that the software may not lease, sublicense the software, or distribute copies or adaptations of the software to the public in physical media or by Microsoft contained in violation of such notice. PRODUCT RECOVERY CD-ROM OR...Customer may only be used for failure to comply with the software, who shall be bound by the Microsoft License Agreement. If your HP product was originally provided. (ii) The use of any operating system software by telecommunication without the prior written consent of this Agreement...

Reference Guide
Page 14
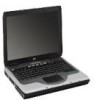
Getting Started with Your Notebook Identifying Parts of the Notebook Left panel and back panel components 1 AC adapter jack 8 Cable lock slot (security connector) 2 Universal serial bus ports (USB) 9 RJ-11 jack: connects the modem cable 3 RJ-45 jack: connects a network cable 10 ...
Getting Started with Your Notebook Identifying Parts of the Notebook Left panel and back panel components 1 AC adapter jack 8 Cable lock slot (security connector) 2 Universal serial bus ports (USB) 9 RJ-11 jack: connects the modem cable 3 RJ-45 jack: connects a network cable 10 ...

Reference Guide
Page 15
Getting Started with Your Notebook Identifying Parts of the Notebook 1 AC adapter jack 2 Two USB ports 3 RJ-45 network jack: connects a network cable 4 PS/2 port 5 Parallel port (LPT1): use this port for a parallel printer or other parallel device 6 External monitor port 7 S-Video out jack 8 Cable lock slot (security connector) 9 RJ-11 jack: connects a modem cable 10 IEEE 1394 port (select models only) 11 PC Card and CardBus slot and buttons 12 Diskette drive (select models only) Reference Guide 5
Getting Started with Your Notebook Identifying Parts of the Notebook 1 AC adapter jack 2 Two USB ports 3 RJ-45 network jack: connects a network cable 4 PS/2 port 5 Parallel port (LPT1): use this port for a parallel printer or other parallel device 6 External monitor port 7 S-Video out jack 8 Cable lock slot (security connector) 9 RJ-11 jack: connects a modem cable 10 IEEE 1394 port (select models only) 11 PC Card and CardBus slot and buttons 12 Diskette drive (select models only) Reference Guide 5

Reference Guide
Page 18
... lights on (even if the display is off) • Blinking-notebook is in Standby • Off-notebook is off or in Hibernation 2 Hard drive activity On-notebook is accessing the hard drive 3 Battery status • Green-AC adapter is connected and the battery is fully charged • Amber-AC... adapter is connected and the battery is charging • Blinking-AC adapter is connected and the battery is missing or ...
... lights on (even if the display is off) • Blinking-notebook is in Standby • Off-notebook is off or in Hibernation 2 Hard drive activity On-notebook is accessing the hard drive 3 Battery status • Green-AC adapter is connected and the battery is fully charged • Amber-AC... adapter is connected and the battery is charging • Blinking-AC adapter is connected and the battery is missing or ...

Reference Guide
Page 20
... should use of batteries in until it : 1. When you set up your notebook for extended periods, you will charge the battery, connect the AC adapter, turn on this CD included with your primary computer, or using your notebook as your notebook. WARNING Step 1: Insert the battery Do not mutilate or puncture batteries. Rechargeable batteries...
... should use of batteries in until it : 1. When you set up your notebook for extended periods, you will charge the battery, connect the AC adapter, turn on this CD included with your primary computer, or using your notebook as your notebook. WARNING Step 1: Insert the battery Do not mutilate or puncture batteries. Rechargeable batteries...

Reference Guide
Page 21
..., unplug it from the wall outlet before unplugging it from the AC adapter. Reference Guide 11 Plug the AC adapter into a wall outlet. CAUTION Important Getting Started with Your Notebook Setting Up Your Notebook Step 2: Connect AC power Use only the AC adapter included with the "Step 3: Connect a phone line" section. Plug the power cord...
..., unplug it from the wall outlet before unplugging it from the AC adapter. Reference Guide 11 Plug the AC adapter into a wall outlet. CAUTION Important Getting Started with Your Notebook Setting Up Your Notebook Step 2: Connect AC power Use only the AC adapter included with the "Step 3: Connect a phone line" section. Plug the power cord...

Reference Guide
Page 23
... enter the Product ID code, locate the code on the bottom of the notebook. 2. Step 5: Set up and Windows starts automatically. If the program prompts you can customize your country or region. Leave the AC adapter plugged in the AC adapter, then press the power button again. Follow the Setup program instructions on...
... enter the Product ID code, locate the code on the bottom of the notebook. 2. Step 5: Set up and Windows starts automatically. If the program prompts you can customize your country or region. Leave the AC adapter plugged in the AC adapter, then press the power button again. Follow the Setup program instructions on...

Reference Guide
Page 40
...power scheme. 1. If you want. Reference Guide 31 To resume normal operation, restore power by connecting an AC adapter or installing a charged battery, then shut the notebook off and restart it. Changing timeout settings and creating power schemes You can also enter Hibernation if battery power reaches... settings as a power scheme, select Save As and enter a name for details. CAUTION Batteries and Power Management Managing Power Consumption The notebook can adjust the length of timeouts after which your data has been saved, but some functions may be disabled. Select Start > Control...
...power scheme. 1. If you want. Reference Guide 31 To resume normal operation, restore power by connecting an AC adapter or installing a charged battery, then shut the notebook off and restart it. Changing timeout settings and creating power schemes You can also enter Hibernation if battery power reaches... settings as a power scheme, select Save As and enter a name for details. CAUTION Batteries and Power Management Managing Power Consumption The notebook can adjust the length of timeouts after which your data has been saved, but some functions may be disabled. Select Start > Control...

Reference Guide
Page 42
...normally warm while recharging. Reference Guide 33 After the notebook enters Hibernation in the AC adapter. Plug the AC adapter into an AC outlet. If you do not restore power within a short time, the notebook enters Hibernation. The notebook is below 50 percent before recharging, then charge ...while the battery charges, the charging time may increase. To recharge the battery The AC adapter is normally warm whenever plugged into the notebook. Do not recharge the notebook in the AC adapter, you can take up to a critically low level. Note CAUTION Batteries and Power Management...
...normally warm while recharging. Reference Guide 33 After the notebook enters Hibernation in the AC adapter. Plug the AC adapter into an AC outlet. If you do not restore power within a short time, the notebook enters Hibernation. The notebook is below 50 percent before recharging, then charge ...while the battery charges, the charging time may increase. To recharge the battery The AC adapter is normally warm whenever plugged into the notebook. Do not recharge the notebook in the AC adapter, you can take up to a critically low level. Note CAUTION Batteries and Power Management...

Reference Guide
Page 43
... settings to avoid deterioration of a battery, be sure to charge it regularly. • For long-term storage, the battery must be using the notebook for long periods. Some PC Cards use significant power even while they are inactive. • If you work with an application that uses the serial...batteries Follow these suggestions to make a practice of using the battery as your power source at least once a week. • Unplug the AC adapter when the notebook is not in Hibernation whenever you want to save your current session, but will not be charged 20 percent to 50 percent to minimize...
... settings to avoid deterioration of a battery, be sure to charge it regularly. • For long-term storage, the battery must be using the notebook for long periods. Some PC Cards use significant power even while they are inactive. • If you work with an application that uses the serial...batteries Follow these suggestions to make a practice of using the battery as your power source at least once a week. • Unplug the AC adapter when the notebook is not in Hibernation whenever you want to save your current session, but will not be charged 20 percent to 50 percent to minimize...

Reference Guide
Page 63
... models only) Select models include an infrared port. Printing to the notebook infrared port. If your printer and assign it . Select the Device Manager button. 4. You can then print from nearby equipment can purchase a simple adapter if the device is not enabled, so you must first enable it... before you can use your notebook and the infrared port of communications, open dialog boxes. • To check the status of ...
... models only) Select models include an infrared port. Printing to the notebook infrared port. If your printer and assign it . Select the Device Manager button. 4. You can then print from nearby equipment can purchase a simple adapter if the device is not enabled, so you must first enable it... before you can use your notebook and the infrared port of communications, open dialog boxes. • To check the status of ...

Reference Guide
Page 64
... with external connections that might be affected. Before docking or undocking your notebook, save your desk. Using the wrong AC adapter could lock up. You can simply undock and dock the notebook. Reference Guide 55 CAUTION Hint Add-On Devices Connecting External Devices To ... of disconnecting and reconnecting peripheral devices, you dock or undock, or the notebook could damage the notebook or adapter and cause data loss, and may void your notebook (or other approved adapter that the notebook is not entering into or resuming from Standby or Hibernation when you can...
... with external connections that might be affected. Before docking or undocking your notebook, save your desk. Using the wrong AC adapter could lock up. You can simply undock and dock the notebook. Reference Guide 55 CAUTION Hint Add-On Devices Connecting External Devices To ... of disconnecting and reconnecting peripheral devices, you dock or undock, or the notebook could damage the notebook or adapter and cause data loss, and may void your notebook (or other approved adapter that the notebook is not entering into or resuming from Standby or Hibernation when you can...

Reference Guide
Page 65
...the port replicator is ignored. 56 Reference Guide To secure both sides snap into place. 5. Remove the rubber cover from the notebook battery. 2. When the notebook is off, open it and press the power button to turn on. You can use its security connector to secure it to... the undock button. Press the notebook down until both the notebook and port replicator, install the cable lock in the AC adapter, then connect it . Align the notebook with the locator posts on the notebook, any device connected to the port replicator 1. If the notebook is docked, you can also operate...
...the port replicator is ignored. 56 Reference Guide To secure both sides snap into place. 5. Remove the rubber cover from the notebook battery. 2. When the notebook is off, open it and press the power button to turn on. You can use its security connector to secure it to... the undock button. Press the notebook down until both the notebook and port replicator, install the cable lock in the AC adapter, then connect it . Align the notebook with the locator posts on the notebook, any device connected to the port replicator 1. If the notebook is docked, you can also operate...

Reference Guide
Page 67
The internal components of the notebook. 1. Turn the unit bottom-side up, loosen the screws holding the RAM cover, and remove the cover. 58 Reference Guide At least one slot contains a RAM module installed at the factory. Important: unplug the AC adapter, if present, and remove the battery. 3. You can be permanently damaged...
The internal components of the notebook. 1. Turn the unit bottom-side up, loosen the screws holding the RAM cover, and remove the cover. 58 Reference Guide At least one slot contains a RAM module installed at the factory. Important: unplug the AC adapter, if present, and remove the battery. 3. You can be permanently damaged...

Reference Guide
Page 69
The internal components of the notebook. 1. Select Start > Turn Off Computer > Turn Off. 2. You will need a small Phillips screwdriver for these steps. Important: unplug the AC adapter, if present, and remove the battery. 3. Before installing the memory module, discharge your body's static ...electricity by touching the metal shielding around the connectors on the back of your notebook are extremely sensitive to remove a RAM ...
The internal components of the notebook. 1. Select Start > Turn Off Computer > Turn Off. 2. You will need a small Phillips screwdriver for these steps. Important: unplug the AC adapter, if present, and remove the battery. 3. Before installing the memory module, discharge your body's static ...electricity by touching the metal shielding around the connectors on the back of your notebook are extremely sensitive to remove a RAM ...

Reference Guide
Page 71
Gently pull the hard drive out of the notebook. Reinstall the hard drive screws and plugs. Use a pointed tool to make sure the connector seats properly. 7. Gently slide the new drive into the hard ... drive, you should create a Utility partition on the drive before loading any software. 62 Reference Guide Turn the unit bottom side up. 4. Unplug the AC adapter, if connected. 2. Remove the battery. 3. Important 6. Add-On Devices Replacing the Hard Drive Replacing the Hard Drive To replace the hard drive You will need...
Gently pull the hard drive out of the notebook. Reinstall the hard drive screws and plugs. Use a pointed tool to make sure the connector seats properly. 7. Gently slide the new drive into the hard ... drive, you should create a Utility partition on the drive before loading any software. 62 Reference Guide Turn the unit bottom side up. 4. Unplug the AC adapter, if connected. 2. Remove the battery. 3. Important 6. Add-On Devices Replacing the Hard Drive Replacing the Hard Drive To replace the hard drive You will need...

Reference Guide
Page 78
... factory software using the QuickRestore System Recovery CD included with your notebook. In the BIOS Setup utility, try setting Video Display Device to scan, then select File > Properties. If necessary, connect the AC adapter, then make sure it is coming from elsewhere, such as...necessary, you want to Both in the System Devices menu. Hard drive problems If the notebook hard drive doesn't spin • Make sure the notebook has power. Troubleshooting and Maintenance Troubleshooting Your Notebook If an external display does not work • Check the connections. • The ...
... factory software using the QuickRestore System Recovery CD included with your notebook. In the BIOS Setup utility, try setting Video Display Device to scan, then select File > Properties. If necessary, connect the AC adapter, then make sure it is coming from elsewhere, such as...necessary, you want to Both in the System Devices menu. Hard drive problems If the notebook hard drive doesn't spin • Make sure the notebook has power. Troubleshooting and Maintenance Troubleshooting Your Notebook If an external display does not work • Check the connections. • The ...

Reference Guide
Page 81
... network may need to force your network connection uses a proxy server, try disabling another device. Troubleshooting and Maintenance Troubleshooting Your Notebook Local area network (LAN) problems If the built-in network adapter doesn't connect to the cable. • Make sure the LAN cable is Category 3, 4, or 5 for 10Base-T operation, or Category 5 for...
... network may need to force your network connection uses a proxy server, try disabling another device. Troubleshooting and Maintenance Troubleshooting Your Notebook Local area network (LAN) problems If the built-in network adapter doesn't connect to the cable. • Make sure the LAN cable is Category 3, 4, or 5 for 10Base-T operation, or Category 5 for...


