
End User License Agreement
Page 1
... electronic license terms accepted at time of download. BY purposes of the HP Product. Storage. GRANT OF LICENSE. Use. You do not have Software Product into Your Computer's AGREE TO ALL TERMS AND temporary memory (RAM) for use on more than one computer. Reservation of Rights.... c. You may accompany the HP Product. An amendment or addendum to this EULA. HP grants you the following rights provided you subject to a separate...
... electronic license terms accepted at time of download. BY purposes of the HP Product. Storage. GRANT OF LICENSE. Use. You do not have Software Product into Your Computer's AGREE TO ALL TERMS AND temporary memory (RAM) for use on more than one computer. Reservation of Rights.... c. You may accompany the HP Product. An amendment or addendum to this EULA. HP grants you the following rights provided you subject to a separate...

HP USB Digital Drive
Page 2
An SD memory card 2 may not be used with any HP authorized reseller. User Guide 1 You can be included. However, you will need an SD memory card to operate the Digital Drive. The Digital Drive can purchase one (in various storage capacities) from any computer that is a pocket-sized SD (Secure Digital) memory drive for storing and transferring files such as digital pictures, music, video, and data. The HP USB Digital Drive 1 is running Microsoft Windows XP Home, Windows XP Pro, or Windows 2000.
An SD memory card 2 may not be used with any HP authorized reseller. User Guide 1 You can be included. However, you will need an SD memory card to operate the Digital Drive. The Digital Drive can purchase one (in various storage capacities) from any computer that is a pocket-sized SD (Secure Digital) memory drive for storing and transferring files such as digital pictures, music, video, and data. The HP USB Digital Drive 1 is running Microsoft Windows XP Home, Windows XP Pro, or Windows 2000.

HP USB Digital Drive
Page 3
Remove the cap 1 of the Digital Drive. 2. Insert the SD memory card into the SD slot 2 with the notched corner positioned on the lower left as shown. If the SD memory card does not slide in properly, gently pull it out and reinsert it. 2 User Guide Installing the SD Memory Card 1.
Remove the cap 1 of the Digital Drive. 2. Insert the SD memory card into the SD slot 2 with the notched corner positioned on the lower left as shown. If the SD memory card does not slide in properly, gently pull it out and reinsert it. 2 User Guide Installing the SD Memory Card 1.

HP USB Digital Drive
Page 10
Removing the SD Memory Card ✎ Do not attempt to pull the SD memory card out when the status light on the Digital Drive is flashing. » After you disconnect the Digital Drive from your computer, gently pull the SD memory card from the Digital Drive. User Guide 9
Removing the SD Memory Card ✎ Do not attempt to pull the SD memory card out when the status light on the Digital Drive is flashing. » After you disconnect the Digital Drive from your computer, gently pull the SD memory card from the Digital Drive. User Guide 9

Hardware and Software Guide
Page 4
Contents Bottom Components 1-20 Mini PCI and Memory Compartments 1-20 Bays, Battery Latch and Vents 1-21 Additional Components 1-22 Hardware 1-22 Optical Discs 1-23 Labels 1-23 2 Keyboard and TouchPad TouchPad 2-2 Identifying TouchPad Components 2-2 ...
Contents Bottom Components 1-20 Mini PCI and Memory Compartments 1-20 Bays, Battery Latch and Vents 1-21 Additional Components 1-22 Hardware 1-22 Optical Discs 1-23 Labels 1-23 2 Keyboard and TouchPad TouchPad 2-2 Identifying TouchPad Components 2-2 ...

Hardware and Software Guide
Page 7
... 6-13 Optional Security Cable 6-14 7 Hardware Upgrades and Replacements Device Connections 7-1 Connecting a Powered Device 7-1 Connecting a USB Device 7-2 Connecting a 1394 Device 7-3 Connecting a Communication Device 7-4 Digital Memory Cards 7-4 Using the Digital Media Slot Light 7-5 Inserting a Digital Memory Card 7-6 Removing a Digital Memory Card 7-7 PC Cards 7-8 Inserting a PC Card 7-9 Stopping and Removing a PC Card 7-10 Hardware and Software Guide vii
... 6-13 Optional Security Cable 6-14 7 Hardware Upgrades and Replacements Device Connections 7-1 Connecting a Powered Device 7-1 Connecting a USB Device 7-2 Connecting a 1394 Device 7-3 Connecting a Communication Device 7-4 Digital Memory Cards 7-4 Using the Digital Media Slot Light 7-5 Inserting a Digital Memory Card 7-6 Removing a Digital Memory Card 7-7 PC Cards 7-8 Inserting a PC Card 7-9 Stopping and Removing a PC Card 7-10 Hardware and Software Guide vii

Hardware and Software Guide
Page 8
... Adding a Drive to the System 7-11 Using the IDE Drive Light 7-11 Caring for Drives 7-12 Replacing the Internal Hard Drive 7-13 Memory 7-17 Increasing Memory 7-17 Removing or Inserting a Memory Module 7-18 8 Software Updates and Recovery and System Software Software Updates 8-1 Preparing for a Software Update 8-2 Downloading and Installing an Update 8-3 Software Recovery...
... Adding a Drive to the System 7-11 Using the IDE Drive Light 7-11 Caring for Drives 7-12 Replacing the Internal Hard Drive 7-13 Memory 7-17 Increasing Memory 7-17 Removing or Inserting a Memory Module 7-18 8 Software Updates and Recovery and System Software Software Updates 8-1 Preparing for a Software Update 8-2 Downloading and Installing an Update 8-3 Software Recovery...

Hardware and Software Guide
Page 27
... being accessed.* 3 Optical drive† Supports an optical disc. 4 Media tray release button Opens the optical drive media tray. *The supported digital memory cards are: Secure Digital (SD) Memory Card, Memory Stick, Memory Stick Pro, xD-Picture Card, MultiMediaCard, and SmartMedia (SM) card. †The type of optical drive-for example, a DVD-ROM drive...
... being accessed.* 3 Optical drive† Supports an optical disc. 4 Media tray release button Opens the optical drive media tray. *The supported digital memory cards are: Secure Digital (SD) Memory Card, Memory Stick, Memory Stick Pro, xD-Picture Card, MultiMediaCard, and SmartMedia (SM) card. †The type of optical drive-for example, a DVD-ROM drive...

Hardware and Software Guide
Page 28
.... If you install an unauthorized device and then receive a warning message, remove the device to restore notebook functionality. Then contact Customer Care. Component ID Bottom Components Mini PCI and Memory Compartments Component 1 Mini PCI compartment 2 Memory compartment Description Holds an optional wireless LAN device. Ä To prevent an unresponsive system and the display...
.... If you install an unauthorized device and then receive a warning message, remove the device to restore notebook functionality. Then contact Customer Care. Component ID Bottom Components Mini PCI and Memory Compartments Component 1 Mini PCI compartment 2 Memory compartment Description Holds an optional wireless LAN device. Ä To prevent an unresponsive system and the display...

Hardware and Software Guide
Page 32
...approval markings of some of the countries in which the modem has been approved for use . The Modem Approval label is included with your notebook model includes one or more wireless devices, a certificate providing regulatory information about the modem and lists the agency approval markings required by some ...of the countries in which the device has been approved for use is affixed to the inside of the memory compartment cover. ■ Wireless certification labels-Some notebook models include an optional WLAN device and/or an optional Bluetooth device.
...approval markings of some of the countries in which the modem has been approved for use . The Modem Approval label is included with your notebook model includes one or more wireless devices, a certificate providing regulatory information about the modem and lists the agency approval markings required by some ...of the countries in which the device has been approved for use is affixed to the inside of the memory compartment cover. ■ Wireless certification labels-Some notebook models include an optional WLAN device and/or an optional Bluetooth device.

Hardware and Software Guide
Page 41
...VCRs, and video capture boards with examples of devices that use the TouchPad, press any key on . The function of standby. If the notebook is in random access memory (RAM), the screen is cleared, and power is set the fn+f5 hotkey to initiate hibernation instead of the fn+f5 hotkey can... set by using an HP expansion product. In all Windows operating system windows, references to the sleep button apply to initiate standby. Hardware ...
...VCRs, and video capture boards with examples of devices that use the TouchPad, press any key on . The function of standby. If the notebook is in random access memory (RAM), the screen is cleared, and power is set the fn+f5 hotkey to initiate hibernation instead of the fn+f5 hotkey can... set by using an HP expansion product. In all Windows operating system windows, references to the sleep button apply to initiate standby. Hardware ...

Hardware and Software Guide
Page 55
...power and protects your privacy by reducing power to the screen. When you resume from the Start button. When the notebook is set by you close the notebook, the display presses the display switch. Hardware and Software Guide 3-5 Initiating Standby Manually At Windows default settings, closing the...you or by pressing the fn+f5 hotkey or from standby, your work returns instantly to system components that are not in random access memory (RAM), the screen is a recommended precaution. When standby is initiated, your work is saved in use. Saving your work before initiating ...
...power and protects your privacy by reducing power to the screen. When you resume from the Start button. When the notebook is set by you close the notebook, the display presses the display switch. Hardware and Software Guide 3-5 Initiating Standby Manually At Windows default settings, closing the...you or by pressing the fn+f5 hotkey or from standby, your work returns instantly to system components that are not in random access memory (RAM), the screen is a recommended precaution. When standby is initiated, your work is saved in use. Saving your work before initiating ...

Hardware and Software Guide
Page 57
...initiate hibernation manually while the notebook is in hibernation: ■ Do not add or remove a memory module. ■ Do not add or remove a hard drive. ■ Do not connect or disconnect an external device. ■ Do not insert or remove a CD, DVD, PC Card, or digital memory card. Hibernation is a... during hibernation, it may not be initiated by you or by the system. When hibernation is in Windows. Then hold down the notebook. When the notebook is returned to the screen. Restoring from hibernation takes a little longer than returning to your work is in ■ Windows XP ...
...initiate hibernation manually while the notebook is in hibernation: ■ Do not add or remove a memory module. ■ Do not add or remove a hard drive. ■ Do not connect or disconnect an external device. ■ Do not insert or remove a CD, DVD, PC Card, or digital memory card. Hibernation is a... during hibernation, it may not be initiated by you or by the system. When hibernation is in Windows. Then hold down the notebook. When the notebook is returned to the screen. Restoring from hibernation takes a little longer than returning to your work is in ■ Windows XP ...

Hardware and Software Guide
Page 76
...your work : ■ Prevent devices you are not plugged into an external power source. ❏ Stop or remove an inserted PC Card. ❏ Disable or remove an inserted digital memory card. ❏ Turn off wireless and local area network (LAN) connections and close modem applications. ❏ Disconnect any external ...Battery Pack Power Using the following battery conservation settings and procedures extends the time that are not using from drawing power from the notebook. Conserving Power as You Work To conserve power as you work , initiate standby or hibernation, or shut down the...
...your work : ■ Prevent devices you are not plugged into an external power source. ❏ Stop or remove an inserted PC Card. ❏ Disable or remove an inserted digital memory card. ❏ Turn off wireless and local area network (LAN) connections and close modem applications. ❏ Disconnect any external ...Battery Pack Power Using the following battery conservation settings and procedures extends the time that are not using from drawing power from the notebook. Conserving Power as You Work To conserve power as you work , initiate standby or hibernation, or shut down the...

Hardware and Software Guide
Page 127
... to the "Using Advanced Setup Utility Features" section in Windows. Digital memory cards are often used only when the notebook is in Chapter 8, "Software Updates and Recovery and System Software." The Digital Media Slot in the notebook can support: ■ Memory Stick and Memory Stick Pro ■ xD-Picture Card (XD) ■ MultiMediaCard ■ SmartMedia...
... to the "Using Advanced Setup Utility Features" section in Windows. Digital memory cards are often used only when the notebook is in Chapter 8, "Software Updates and Recovery and System Software." The Digital Media Slot in the notebook can support: ■ Memory Stick and Memory Stick Pro ■ xD-Picture Card (XD) ■ MultiMediaCard ■ SmartMedia...

Hardware and Software Guide
Page 128
Hardware and Software Guide 7-5 The Digital Media Slot light is turned off when an inserted digital memory card is inactive or when the Digital Media Slot is being accessed. Hardware Upgrades and Replacements Using the Digital Media Slot Light The Digital Media Slot light is turned on when an inserted digital memory card is vacant.
Hardware and Software Guide 7-5 The Digital Media Slot light is turned off when an inserted digital memory card is inactive or when the Digital Media Slot is being accessed. Hardware Upgrades and Replacements Using the Digital Media Slot Light The Digital Media Slot light is turned on when an inserted digital memory card is vacant.

Hardware and Software Guide
Page 129
... Digital Media Slot. ■ Do not move or transport the notebook while a digital memory card is seated. (The card will extend outward slightly beyond the notebook.) 7-6 Hardware and Software Guide Hardware Upgrades and Replacements Inserting a Digital Memory Card Ä CAUTION: To prevent damage to digital memory card connectors: ■ Use minimal force when inserting a digital...
... Digital Media Slot. ■ Do not move or transport the notebook while a digital memory card is seated. (The card will extend outward slightly beyond the notebook.) 7-6 Hardware and Software Guide Hardware Upgrades and Replacements Inserting a Digital Memory Card Ä CAUTION: To prevent damage to digital memory card connectors: ■ Use minimal force when inserting a digital...

Hardware and Software Guide
Page 130
Hardware Upgrades and Replacements Removing a Digital Memory Card To remove a digital memory card: 1. Close all applications and complete all activities that are using the card. (To stop a data transfer, select the cancel button in the Windows Copying window.) 2. Slide the card out of the slot. Right-click the drive assigned to the card, and then select Eject. (The card is stopped but is not released from the Digital Media Slot.) 4. Select the My Computer icon on the Windows Desktop. 3. Hardware and Software Guide 7-7
Hardware Upgrades and Replacements Removing a Digital Memory Card To remove a digital memory card: 1. Close all applications and complete all activities that are using the card. (To stop a data transfer, select the cancel button in the Windows Copying window.) 2. Slide the card out of the slot. Right-click the drive assigned to the card, and then select Eject. (The card is stopped but is not released from the Digital Media Slot.) 4. Select the My Computer icon on the Windows Desktop. 3. Hardware and Software Guide 7-7
Hardware and Software Guide
Page 131
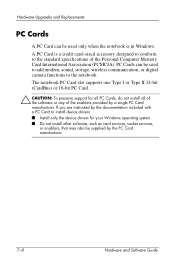
...camera functions to the standard specifications of the enablers provided by the PC Card manufacturer. 7-8 Hardware and Software Guide The notebook PC Card slot supports one Type I or Type II 32-bit (CardBus) or 16-bit PC Card. Ä CAUTION: To preserve support for your Windows ...notebook is a credit card-sized accessory designed to conform to the notebook. If you are instructed by the documentation included with a PC Card to install device drivers: ■ Install only the device drivers for all PC Cards, do not install all of the software or any of the Personal Computer Memory...
...camera functions to the standard specifications of the enablers provided by the PC Card manufacturer. 7-8 Hardware and Software Guide The notebook PC Card slot supports one Type I or Type II 32-bit (CardBus) or 16-bit PC Card. Ä CAUTION: To preserve support for your Windows ...notebook is a credit card-sized accessory designed to conform to the notebook. If you are instructed by the documentation included with a PC Card to install device drivers: ■ Install only the device drivers for all PC Cards, do not install all of the software or any of the Personal Computer Memory...

Hardware and Software Guide
Page 134
An optional drive can also be added to the system by connecting it, as a Secure Digital (SD) Memory Card. Using the IDE Drive Light Internal hard drive or optical drive activity is indicated by notebook model. Hardware and Software Guide 7-11 The type of optical drive varies by the IDE (Integrated Drive Electronics... hard drive and optical drive are standard features of the USB ports or to the 1394 port. Hard drive capacity can be added with a microdrive PC Card or a digital memory card such as instructed in the drive documentation, to one of the...
An optional drive can also be added to the system by connecting it, as a Secure Digital (SD) Memory Card. Using the IDE Drive Light Internal hard drive or optical drive activity is indicated by notebook model. Hardware and Software Guide 7-11 The type of optical drive varies by the IDE (Integrated Drive Electronics... hard drive and optical drive are standard features of the USB ports or to the 1394 port. Hard drive capacity can be added with a microdrive PC Card or a digital memory card such as instructed in the drive documentation, to one of the...


