
Wireless (Select Models Only) - Windows Vista
Page 19
... slot, and gently push the SIM into the slot until it is not replaced. 9. To insert a SIM: 1. Unplug the power cord from the AC outlet. 5. NOTE: HP Mobile Broadband will be disabled if the battery is firmly seated. 8. Inserting a SIM 13 Turn the computer upside down ...on by pressing the power button. Reconnect external power. 10. Replace the battery. Inserting a SIM CAUTION: To prevent damage to the computer...
... slot, and gently push the SIM into the slot until it is not replaced. 9. To insert a SIM: 1. Unplug the power cord from the AC outlet. 5. NOTE: HP Mobile Broadband will be disabled if the battery is firmly seated. 8. Inserting a SIM 13 Turn the computer upside down ...on by pressing the power button. Reconnect external power. 10. Replace the battery. Inserting a SIM CAUTION: To prevent damage to the computer...

Wireless (Select Models Only) - Windows Vista
Page 20
...down the computer through the operating system. 2. Then shut down the computer. Press in Hibernation, turn the computer on by pressing the power button. Replace the battery. 9. Remove the battery. 7. Disconnect all external devices connected to the computer. 4. Turn on the SIM (1), and then remove it from the AC outlet. 5. If you... . 6. Reconnect external power. 10. Turn the computer upside down on a flat surface, with the battery bay toward you are not sure whether the computer is off or in on the computer. 14 Chapter 3 Using...
...down the computer through the operating system. 2. Then shut down the computer. Press in Hibernation, turn the computer on by pressing the power button. Replace the battery. 9. Remove the battery. 7. Disconnect all external devices connected to the computer. 4. Turn on the SIM (1), and then remove it from the AC outlet. 5. If you... . 6. Reconnect external power. 10. Turn the computer upside down on a flat surface, with the battery bay toward you are not sure whether the computer is off or in on the computer. 14 Chapter 3 Using...

HP Mobile Remote Control (Select Models Only) - Windows Vista
Page 9
... the battery facing up, insert the battery into the remote control, follow these instructions: 1. To insert the battery into the compartment (1). 5 To access Help and Support, select Start > Help and Support > User Guides. To reduce potential safety issues, use only the battery provided with the computer, a replacement battery provided by HP, or a compatible battery purchased from HP. 3 Inserting the battery...
... the battery facing up, insert the battery into the remote control, follow these instructions: 1. To insert the battery into the compartment (1). 5 To access Help and Support, select Start > Help and Support > User Guides. To reduce potential safety issues, use only the battery provided with the computer, a replacement battery provided by HP, or a compatible battery purchased from HP. 3 Inserting the battery...

HP Mobile Remote Control (Select Models Only) - Windows Vista
Page 11
4 Troubleshooting Try the following solutions if your remote control does not function properly: ● Be sure that you have a clear line of sight from the remote control to the IR port on the computer or expansion product. ● Be sure that you are within range of the IR port on the computer or expansion product. ● Be sure that you are using the remote control with a supported computer or expansion product. 7 Replace the battery if necessary. ● Be sure that the battery is properly installed and has a charge.
4 Troubleshooting Try the following solutions if your remote control does not function properly: ● Be sure that you have a clear line of sight from the remote control to the IR port on the computer or expansion product. ● Be sure that you are within range of the IR port on the computer or expansion product. ● Be sure that you are using the remote control with a supported computer or expansion product. 7 Replace the battery if necessary. ● Be sure that the battery is properly installed and has a charge.

Drives - Windows Vista
Page 19
...: 1. Loosen the captive screw that secures the hard drive to the computer. 4. Shut down the computer through the operating system. Remove the battery from the computer (2). 9. Pull the hard drive tab to the left (2) to disconnect the hard drive. 15 Turn the computer upside down ...the computer before removing the hard drive from the AC outlet. 5. 6 Replacing the hard drive CAUTION: To prevent information loss or an unresponsive system: Shut down on by pressing the power button. If you , loosen the...
...: 1. Loosen the captive screw that secures the hard drive to the computer. 4. Shut down the computer through the operating system. Remove the battery from the computer (2). 9. Pull the hard drive tab to the left (2) to disconnect the hard drive. 15 Turn the computer upside down ...the computer before removing the hard drive from the AC outlet. 5. 6 Replacing the hard drive CAUTION: To prevent information loss or an unresponsive system: Shut down on by pressing the power button. If you , loosen the...

Memory Modules - Windows Vista
Page 5
WARNING! To add or replace a memory module: 1. If you are discharged of static electricity by upgrading the existing memory module in Hibernation, turn the computer on the bottom of the computer. Disconnect all batteries before installing a memory module. CAUTION: Electrostatic discharge (ESD) can be sure that...the power button. Unplug the power cord from the computer. 7. Then shut down the computer and close the display. Adding or replacing a memory module The computer has one memory module compartment, which is off or in the primary memory module slot. Turn the ...
WARNING! To add or replace a memory module: 1. If you are discharged of static electricity by upgrading the existing memory module in Hibernation, turn the computer on the bottom of the computer. Disconnect all batteries before installing a memory module. CAUTION: Electrostatic discharge (ESD) can be sure that...the power button. Unplug the power cord from the computer. 7. Then shut down the computer and close the display. Adding or replacing a memory module The computer has one memory module compartment, which is off or in the primary memory module slot. Turn the ...

Memory Modules - Windows Vista
Page 7
... memory module, until the retention clips snap into the memory module slot until it is seated. Do not touch the components on the computer. 12. Replace the battery. 3
... memory module, until the retention clips snap into the memory module slot until it is seated. Do not touch the components on the computer. 12. Replace the battery. 3

Notebook Tour - Windows Vista
Page 17
... (6) Optical drive release latch (7) Hard drive bay Description Release the battery from the battery bay. NOTE: The computer fan starts up automatically to restore computer functionality, and then contact technical support through Help and Support. NOTE: To prevent an unresponsive system, replace the wireless module only with a wireless module authorized for the internal...
... (6) Optical drive release latch (7) Hard drive bay Description Release the battery from the battery bay. NOTE: The computer fan starts up automatically to restore computer functionality, and then contact technical support through Help and Support. NOTE: To prevent an unresponsive system, replace the wireless module only with a wireless module authorized for the internal...

Power Management - Windows Vista
Page 4
Step 5: Reenable Hibernation and Sleep 16 Conserving battery power ...17 Storing a battery ...17 Disposing of a used battery ...17 Replacing the battery ...17 4 Shutting down the computer Index ...19 iv
Step 5: Reenable Hibernation and Sleep 16 Conserving battery power ...17 Storing a battery ...17 Disposing of a used battery ...17 Replacing the battery ...17 4 Shutting down the computer Index ...19 iv
Power Management - Windows Vista
Page 9
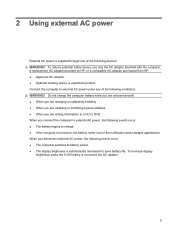
... only the AC adapter provided with the computer, a replacement AC adapter provided by HP, or a compatible AC adapter purchased from HP. ● Approved AC adapter ● Optional docking device or expansion product Connect the computer to charge. ● If the computer is turned on, the battery meter icon in the notification area changes appearance...
... only the AC adapter provided with the computer, a replacement AC adapter provided by HP, or a compatible AC adapter purchased from HP. ● Approved AC adapter ● Optional docking device or expansion product Connect the computer to charge. ● If the computer is turned on, the battery meter icon in the notification area changes appearance...

Power Management - Windows Vista
Page 11
... . ● The power light is not functioning and should be replaced. NOTE: The left battery release latch (1). Connect the AC adapter to release the battery from the computer. Contact HP technical support for information on a flat surface, with the battery bay toward you. Slide the right battery release latch (2) to the computer, and then plug it...
... . ● The power light is not functioning and should be replaced. NOTE: The left battery release latch (1). Connect the AC adapter to release the battery from the computer. Contact HP technical support for information on a flat surface, with the battery bay toward you. Slide the right battery release latch (2) to the computer, and then plug it...

Power Management - Windows Vista
Page 12
... connected to the computer, and other factors. To increase display brightness, use only the battery provided with the computer, a replacement battery provided by HP, or a compatible battery purchased from external power. WARNING! Keeping the battery in the computer. 8 Chapter 3 Using battery power However, a battery in the computer slowly discharges when the computer is plugged into external AC power...
... connected to the computer, and other factors. To increase display brightness, use only the battery provided with the computer, a replacement battery provided by HP, or a compatible battery purchased from external power. WARNING! Keeping the battery in the computer. 8 Chapter 3 Using battery power However, a battery in the computer slowly discharges when the computer is plugged into external AC power...

Power Management - Windows Vista
Page 21
... it to high temperatures for extended periods of a battery in a cool, dry place. Do not expose a battery to replace the battery when an internal cell is possibly covered by an HP warranty, instructions include a warranty ID. Battery Check notifies you need it separately. Replace the battery only with a battery approved for battery disposal information. or dispose of time. If the...
... it to high temperatures for extended periods of a battery in a cool, dry place. Do not expose a battery to replace the battery when an internal cell is possibly covered by an HP warranty, instructions include a warranty ID. Battery Check notifies you need it separately. Replace the battery only with a battery approved for battery disposal information. or dispose of time. If the...

Power Management - Windows Vista
Page 22
Shut down the computer under any of the following conditions: ● When you need to replace the battery or access components inside the computer ● When you are unable to use the preceding shutdown procedures, try the following emergency procedures in Hibernation... the computer will be unused and disconnected from external power for at least 5 seconds. ● Disconnect the computer from external power and remove the battery. 18 Chapter 4 Shutting down the computer Click Shut Down. The Shut Down command closes all open programs, including the operating system, and then turns...
Shut down the computer under any of the following conditions: ● When you need to replace the battery or access components inside the computer ● When you are unable to use the preceding shutdown procedures, try the following emergency procedures in Hibernation... the computer will be unused and disconnected from external power for at least 5 seconds. ● Disconnect the computer from external power and remove the battery. 18 Chapter 4 Shutting down the computer Click Shut Down. The Shut Down command closes all open programs, including the operating system, and then turns...

Power Management - Windows Vista
Page 23
... charging 11, 14 conserving power 17 discharging 11 disposing 17 inserting 9 low battery levels 11 recharging 16 removing 9 replacing 17 storing 17 Battery Check 8 battery light 11, 12 battery power 8 battery release latch 9 battery temperature 17 C calibrating battery 14 charging batteries 11, 14 connection, external power 6 conservation, power 17 critical battery level 12 D drive media 1 H Hibernation exiting 2 initiated during critical...
... charging 11, 14 conserving power 17 discharging 11 disposing 17 inserting 9 low battery levels 11 recharging 16 removing 9 replacing 17 storing 17 Battery Check 8 battery light 11, 12 battery power 8 battery release latch 9 battery temperature 17 C calibrating battery 14 charging batteries 11, 14 connection, external power 6 conservation, power 17 critical battery level 12 D drive media 1 H Hibernation exiting 2 initiated during critical...


