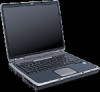
End User License Agreement
Page 2
UPGRADES. ADDITIONAL SOFTWARE. a. You may not reverse engineer, decompile, or disassemble the Software Product, except and only to the extent that the right to United States copyright, trade secret, and trademark law, as well as a ...of any product identification, copyright notices or proprietary restrictions from the Software Product. 6. After upgrading, you fail to the original Software Product provided by HP unless HP provides other form, may not be licensed for the original Software Product identified by the Microsoft License Agreement. 2. This EULA applies to updates or ...
UPGRADES. ADDITIONAL SOFTWARE. a. You may not reverse engineer, decompile, or disassemble the Software Product, except and only to the extent that the right to United States copyright, trade secret, and trademark law, as well as a ...of any product identification, copyright notices or proprietary restrictions from the Software Product. 6. After upgrading, you fail to the original Software Product provided by HP unless HP provides other form, may not be licensed for the original Software Product identified by the Microsoft License Agreement. 2. This EULA applies to updates or ...

Maintenance and Service Guide
Page 3
Contents Introduction...vii Product Information...1-1 Features ...1-8 Operation...1-14 Specifications ...1-18 Internal Design...1-24 Removal and Replacement 2-1 Disassembly Flowchart ...2-3 Removing the Battery ...2-4 Removing an SDRAM Module...2-5 Removing the Wireless LAN Mini PCI Card 2-7 Removing the Hard Disk Drive...2-9 Recovering the Factory Software...2-11 ...
Contents Introduction...vii Product Information...1-1 Features ...1-8 Operation...1-14 Specifications ...1-18 Internal Design...1-24 Removal and Replacement 2-1 Disassembly Flowchart ...2-3 Removing the Battery ...2-4 Removing an SDRAM Module...2-5 Removing the Wireless LAN Mini PCI Card 2-7 Removing the Hard Disk Drive...2-9 Recovering the Factory Software...2-11 ...

Maintenance and Service Guide
Page 4
...Removing the Heat Sink (with Fan 2-43 Figure 2-28. Removing the Hard Disk Drive Guide 2-53 iv Service Manual Figures Figure 1-1. Disassembly Flow...2-3 Figure 2-2. Removing an SDRAM Module 2-5 Figure 2-4. Removing the Switchboard PCA 2-19 Figure 2-15. Removing the Battery ...2-4 Figure ... Top Case Screws 2-29 Figure 2-20. Removing the CD/DVD Drive 2-21 Figure 2-16. Bottom View...1-13 Figure 1-7. Resetting the Notebook ...1-17 Figure 1-8. Removing the Hard Disk Drive 2-9 Figure 2-8. Removing the Speaker Assembly 2-15 Figure 2-12. Removing the Floppy Drive ...
...Removing the Heat Sink (with Fan 2-43 Figure 2-28. Removing the Hard Disk Drive Guide 2-53 iv Service Manual Figures Figure 1-1. Disassembly Flow...2-3 Figure 2-2. Removing an SDRAM Module 2-5 Figure 2-4. Removing the Switchboard PCA 2-19 Figure 2-15. Removing the Battery ...2-4 Figure ... Top Case Screws 2-29 Figure 2-20. Removing the CD/DVD Drive 2-21 Figure 2-16. Bottom View...1-13 Figure 1-7. Resetting the Notebook ...1-17 Figure 1-8. Removing the Hard Disk Drive 2-9 Figure 2-8. Removing the Speaker Assembly 2-15 Figure 2-12. Removing the Floppy Drive ...

Maintenance and Service Guide
Page 33
Disassembly Flow Service Manual Removal and Replacement 2-3 Figure 2-1. Disassembly Flowchart The following diagram shows the general "path" you will use when disassembling the notebook to access any particular component.
Disassembly Flow Service Manual Removal and Replacement 2-3 Figure 2-1. Disassembly Flowchart The following diagram shows the general "path" you will use when disassembling the notebook to access any particular component.
Service Manual
Page 3
Contents Product Information...1-1 Features ...1-48 Operation ...1-54 Specifications ...1-58 Internal Design ...1-64 Removal and Replacement 2-1 Disassembly Flowchart ...2-3 Removing the Battery...2-4 Removing a SDRAM Module...2-5 Removing the Wireless LAN Mini-PCI Card 2-7 Removing the Hard Disk Drive...2-9 Replacing Small Parts ...2-11 Removing the ...
Contents Product Information...1-1 Features ...1-48 Operation ...1-54 Specifications ...1-58 Internal Design ...1-64 Removal and Replacement 2-1 Disassembly Flowchart ...2-3 Removing the Battery...2-4 Removing a SDRAM Module...2-5 Removing the Wireless LAN Mini-PCI Card 2-7 Removing the Hard Disk Drive...2-9 Replacing Small Parts ...2-11 Removing the ...

Service Manual
Page 4
...the Floppy Drive 2-33 Figure 2-23. Removing the Heat Sink (with Fan 2-40 Figure 2-27. Removing a PCMCIA Door 2-60 Figure 2-38. Disassembly Flow ...2-3 Figure 2-2. Removing the Switchboard PCA 2-18 Figure 2-14. Removing the I/R PCA 2-37 Figure 2-25. Removing the RJ11/1394 Connector Module...2-15 Figure 2-12. Removing the Display Assembly 2-24 Figure 2-18. Removing the Hard Disk Drive Guide 2-53 Figure 2-33. Resetting the Notebook 1-57 Figure 1-8. Removing the Top Case 2-31 Figure 2-22. Removing the Keyboard Cover 2-13 Figure 2-10. Back View...1-52 Figure ...
...the Floppy Drive 2-33 Figure 2-23. Removing the Heat Sink (with Fan 2-40 Figure 2-27. Removing a PCMCIA Door 2-60 Figure 2-38. Disassembly Flow ...2-3 Figure 2-2. Removing the Switchboard PCA 2-18 Figure 2-14. Removing the I/R PCA 2-37 Figure 2-25. Removing the RJ11/1394 Connector Module...2-15 Figure 2-12. Removing the Display Assembly 2-24 Figure 2-18. Removing the Hard Disk Drive Guide 2-53 Figure 2-33. Resetting the Notebook 1-57 Figure 1-8. Removing the Top Case 2-31 Figure 2-22. Removing the Keyboard Cover 2-13 Figure 2-10. Back View...1-52 Figure ...

Service Manual
Page 74
Disassembly Flow Service Manual Removal and Replacement 2-3 Disassembly Flowchart The following diagram shows the general "path" you will use when disassembling the notebook to access any particular component. Figure 2-1.
Disassembly Flow Service Manual Removal and Replacement 2-3 Disassembly Flowchart The following diagram shows the general "path" you will use when disassembling the notebook to access any particular component. Figure 2-1.

HP Pavilion ze4x00, ze5x00 and specific xt notebook series - Startup Guide
Page 2
... Celeron™ and SpeedStep™ are U.S. Notice This manual and any examples contained herein are provided "as allowed under the copyright laws. Reverse engineering or disassembly is also prohibited. Reproduction, adaptation, or translation of certain U.S. Reproduction, adaptation, or translation of this manual, including, but not limited to change without prior written...
... Celeron™ and SpeedStep™ are U.S. Notice This manual and any examples contained herein are provided "as allowed under the copyright laws. Reverse engineering or disassembly is also prohibited. Reproduction, adaptation, or translation of certain U.S. Reproduction, adaptation, or translation of this manual, including, but not limited to change without prior written...
HP Pavilion PC - Safety and Comfort Guide
Page 46
... the power cord from the electrical outlet. Voltage Select Switch Ensure that operates from the type of the grounding-type plug by an HP 7-4 Safety & Comfort Guide Do not attempt to use the product in your electrician to the equipment operator as close to replace the... that has a third pin for the product, and the product instructions have questions about the type of power source to recharge the battery, disassemble it, immerse it into is a safety feature. When you cannot insert the plug into a grounded electrical outlet. Electrical and Mechanical Safety Information...
... the power cord from the electrical outlet. Voltage Select Switch Ensure that operates from the type of the grounding-type plug by an HP 7-4 Safety & Comfort Guide Do not attempt to use the product in your electrician to the equipment operator as close to replace the... that has a third pin for the product, and the product instructions have questions about the type of power source to recharge the battery, disassemble it, immerse it into is a safety feature. When you cannot insert the plug into a grounded electrical outlet. Electrical and Mechanical Safety Information...


