
Worldwide Limited Warranty and Technical Support - (1 Year)
Page 3
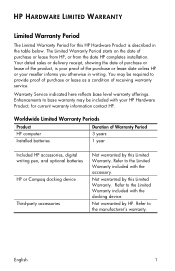
... this Limited Warranty. The Limited Warranty Period starts on the date of Warranty Period HP computer 1 year Installed batteries 1 year Included HP accessories, digital writing pen, and optional batteries HP or Compaq docking device Third-party accessories Not warranted by HP. HP HARDWARE LIMITED WARRANTY Limited Warranty Period The Limited Warranty Period for current warranty information contact...
... this Limited Warranty. The Limited Warranty Period starts on the date of Warranty Period HP computer 1 year Installed batteries 1 year Included HP accessories, digital writing pen, and optional batteries HP or Compaq docking device Third-party accessories Not warranted by HP. HP HARDWARE LIMITED WARRANTY Limited Warranty Period The Limited Warranty Period for current warranty information contact...

Worldwide Limited Warranty and Technical Support - (1 Year)
Page 6
...its sole discretion, may be required to give you a refund of your own installation of end-user replaceable HP or HP approved parts if available for defective products. Your battery is only warranted from which they are replacing or in the servicing country or region. In the unlikely event... that shipped with the product; (c) by software, interfacing, parts or supplies not supplied by HP that manifests a defect in battery capacity. This is your exclusive remedy for your product in which the serial number has been removed or that has been damaged...
...its sole discretion, may be required to give you a refund of your own installation of end-user replaceable HP or HP approved parts if available for defective products. Your battery is only warranted from which they are replacing or in the servicing country or region. In the unlikely event... that shipped with the product; (c) by software, interfacing, parts or supplies not supplied by HP that manifests a defect in battery capacity. This is your exclusive remedy for your product in which the serial number has been removed or that has been damaged...
Worldwide Limited Warranty and Technical Support - (3 Year)
Page 3
... in writing. Refer to provide proof of purchase or lease as a condition of Warranty Period HP computer 3 years Installed batteries 1 year Included HP accessories, digital writing pen, and optional batteries HP or Compaq docking device Third-party accessories Not warranted by HP. Refer to the manufacturer's warranty. Worldwide Limited Warranty Periods Product Duration of receiving warranty...
... in writing. Refer to provide proof of purchase or lease as a condition of Warranty Period HP computer 3 years Installed batteries 1 year Included HP accessories, digital writing pen, and optional batteries HP or Compaq docking device Third-party accessories Not warranted by HP. Refer to the manufacturer's warranty. Worldwide Limited Warranty Periods Product Duration of receiving warranty...

Worldwide Limited Warranty and Technical Support - (3 Year)
Page 6
...in the user documentation that shipped with the product; (c) by software, interfacing, parts or supplies not supplied by HP that manifests a defect in failure. Your battery is not warranted and will vary depending on product configuration and usage, including but not limited 4 English Limited Warranty...you with time or use. All component parts or hardware products removed under this Limited Warranty become the property of the battery included in the HP Product will , at its discretion, repair or replace any product from defects in materials or workmanship resulting in materials or ...
...in the user documentation that shipped with the product; (c) by software, interfacing, parts or supplies not supplied by HP that manifests a defect in failure. Your battery is not warranted and will vary depending on product configuration and usage, including but not limited 4 English Limited Warranty...you with time or use. All component parts or hardware products removed under this Limited Warranty become the property of the battery included in the HP Product will , at its discretion, repair or replace any product from defects in materials or workmanship resulting in materials or ...

Getting Started - Windows 7
Page 6
5 Maintenance ...20 Inserting or removing the battery ...20 Replacing or upgrading the hard drive 21 Removing the hard drive ...21 Installing the hard drive ...22 Replacing the memory module ...24 Updating programs ... ...27 Cleaning products 27 Cleaning procedures 27 Cleaning the display 27 Cleaning the sides and cover 28 Cleaning the TouchPad and keyboard 28 Cleaning a tablet PC pen and pen holder 28 6 Backup and recovery ...29 Backing up your information ...29 Performing a recovery ...30 Using the Windows recovery tools 30 Using a Windows...
5 Maintenance ...20 Inserting or removing the battery ...20 Replacing or upgrading the hard drive 21 Removing the hard drive ...21 Installing the hard drive ...22 Replacing the memory module ...24 Updating programs ... ...27 Cleaning products 27 Cleaning procedures 27 Cleaning the display 27 Cleaning the sides and cover 28 Cleaning the TouchPad and keyboard 28 Cleaning a tablet PC pen and pen holder 28 6 Backup and recovery ...29 Backing up your information ...29 Performing a recovery ...30 Using the Windows recovery tools 30 Using a Windows...

Getting Started - Windows 7
Page 7
...The spill-resistant keyboard and durable plastic housing are especially designed with the computer, refer to help you can connect to the HP Notebook Reference Guide. For more information, refer to the Internet. For information about using the software included with the beginning computer user...to the Internet-Set up the computer ● Help to identify computer components ● Power management features ● How to maximize battery life ● How to know your computer-Learn about your wired or wireless network so that you perform various tasks. Refer to ...
...The spill-resistant keyboard and durable plastic housing are especially designed with the computer, refer to help you can connect to the HP Notebook Reference Guide. For more information, refer to the Internet. For information about using the software included with the beginning computer user...to the Internet-Set up the computer ● Help to identify computer components ● Power management features ● How to maximize battery life ● How to know your computer-Learn about your wired or wireless network so that you perform various tasks. Refer to ...

Getting Started - Windows 7
Page 8
... the safe and proper handling of the power supply, battery, and power cord. 2 Chapter 1 Welcome In countries/regions where the warranty is an educational tool and not a toy. Go to http://www.hp.com/ support. ● Support information ● Ordering...Environmental Notices ● Regulatory and safety information To access the notices, select Start > All Programs > ● Battery disposal information HP > HP Documentation. Worldwide Telephone Numbers booklet HP support telephone numbers This booklet is provided with regard to : ● North America: Hewlett-Packard, MS POD,...
... the safe and proper handling of the power supply, battery, and power cord. 2 Chapter 1 Welcome In countries/regions where the warranty is an educational tool and not a toy. Go to http://www.hp.com/ support. ● Support information ● Ordering...Environmental Notices ● Regulatory and safety information To access the notices, select Start > All Programs > ● Battery disposal information HP > HP Documentation. Worldwide Telephone Numbers booklet HP support telephone numbers This booklet is provided with regard to : ● North America: Hewlett-Packard, MS POD,...

Getting Started - Windows 7
Page 16
... and off during routine operation. Left side Component (1) Vent (2) Power connector (3) Battery light (4) External monitor port (5) USB port (6) RJ-11 (modem) jack Description Enables airflow to external power and the battery is the only USB port in use, it functions as a powered USB port.... It is normal for the internal fan to cycle on battery power. ● Amber: The battery has reached a low or critical level or there is a battery error. ● White: The computer is connected to cool internal components. Connects an optional USB...
... and off during routine operation. Left side Component (1) Vent (2) Power connector (3) Battery light (4) External monitor port (5) USB port (6) RJ-11 (modem) jack Description Enables airflow to external power and the battery is the only USB port in use, it functions as a powered USB port.... It is normal for the internal fan to cycle on battery power. ● Amber: The battery has reached a low or critical level or there is a battery error. ● White: The computer is connected to cool internal components. Connects an optional USB...

Getting Started - Windows 7
Page 18
Locks the battery into the battery bay. (4) Vent (5) Battery release latch (6) Battery bay Enables airflow to know your computer Holds the battery. 12 Chapter 2 Getting to cool internal components. It is normal for the internal fan to the hard drive ...during routine operation. NOTE: The computer fan starts up by the handle. Releases the battery from the battery bay. Bottom Component (1) Computer handle (select models only) (2) Service access cover (3) Battery locking latch Description Allows you to cool internal components and prevent overheating. CAUTION: To ...
Locks the battery into the battery bay. (4) Vent (5) Battery release latch (6) Battery bay Enables airflow to know your computer Holds the battery. 12 Chapter 2 Getting to cool internal components. It is normal for the internal fan to the hard drive ...during routine operation. NOTE: The computer fan starts up by the handle. Releases the battery from the battery bay. Bottom Component (1) Computer handle (select models only) (2) Service access cover (3) Battery locking latch Description Allows you to cool internal components and prevent overheating. CAUTION: To ...

Getting Started - Windows 7
Page 26
Lower the outside edge (1) of the battery into the battery bay. Slide the battery locking latch (3) inward to the HP Notebook Reference Guide. To remove the battery: CAUTION: Removing a battery that is the sole power source for the computer can cause loss of information. To prevent loss of information, save your work and initiate Hibernation ...
Lower the outside edge (1) of the battery into the battery bay. Slide the battery locking latch (3) inward to the HP Notebook Reference Guide. To remove the battery: CAUTION: Removing a battery that is the sole power source for the computer can cause loss of information. To prevent loss of information, save your work and initiate Hibernation ...

Getting Started - Windows 7
Page 27
... the hard drive 1. Remove the 2 screws (1) on by pressing the power button. Lift the inner edge (3) of the battery, and remove the battery from the hard drive bay. Position the computer with the battery bay facing you are not sure whether the computer is on, in the Sleep state, or in Hibernation, turn... in Hibernation. Save your work and shut down the computer through the operating system. Unplug the power cord from the AC outlet and remove the battery. 4. 3. Then shut down the computer. 2.
... the hard drive 1. Remove the 2 screws (1) on by pressing the power button. Lift the inner edge (3) of the battery, and remove the battery from the hard drive bay. Position the computer with the battery bay facing you are not sure whether the computer is on, in the Sleep state, or in Hibernation, turn... in Hibernation. Save your work and shut down the computer through the operating system. Unplug the power cord from the AC outlet and remove the battery. 4. 3. Then shut down the computer. 2.

Getting Started - Windows 7
Page 29
2. Replace the 2 screws (3) on the computer. 4. Align the tabs (1) on the service access cover with the notches on the service access cover. 6. Replace the 4 hard drive screws (3). 3. Turn on the computer. Replacing or upgrading the hard drive 23 Close the cover (2). 5. Replace the battery. 7. Reconnect external power and external devices. 8.
2. Replace the 2 screws (3) on the computer. 4. Align the tabs (1) on the service access cover with the notches on the service access cover. 6. Replace the 4 hard drive screws (3). 3. Turn on the computer. Replacing or upgrading the hard drive 23 Close the cover (2). 5. Replace the battery. 7. Reconnect external power and external devices. 8.

Getting Started - Windows 7
Page 30
...If you can damage electronic components. Unplug the power cord from the AC outlet and remove the battery. 4. To reduce the risk of the computer by replacing the 1-GB module with the battery bay facing you. 5. Save your computer has a 1-GB module, you are discharged of ... Maintenance Position the computer with a 2-GB module. Disconnect all external devices connected to the equipment, unplug the power cord and remove the battery before adding or replacing memory modules. Replacing the memory module The computer has one memory module slot, which contains either a 1-GB memory module...
...If you can damage electronic components. Unplug the power cord from the AC outlet and remove the battery. 4. To reduce the risk of the computer by replacing the 1-GB module with the battery bay facing you. 5. Save your computer has a 1-GB module, you are discharged of ... Maintenance Position the computer with a 2-GB module. Disconnect all external devices connected to the equipment, unplug the power cord and remove the battery before adding or replacing memory modules. Replacing the memory module The computer has one memory module slot, which contains either a 1-GB memory module...

Getting Started - Windows 7
Page 32
c. Align the tabs (1) on the service access cover with the notches on the service access cover. 12. CAUTION: To prevent damage to both the left and right edges of the memory module, until the retention clips snap into place. Replace the battery. 26 Chapter 5 Maintenance Replace the 2 screws (3) on the computer. 10. Close the cover (2). 11. Gently press the memory module (3) down, applying pressure to the memory module, be sure that you do not bend the memory module. 9.
c. Align the tabs (1) on the service access cover with the notches on the service access cover. 12. CAUTION: To prevent damage to both the left and right edges of the memory module, until the retention clips snap into place. Replace the battery. 26 Chapter 5 Maintenance Replace the 2 screws (3) on the computer. 10. Close the cover (2). 11. Gently press the memory module (3) down, applying pressure to the memory module, be sure that you do not bend the memory module. 9.

Getting Started - Windows 7
Page 39
.... You may need this information available when you contact technical support. The serial number label is affixed inside the battery bay. ● Regulatory label-Provides regulatory information about optional wireless devices and the approval markings of some of Authenticity is located... inside the battery bay. ● Wireless certification label or labels (select models only)-Provide information about the computer. If your computer model ...
.... You may need this information available when you contact technical support. The serial number label is affixed inside the battery bay. ● Regulatory label-Provides regulatory information about optional wireless devices and the approval markings of some of Authenticity is located... inside the battery bay. ● Wireless certification label or labels (select models only)-Provide information about the computer. If your computer model ...
Getting Started - Windows 7
Page 41
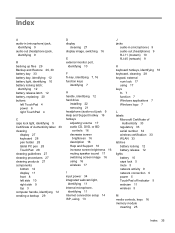
identifying 12 battery release latch 12 battery, replacing 20 buttons left TouchPad 4 power 6 right TouchPad 4 C caps lock light, identifying 5 Certificate of Authenticity label 33 cleaning display 27 keyboard 28 pen holder 28 tablet PC pen 28 TouchPad 28 cleaning guidelines 27 cleaning ...(microphone) jack, identifying 9 audio-out (headphone) jack, identifying 9 B backing up files 29 Backup and Restore 29, 30 battery bay 33 battery bay, identifying 12 battery light, identifying 10 battery locking latch; Index A audio-in (microphone) 9 audio-out (headphone) 9 RJ-11 (modem) 10 RJ-45 (network) ...
identifying 12 battery release latch 12 battery, replacing 20 buttons left TouchPad 4 power 6 right TouchPad 4 C caps lock light, identifying 5 Certificate of Authenticity label 33 cleaning display 27 keyboard 28 pen holder 28 tablet PC pen 28 TouchPad 28 cleaning guidelines 27 cleaning ...(microphone) jack, identifying 9 audio-out (headphone) jack, identifying 9 B backing up files 29 Backup and Restore 29, 30 battery bay 33 battery bay, identifying 12 battery light, identifying 10 battery locking latch; Index A audio-in (microphone) 9 audio-out (headphone) 9 RJ-11 (modem) 10 RJ-45 (network) ...

Getting Started - Windows Vista
Page 5
The illustrations in appearance by computer model. Basic Setup 1 Unpack the box ✎ Computer color, features, and options may look slightly different from your computer. Component Component 1 AC adapter 3 Battery* 2 Computer 4 Power cord* *Batteries and power cords vary in this guide may vary by country or region. Getting Started 1
The illustrations in appearance by computer model. Basic Setup 1 Unpack the box ✎ Computer color, features, and options may look slightly different from your computer. Component Component 1 AC adapter 3 Battery* 2 Computer 4 Power cord* *Batteries and power cords vary in this guide may vary by country or region. Getting Started 1

Getting Started - Windows Vista
Page 6
... cord, plug the cord into a grounded (earthed) 3-pin outlet. Basic Setup 2 Insert the battery Å WARNING: To reduce potential safety issues, use only the AC adapter or battery provided with the computer, or a replacement AC adapter or battery provided by HP. 3 Connect the computer to external power Å WARNING: To reduce the risk of...
... cord, plug the cord into a grounded (earthed) 3-pin outlet. Basic Setup 2 Insert the battery Å WARNING: To reduce potential safety issues, use only the AC adapter or battery provided with the computer, or a replacement AC adapter or battery provided by HP. 3 Connect the computer to external power Å WARNING: To reduce the risk of...

Getting Started - Windows Vista
Page 7
Getting Started 3 The AC adapter light (on the right-side of the computer) remains on when it is charging. 4 Open the computer 5 Turn on the computer ✎ If the computer will not be accurate until the AC adapter light turns off. ✎ A partially charged new battery can run the computer after software setup is complete, but battery charge displays will not start up, be sure that the power cord and AC adapter connections are secure. Basic Setup Leave the computer connected to external power until the new battery has been fully charged.
Getting Started 3 The AC adapter light (on the right-side of the computer) remains on when it is charging. 4 Open the computer 5 Turn on the computer ✎ If the computer will not be accurate until the AC adapter light turns off. ✎ A partially charged new battery can run the computer after software setup is complete, but battery charge displays will not start up, be sure that the power cord and AC adapter connections are secure. Basic Setup Leave the computer connected to external power until the new battery has been fully charged.

Getting Started - Windows Vista
Page 10
...and about the operating system, drivers, and troubleshooting tools. It describes proper workstation setup and proper posture, health, and work habits for battery disposal information, refer to the User Guides disc included with some models. To access the notices, click Start, click Help and Support...9632; Restoring the computer to a previous state ■ Recovering information using recovery tools ✎ For instructions on the Web at http://www.hp.com/ergo. Backing up your entire hard drive (select models only), or create system restore points. What's Next? To access Help and ...
...and about the operating system, drivers, and troubleshooting tools. It describes proper workstation setup and proper posture, health, and work habits for battery disposal information, refer to the User Guides disc included with some models. To access the notices, click Start, click Help and Support...9632; Restoring the computer to a previous state ■ Recovering information using recovery tools ✎ For instructions on the Web at http://www.hp.com/ergo. Backing up your entire hard drive (select models only), or create system restore points. What's Next? To access Help and ...


