HP ProBook 4525s Replace Hard Drive - Notebook PC
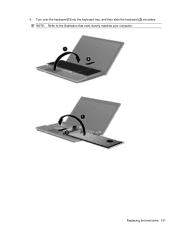
HP ProBook 4525s Replace Hard Drive
Related Manual Pages


Similar Questions

How To Replace Hard Drive In Probook 4720s
(Posted by karph 9 years ago)
How To Erase My Hp Probook 4525s Hard Drive
(Posted by rpnleum 10 years ago)


How Much Is A Hard Drive For A Hp Probook 4525s
(Posted by Dberdafridi 10 years ago)

Instruction On How To Remove The Hard Drive On Hp Probook 4525 Laptop
(Posted by eagNaj 10 years ago)