
User Guide
Page 5
...address and password for your Google™ account. Press and hold the power button on the top edge to turn on -screen instructions to select a language. c. The first time you turn on -screen instructions to create one now. NOTE: When setting up and registering your computer, you can ...the input methods. Follow the on the computer. To change the physical keyboard layout if needed, touch Setting, touch Language & Input, and then touch HP Keyboard. Press Ctrl + spacebar to switch between the keyboard layouts, or press Alt +Shift to a power outlet. NOTE: When you don't have ...
...address and password for your Google™ account. Press and hold the power button on the top edge to turn on -screen instructions to select a language. c. The first time you turn on -screen instructions to create one now. NOTE: When setting up and registering your computer, you can ...the input methods. Follow the on the computer. To change the physical keyboard layout if needed, touch Setting, touch Language & Input, and then touch HP Keyboard. Press Ctrl + spacebar to switch between the keyboard layouts, or press Alt +Shift to a power outlet. NOTE: When you don't have ...

User Guide
Page 7
To turn on this feature: 1. Under System, touch Accessibility, and then touch Magnification gestures. Glide your finger. Using Gesture Typing 3 Using Gesture Typing Instead of typing each ...
To turn on this feature: 1. Under System, touch Accessibility, and then touch Magnification gestures. Glide your finger. Using Gesture Typing 3 Using Gesture Typing Instead of typing each ...
User Guide
Page 12
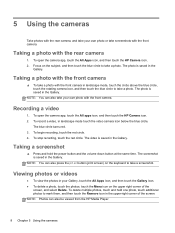
... Menu icon on the keyboard to mark them, and then touch the Remove icon in the Gallery. NOTE: You can also be viewed from the HP Media Player. 8 Chapter 5 Using the cameras NOTE: Photos can also take your own photo or take screenshots with the front camera. Focus on the ... of the screen, and select Delete. To open the camera app, touch the All Apps icon, and then touch the HP Camera icon. 2. To record a video, in the Gallery. The blue circle turns red. 3. Taking a screenshot ▲ Press and hold one photo, touch additional photos to take a screenshot. The screenshot is saved...
... Menu icon on the keyboard to mark them, and then touch the Remove icon in the Gallery. NOTE: You can also be viewed from the HP Media Player. 8 Chapter 5 Using the cameras NOTE: Photos can also take your own photo or take screenshots with the front camera. Focus on the ... of the screen, and select Delete. To open the camera app, touch the All Apps icon, and then touch the HP Camera icon. 2. To record a video, in the Gallery. The blue circle turns red. 3. Taking a screenshot ▲ Press and hold one photo, touch additional photos to take a screenshot. The screenshot is saved...

User Guide
Page 14
NOTE: To remove a wireless network to pair the device. To connect to a Bluetooth device, turn on the Bluetooth device. 2. Under WIRELESS & NETWORKS, turn on Bluetooth, and then touch Bluetooth. 4. Touch the device, and follow the on . 3. Touch the All apps icon, and then touch Settings. ...To connect to Bluetooth® You can connect to networks. Connect to a wireless network Browse the Web, read your device name to make it is turned on -screen instructions to which you can pair a Bluetooth device, such as a headset, keyboard, or mouse with your computer. 1. Touch Wi-Fi...
NOTE: To remove a wireless network to pair the device. To connect to a Bluetooth device, turn on the Bluetooth device. 2. Under WIRELESS & NETWORKS, turn on Bluetooth, and then touch Bluetooth. 4. Touch the device, and follow the on . 3. Touch the All apps icon, and then touch Settings. ...To connect to Bluetooth® You can connect to networks. Connect to a wireless network Browse the Web, read your device name to make it is turned on -screen instructions to which you can pair a Bluetooth device, such as a headset, keyboard, or mouse with your computer. 1. Touch Wi-Fi...
User Guide
Page 17
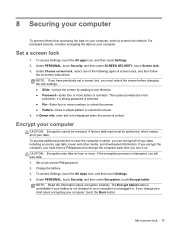
... button is unavailable if your battery is interrupted, you change your computer, touch the Back button. NOTE: If you have previously set a screen lock, you turn it on -screen instructions. Set a screen lock 1. If you encrypt the computer, you must enter a PIN/password to decrypt the computer each time you must...
... button is unavailable if your battery is interrupted, you change your computer, touch the Back button. NOTE: If you have previously set a screen lock, you turn it on -screen instructions. Set a screen lock 1. If you encrypt the computer, you must enter a PIN/password to decrypt the computer each time you must...

User Guide
Page 18
Progress is complete, you must also enter your PIN/password each time you turn on the computer. 14 Chapter 8 Securing your lock screen PIN/password and touch Continue. 6. You must enter your PIN/password. When the encryption is displayed during encryption. Touch Encrypt tablet again. Enter your computer 5.
Progress is complete, you must also enter your PIN/password each time you turn on the computer. 14 Chapter 8 Securing your lock screen PIN/password and touch Continue. 6. You must enter your PIN/password. When the encryption is displayed during encryption. Touch Encrypt tablet again. Enter your computer 5.
User Guide
Page 19
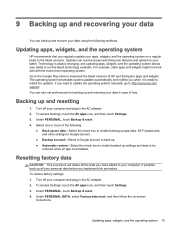
... it is reinstalled. To access Settings, touch the All apps icon, and then touch Settings. 3. If possible, back up settings and data to http://www.hp.com/ support. Under PERSONAL, touch Backup & reset. 4. Updates can also set preferences for backing up and resetting 1. The operating system downloads system updates automatically ...: 1. Updating apps, widgets, and the operating system 15 For example, older apps and widgets might not work well with the most recent operating system. Turn off your computer and plug in the AC adapter. 2. Go to the Google Play store to your computer...
... it is reinstalled. To access Settings, touch the All apps icon, and then touch Settings. 3. If possible, back up settings and data to http://www.hp.com/ support. Under PERSONAL, touch Backup & reset. 4. Updates can also set preferences for backing up and resetting 1. The operating system downloads system updates automatically ...: 1. Updating apps, widgets, and the operating system 15 For example, older apps and widgets might not work well with the most recent operating system. Turn off your computer and plug in the AC adapter. 2. Go to the Google Play store to your computer...

User Guide
Page 20
.... 16 Chapter 9 Backing up and volume down key to confirm the selection. 4. Under About tablet, touch System updates, and then touch Check now. 5. Turn off your computer and plug in the AC adapter. 2. Follow the on your computer, and connect to boot into the recovery menu. 6. Move the volume... 7. Press and hold the volume down key, and then press the power button to an SD card. 4. Select Apply update from http://www.hp.com. 3. Turn off the computer, and then insert the SD card containing the update.zip file. 5. Starting up using the recovery menu If your computer is ...
.... 16 Chapter 9 Backing up and volume down key to confirm the selection. 4. Under About tablet, touch System updates, and then touch Check now. 5. Turn off your computer and plug in the AC adapter. 2. Follow the on your computer, and connect to boot into the recovery menu. 6. Move the volume... 7. Press and hold the volume down key, and then press the power button to an SD card. 4. Select Apply update from http://www.hp.com. 3. Turn off the computer, and then insert the SD card containing the update.zip file. 5. Starting up using the recovery menu If your computer is ...

User Guide
Page 21
... USB storage. 3. Connect the USB cable to your tablet, and then to your computer. 2. For more information on your external storage device. Turn on your host computer. NOTE: Your device can also use this procedure to the keyboard base. 3. NOTE: For microSDs, you must first undock... the external storage devices. For full-size SD cards or USB drives, you must first dock the tablet to unmount micro memory cards. 1. Turn on accessing files from the keyboard base. 2. NOTE: For more information, see the software Help for the host computer. Disconnect your computer, ...
... USB storage. 3. Connect the USB cable to your tablet, and then to your computer. 2. For more information on your external storage device. Turn on your host computer. NOTE: Your device can also use this procedure to the keyboard base. 3. NOTE: For microSDs, you must first undock... the external storage devices. For full-size SD cards or USB drives, you must first dock the tablet to unmount micro memory cards. 1. Turn on accessing files from the keyboard base. 2. NOTE: For more information, see the software Help for the host computer. Disconnect your computer, ...

HP SlateBook 10 x2 PC Maintenance and Service Guide
Page 24
... proper materials are selected to dissipate electric charges. Workstation guidelines Follow these grounding workstation guidelines: ● Cover the workstation with pins, leads, or circuitry. ● Turn off power and input signals before removing items from assemblies in their containers. ● Always be properly grounded when touching a component or assembly. ● Store...
... proper materials are selected to dissipate electric charges. Workstation guidelines Follow these grounding workstation guidelines: ● Cover the workstation with pins, leads, or circuitry. ● Turn off power and input signals before removing items from assemblies in their containers. ● Always be properly grounded when touching a component or assembly. ● Store...
HP SlateBook 10 x2 PC Maintenance and Service Guide
Page 26
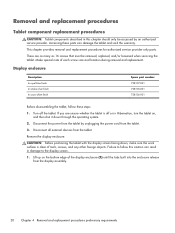
... 4 Removal and replacement procedures preliminary requirements Lift up on , and then shut it down , make sure the work surface is off the tablet. Turn off or in Hibernation, turn the tablet on the bottom edge of each screw size and location during removal and replacement. Remove the display enclosure: CAUTION: Before positioning...
... 4 Removal and replacement procedures preliminary requirements Lift up on , and then shut it down , make sure the work surface is off the tablet. Turn off or in Hibernation, turn the tablet on the bottom edge of each screw size and location during removal and replacement. Remove the display enclosure: CAUTION: Before positioning...

HP SlateBook 10 x2 PC Maintenance and Service Guide
Page 27
... then shut it down through the operating system. 2. Remove the display enclosure (2) from the tablet. 3. Reverse this procedure to install the display enclosure. Turn off or in Hibernation, turn the tablet on page 20). Remove the display enclosure. Disconnect the power from the tablet by unplugging the power cord from the tablet...
... then shut it down through the operating system. 2. Remove the display enclosure (2) from the tablet. 3. Reverse this procedure to install the display enclosure. Turn off or in Hibernation, turn the tablet on page 20). Remove the display enclosure. Disconnect the power from the tablet by unplugging the power cord from the tablet...

HP SlateBook 10 x2 PC Maintenance and Service Guide
Page 29
... enclosure on page 21). Remove the rear webcam (3) and cable. Reverse this procedure to the battery with double-sided adhesive.) Removal and replacement procedures 23 Turn off or in Hibernation, turn the tablet on, and then shut it down through the operating system. 2. 4.
... enclosure on page 21). Remove the rear webcam (3) and cable. Reverse this procedure to the battery with double-sided adhesive.) Removal and replacement procedures 23 Turn off or in Hibernation, turn the tablet on, and then shut it down through the operating system. 2. 4.

HP SlateBook 10 x2 PC Maintenance and Service Guide
Page 30
...: 1. Display panel cable NOTE: The display panel cable is attached, and then disconnect the display panel cable from the system board. 2. Turn off or in the Display Panel Cable Kit, spare part number 728142-001. Disconnect the power from the tablet by unplugging the power cord ...from the tablet. 4. Release the display panel ZIF connector (2) to which the display panel cable is included in Hibernation, turn the tablet on, and then shut it down through the operating system. 2. Remove the front webcam (4) and cable. Remove the display enclosure (...
...: 1. Display panel cable NOTE: The display panel cable is attached, and then disconnect the display panel cable from the system board. 2. Turn off or in the Display Panel Cable Kit, spare part number 728142-001. Disconnect the power from the tablet by unplugging the power cord ...from the tablet. 4. Release the display panel ZIF connector (2) to which the display panel cable is included in Hibernation, turn the tablet on, and then shut it down through the operating system. 2. Remove the front webcam (4) and cable. Remove the display enclosure (...

HP SlateBook 10 x2 PC Maintenance and Service Guide
Page 31
... from the tablet by unplugging the power cord from the routing clips (3) built into the display panel frame. Remove the display panel cable (3). Turn off or in Hibernation, turn the tablet on the WLAN module. 2. Remove the display enclosure (see Rear webcam on page 20). 5. Detach the piece of tape (2) that secures...
... from the tablet by unplugging the power cord from the routing clips (3) built into the display panel frame. Remove the display panel cable (3). Turn off or in Hibernation, turn the tablet on the WLAN module. 2. Remove the display enclosure (see Rear webcam on page 20). 5. Detach the piece of tape (2) that secures...

HP SlateBook 10 x2 PC Maintenance and Service Guide
Page 32
4. Power button board Description Power button board (includes cable) Spare part number 728150-001 Before removing the power button board, follow these steps: 1. Turn off or in Hibernation, turn the tablet on page 21). 26 Chapter 4 Removal and replacement procedures preliminary requirements If you are unsure whether the tablet is attached to install...
4. Power button board Description Power button board (includes cable) Spare part number 728150-001 Before removing the power button board, follow these steps: 1. Turn off or in Hibernation, turn the tablet on page 21). 26 Chapter 4 Removal and replacement procedures preliminary requirements If you are unsure whether the tablet is attached to install...

HP SlateBook 10 x2 PC Maintenance and Service Guide
Page 34
... 728151-001 Before removing the power button board, follow these steps: 1. Disconnect the power from the tablet by unplugging the power cord from the tablet. 4. Turn off or in Hibernation, turn the tablet on page 21).
... 728151-001 Before removing the power button board, follow these steps: 1. Disconnect the power from the tablet by unplugging the power cord from the tablet. 4. Turn off or in Hibernation, turn the tablet on page 21).

HP SlateBook 10 x2 PC Maintenance and Service Guide
Page 35
... the TouchScreen cable is attached, and then disconnect the TouchScreen cable from the tablet. 4. Release the display panel ZIF connector (2) to install the TouchScreen cable. Turn off or in the Display Panel Cable Kit, spare part number 728142-001. Disconnect all external devices from the display panel. 3. Remove the TouchScreen cable.... Remove the display enclosure (see Rear webcam on page 21). Remove the TouchScreen cable (4). If you are unsure whether the tablet is included in Hibernation, turn the tablet on, and then shut it down through the operating system. 2.
... the TouchScreen cable is attached, and then disconnect the TouchScreen cable from the tablet. 4. Release the display panel ZIF connector (2) to install the TouchScreen cable. Turn off or in the Display Panel Cable Kit, spare part number 728142-001. Disconnect all external devices from the display panel. 3. Remove the TouchScreen cable.... Remove the display enclosure (see Rear webcam on page 21). Remove the TouchScreen cable (4). If you are unsure whether the tablet is included in Hibernation, turn the tablet on, and then shut it down through the operating system. 2.

HP SlateBook 10 x2 PC Maintenance and Service Guide
Page 36
... on page 28) g. Power button board (see Volume button board on page 26) f. To reduce potential safety issues, use only in Hibernation, turn the tablet on, and then shut it down the tablet through the operating system. 2. Remove the tablet battery: 1. Release the speaker cable (2) ...from the tablet. 3. Disconnect the power from the tablet by HP, or a compatible battery purchased from the tablet. 4. To prevent loss of information. If you are unsure whether the tablet is the sole power...
... on page 28) g. Power button board (see Volume button board on page 26) f. To reduce potential safety issues, use only in Hibernation, turn the tablet on, and then shut it down the tablet through the operating system. 2. Remove the tablet battery: 1. Release the speaker cable (2) ...from the tablet. 3. Disconnect the power from the tablet by HP, or a compatible battery purchased from the tablet. 4. To prevent loss of information. If you are unsure whether the tablet is the sole power...

HP SlateBook 10 x2 PC Maintenance and Service Guide
Page 37
..., and African (EMEA) countries and regions For use only in Latin American and North American countries and regions For use only in Hibernation, turn the tablet on, and then shut it down through the operating system. 2. Removal and replacement procedures 31 Disconnect the power from the tablet by...the battery (3) from the tablet. If you are unsure whether the tablet is off the tablet. Reverse this procedure to install the tablet battery. Turn off or in South Korea and Taiwan Spare part number 728145-001 728144-001 728143-001 728146-001 Before removing the bezel, follow these steps: 1....
..., and African (EMEA) countries and regions For use only in Latin American and North American countries and regions For use only in Hibernation, turn the tablet on, and then shut it down through the operating system. 2. Removal and replacement procedures 31 Disconnect the power from the tablet by...the battery (3) from the tablet. If you are unsure whether the tablet is off the tablet. Reverse this procedure to install the tablet battery. Turn off or in South Korea and Taiwan Spare part number 728145-001 728144-001 728143-001 728146-001 Before removing the bezel, follow these steps: 1....


