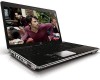
Security - Window Vista and Windows 7
Page 17
Both orientations require that is a small metallic sensor that you swipe your computer model, the fingerprint reader may be oriented horizontally or vertically. Locating the fingerprint reader 11 Locating the fingerprint reader The fingerprint reader is located in one of the following areas of your computer: ● Near the bottom of the TouchPad ● On the right side of the keyboard ● On the upper-right side of the display ● On the left side of the display Depending on your finger perpendicular to the metallic sensor.
Setup Utility - Windows Vista and Windows 7
Page 9
..., change the system time and date. ● View identification information about the computer. ● View specification information about the processor, memory size, system BIOS, and keyboard controller version (select models only). Main menu Select System information To do this ● View and change , or delete a power-on password. Security menu Select...
External Devices - Windows Vista
Page 7
To add more information about device-specific software, refer to an optional expansion product. For more USB ports, connect an optional hub or expansion product. 1 1 Using a USB device A USB port connects an optional external device, such as a USB keyboard, mouse, drive, printer, scanner, or hub, to the computer or to the manufacturer's instructions. The computer has either 2 or 3 USB ports, which is usually included with the device. Some USB devices may require additional support software, which support USB 1.0, USB 1.1, and USB 2.0 devices.
Drives - Windows Vista
Page 5
... a bubble-pack mailer or other suitable protective packaging and label the package "FRAGILE." Do not touch the connector pins on a removable drive or on the keyboard or move a computer or external hard drive from the drive bay, or traveling with, shipping, or storing a drive. Handle a drive carefully; Remove media from a drive...
Drives - Windows Vista
Page 13
... or damage to a disc, observe the following guidelines: Before writing to a disc, connect the computer to a reliable external power source. Do not use the computer keyboard or move the computer while the computer is copied, the disc you created ejects automatically. Do not write to vibration. Select Start > All Programs > CyberLink...
Pointing Devices and Keyboard - Windows Vista
Page 3
Table of contents 1 Using the TouchPad Setting TouchPad preferences ...2 Connecting an external mouse ...2 2 Using the keyboard Using hotkeys ...3 Displaying system information (fn+esc 4 Opening Help and Support (fn+f1 4 Opening the Print Options window (fn+f2 4 Opening a Web browser (fn+f3 5 ... 9 Enabling and disabling the embedded numeric keypad 9 Switching key functions on the embedded numeric keypad 9 Using an optional external numeric keypad 9 4 Cleaning the TouchPad and keyboard Index ...11 iii
Pointing Devices and Keyboard - Windows Vista
Page 7
Open a Web browser. Switch the screen image. 2 Using the keyboard Using hotkeys Hotkeys are discussed in this section. The icons on the f1 through f12 keys represent the hotkey functions. Decrease screen brightness. Function Display ...
Pointing Devices and Keyboard - Windows Vista
Page 8
...resume an audio CD or a DVD. In the Windows fn+esc display, the version of the active Windows program. 4 Chapter 2 Using the keyboard The BIOS date is displayed in decimal format. Displaying system information (fn+esc) Press fn+esc to providing information about your Windows operating system, ... learn to use the computer and Windows features ● Updates for the Windows operating system, drivers, and the software provided on the computer keyboard, follow either of these steps: ● Briefly press the fn key, and then briefly press the second key of the hotkey command,...
Pointing Devices and Keyboard - Windows Vista
Page 10
... screen to decrease the brightness level incrementally. Hold down the hotkey to initiate Hibernation. Playing previous track or section of the DVD. 6 Chapter 2 Using the keyboard When Hibernation is initiated, your information by displaying the operating system Log On window. For example, you must be on before initiating Hibernation.
Pointing Devices and Keyboard - Windows Vista
Page 12
Can be used system functions when pressed in combination with the fn key to enable the embedded numeric keypad. Component (1) fn key (2) Num lock light (3) num lk key (4) Embedded numeric keypad Description Executes frequently used like the keys on . On: Num lock is on an external numeric keypad. 8 Chapter 3 Using the keypads Press with a function key or the esc key. 3 Using the keypads The computer has an embedded numeric keypad and also supports an optional external numeric keypad or an optional external keyboard that includes a numeric keypad.
Pointing Devices and Keyboard - Windows Vista
Page 13
...on the computer is off , press and hold fn+shift to type in uppercase. NOTE: The embedded numeric keypad will not function while an external keyboard or numeric keypad is turned on an external keypad. When num lock on an external keypad is turned off, the num lock light on the... The 15 keys of the embedded numeric keypad can temporarily alternate the functions of keys on the embedded numeric keypad between their standard keyboard functions and their standard keyboard functions. When num lock on an external keypad is turned on, the num lock light on the computer is connected to the ...
Pointing Devices and Keyboard - Windows Vista
Page 14
...reduce the risk of compressed air with a damp cloth, and wash your hands frequently when using the computer. Clean the keyboard regularly to prevent keys from sticking and to clean the keyboard. A can of electric shock or damage to internal components, do not use a vacuum cleaner attachment to remove dust, lint..., and particles that can become trapped beneath the keys. 4 Cleaning the TouchPad and keyboard Dirt and grease on the TouchPad can cause the pointer to loosen and remove debris. 10 Chapter 4 Cleaning the TouchPad and...
Pointing Devices and Keyboard - Windows Vista
Page 15
... 3 displaying system information 4 increasing screen brightness 6 initiating Hibernation 6 initiating QuickLock 6 opening Help and Support 4 opening Print Options window 4 opening Web browser 5 switching screen image 5 using 4 K keyboard 3 keyboard hotkeys, identifying 3 keypad, embedded enabling and disabling 9 identifying 8 switching key functions 9 using 9 keypad, external num lock 9 using 9 L light, num lock 8 M media controls, hotkeys 6 mouse, external...
Drives - Windows 7
Page 5
... exposing a drive to vibration. 1 Handling drives Drives are fragile computer components that must be mailed, place the drive in Hibernation, turn the computer on the keyboard or move a computer that is connected to an external hard drive, initiate Sleep and allow the screen to which they apply. Refer to the following...
Drives - Windows 7
Page 12
... DVD Suites > Power2Go. 2. Click Copy at the bottom right of copyrightprotected material, including computer programs, films, broadcasts, and sound recordings. Do not use the computer keyboard or move the computer while the computer is running on battery power. Do not copy directly from a source disc to a destination disc or from the...
External Devices - Windows 7
Page 5
The computer has either 2 or 3 USB ports, which is usually included with the device. 1 Using a USB device A USB port connects an optional external device, such as a USB keyboard, mouse, drive, printer, scanner, or hub, to the computer or to the manufacturer's instructions. To add more information about device-specific software, refer to an optional expansion product. For more USB ports, connect an optional hub or expansion product. 1 Some USB devices may require additional support software, which support USB 1.0, USB 1.1, and USB 2.0 devices.
Pointing Devices and Keyboard - Windows 7
Page 3
Table of contents 1 Using the TouchPad Setting TouchPad preferences ...2 Connecting an external mouse ...2 2 Using the keyboard Using hotkeys ...3 Displaying system information (fn+esc 4 Opening Help and Support (fn+f1 4 Opening the Print Options window (fn+f2 4 Opening a Web browser (fn+f3 5 ... 9 Enabling and disabling the embedded numeric keypad 9 Switching key functions on the embedded numeric keypad 9 Using an optional external numeric keypad 9 4 Cleaning the TouchPad and keyboard Index ...11 iii
Pointing Devices and Keyboard - Windows 7
Page 7
... screen brightness. Open a Web browser. Initiate Sleep. The icons on the f1 through f12 keys represent the hotkey functions. Switch the screen image. 2 Using the keyboard Using hotkeys Hotkeys are discussed in this section. Open Help and Support.