

Owner's Manual
Page 1
... is right for your system, visit www.honeywell.com/ yourhome or call Honeywell Customer Care at 1-800-468-1502. Registered Trademark Copyright © 2002 Honeywell All Rights Reserved 69-0274-6 Installation Instructions Compatible with: Heating/Cooling system CT87A CT87B CT87J Heating only: Gas or oil fueled ... unit (compressor) with no auxiliary or backup heat. CT87A,B,J Round® Thermostat LOW VOLTAGE (15 TO 30 VAC), THERMOSTAT AND MOUNTING HARDWARE 1 Verify that you have the correct thermostat Using the compatibility chart below, verify that you are unsure which model is ...
... is right for your system, visit www.honeywell.com/ yourhome or call Honeywell Customer Care at 1-800-468-1502. Registered Trademark Copyright © 2002 Honeywell All Rights Reserved 69-0274-6 Installation Instructions Compatible with: Heating/Cooling system CT87A CT87B CT87J Heating only: Gas or oil fueled ... unit (compressor) with no auxiliary or backup heat. CT87A,B,J Round® Thermostat LOW VOLTAGE (15 TO 30 VAC), THERMOSTAT AND MOUNTING HARDWARE 1 Verify that you have the correct thermostat Using the compatibility chart below, verify that you are unsure which model is ...
Owner's Manual
Page 2
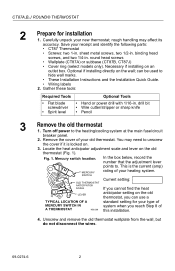
... anticipator setting on the old thermostat (Fig. 1). Unscrew and remove the old thermostat wallplate from the wall, but do not disconnect the wires. 69-0274-6 2 round head screws • Wallplate (CT87A) or subbase (CT87B, CT87J) • Cover ring (select models only). can use a TYPICAL LOCATION OF A standard setting for installation 1. Mercury switch location. rough...
... anticipator setting on the old thermostat (Fig. 1). Unscrew and remove the old thermostat wallplate from the wall, but do not disconnect the wires. 69-0274-6 2 round head screws • Wallplate (CT87A) or subbase (CT87B, CT87J) • Cover ring (select models only). can use a TYPICAL LOCATION OF A standard setting for installation 1. Mercury switch location. rough...

Owner's Manual
Page 3
...in a sealed tube, do not place your old control in a sealed tube. 4 Install the cover ring and wallplate or subbase If installing on the wall (wallplate shown). Disconnect the wires from the old thermostat and wrap them around a pencil to Fig. 4 as you work. Contact your ...management authority for instructions regarding recycling and the proper disposal of this thermostat is replacing a control that came with the CT87. stat (Fig. 2). Labeling wires. Do not label the wires by color. 6. Installing wallplate/subbase on the wall Refer to keep them from falling back...
...in a sealed tube, do not place your old control in a sealed tube. 4 Install the cover ring and wallplate or subbase If installing on the wall (wallplate shown). Disconnect the wires from the old thermostat and wrap them around a pencil to Fig. 4 as you work. Contact your ...management authority for instructions regarding recycling and the proper disposal of this thermostat is replacing a control that came with the CT87. stat (Fig. 2). Labeling wires. Do not label the wires by color. 6. Installing wallplate/subbase on the wall Refer to keep them from falling back...

Owner's Manual
Page 4
.... 4. Reposition the cover ring (if used) and wallplate/subbase over the cover ring. Installing wallplate/subbase on the top. 3. You will be inserting screws through the wiring opening, and loosely insert the two 1-in . ROUND HEAD SCREW (2) A THERMOSTAT WIRING HOLE 1 THE TWO INNER HOLES ARE USED WITH WALLPLATE. 2 IF OUTLET BOX IS...
.... 4. Reposition the cover ring (if used) and wallplate/subbase over the cover ring. Installing wallplate/subbase on the top. 3. You will be inserting screws through the wiring opening, and loosely insert the two 1-in . ROUND HEAD SCREW (2) A THERMOSTAT WIRING HOLE 1 THE TWO INNER HOLES ARE USED WITH WALLPLATE. 2 IF OUTLET BOX IS...

Owner's Manual
Page 9
... mercury switch in Fig. 14. NOTE: These screws complete the installation of the thermostat. Tightening mounting screws. CT87A,B,J ROUND® THERMOSTAT 7 Mount the thermostat 1. HEAT ANTICIPATOR INDICATOR 1.2 .6 .5 .4 .3 .2 HOLE SUITABLE FOR PENCIL POINT TO MOVE INDICATOR .15 SCALE .12 .10 M20226 3. IMPORTANT: This prevents the thermostat from being damaged. Adjusting heat anticipator indicator. CAPTIVE SCREWS (3) M20227...
... mercury switch in Fig. 14. NOTE: These screws complete the installation of the thermostat. Tightening mounting screws. CT87A,B,J ROUND® THERMOSTAT 7 Mount the thermostat 1. HEAT ANTICIPATOR INDICATOR 1.2 .6 .5 .4 .3 .2 HOLE SUITABLE FOR PENCIL POINT TO MOVE INDICATOR .15 SCALE .12 .10 M20226 3. IMPORTANT: This prevents the thermostat from being damaged. Adjusting heat anticipator indicator. CAPTIVE SCREWS (3) M20227...


