
Owners Manual
Page 5
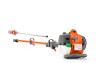
... chain oil 21 Operator's manual 22 Transport guard, bar 23 Allen key 24 Combination spanner 25 Harness (327P4) 26 Balance Flex harness (327P5) 27 Shaft coupling (327P5) 28 Upper shaft (327P5) 29 Lower shaft (327P5) 30 Impact guard (327P5) 31 Spark plug cap and spark plug English - 5
... chain oil 21 Operator's manual 22 Transport guard, bar 23 Allen key 24 Combination spanner 25 Harness (327P4) 26 Balance Flex harness (327P5) 27 Shaft coupling (327P5) 28 Upper shaft (327P5) 29 Lower shaft (327P5) 30 Impact guard (327P5) 31 Spark plug cap and spark plug English - 5

Owners Manual
Page 16
...the knob (at least 3 times). • Fill with the arrow on top of the bar head Dismantling: Loosen the coupling by turning the knob. • Align the tab of the coupling. Tighten the screws to a torque 16 - Fit the guard using the unit, tighten the knob securely. • ... the impact guard is assembled. English B A • Push the attachment into the coupling until the attachment snaps into place. While securely holding the engine end, pull the attachment straight out of the attachment (A) with Husqvarna saw chain oil. • Refit the cap. Fit the two short screws ...
...the knob (at least 3 times). • Fill with the arrow on top of the bar head Dismantling: Loosen the coupling by turning the knob. • Align the tab of the coupling. Tighten the screws to a torque 16 - Fit the guard using the unit, tighten the knob securely. • ... the impact guard is assembled. English B A • Push the attachment into the coupling until the attachment snaps into place. While securely holding the engine end, pull the attachment straight out of the attachment (A) with Husqvarna saw chain oil. • Refit the cap. Fit the two short screws ...

Owners Manual
Page 17
... the engine end, pull the attachment straight out of 4 Nm. Dismantling • Loosen the coupling by turning the knob. • Align the tab of the saw attachment (327P5) Assembly • Loosen the coupling by turning the knob (at least 3 times). B A • Push and hold the ...button (C). Assembly of the attachment (A) with the arrow on the coupling (B). ASSEMBLY of the coupling. • Push the attachment into the coupling until the attachment snaps into place. After the machine has been in use for around 20 hours, re-tighten the...
... the engine end, pull the attachment straight out of 4 Nm. Dismantling • Loosen the coupling by turning the knob. • Align the tab of the saw attachment (327P5) Assembly • Loosen the coupling by turning the knob (at least 3 times). B A • Push and hold the ...button (C). Assembly of the attachment (A) with the arrow on the coupling (B). ASSEMBLY of the coupling. • Push the attachment into the coupling until the attachment snaps into place. After the machine has been in use for around 20 hours, re-tighten the...

Owners Manual
Page 28
...64257;tting it clean in use the recommended spark plug type! Wash it . Your warranty does not cover damage or liability caused by HUSQVARNA. The spark plug should therefore avoid skin contact. Squeeze the excess oil out of replacement parts can damage the piston/ cylinder. Knead ...;lter Air filter The air filter must therefore be cleaned completely. An air filter that the drive shaft ends (splined coupling) on models with a new one at regular intervals. Clean the filter every 25 hours, or more regularly if conditions are not lubricated...
...64257;tting it clean in use the recommended spark plug type! Wash it . Your warranty does not cover damage or liability caused by HUSQVARNA. The spark plug should therefore avoid skin contact. Squeeze the excess oil out of replacement parts can damage the piston/ cylinder. Knead ...;lter Air filter The air filter must therefore be cleaned completely. An air filter that the drive shaft ends (splined coupling) on models with a new one at regular intervals. Clean the filter every 25 hours, or more regularly if conditions are not lubricated...