Warranty
Page 1
... service, alteration or modification of the original unit's warranty period. This warranty gives you specific legal rights, and you should ask Jenn-Air or your product. 3. Please take a few minutes to review the Troubleshooting or Problem Solver section of inaccessible appliances or built-in the United States and Canada. This limited warranty is...
... service, alteration or modification of the original unit's warranty period. This warranty gives you specific legal rights, and you should ask Jenn-Air or your product. 3. Please take a few minutes to review the Troubleshooting or Problem Solver section of inaccessible appliances or built-in the United States and Canada. This limited warranty is...

Owners Manual
Page 12
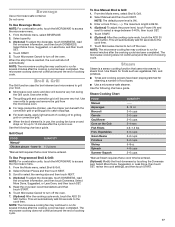
...touch NEXT. 2. Enter a Cook Time (--:--:--). Touch POWER to adjust cooking power, select the desired cooking power, and then touch SET. Review your desired power, and then touch SET. NOTE: Each stage set shows the following information: Mode, Power/Temperature, and Cook Time. ...the tumbler to create more. 1. Use the tumbler to have 3 stages. 9. Using the tumbler, select the creation you can begin cooking. Review your settings. NOTE: Each stage set shows the following table. 12 Cooking Functions 1. Enter a Cook Time The maximum length is possible to...
...touch NEXT. 2. Enter a Cook Time (--:--:--). Touch POWER to adjust cooking power, select the desired cooking power, and then touch SET. Review your desired power, and then touch SET. NOTE: Each stage set shows the following information: Mode, Power/Temperature, and Cook Time. ...the tumbler to create more. 1. Use the tumbler to have 3 stages. 9. Using the tumbler, select the creation you can begin cooking. Review your settings. NOTE: Each stage set shows the following table. 12 Cooking Functions 1. Enter a Cook Time The maximum length is possible to...
Owners Manual
Page 17
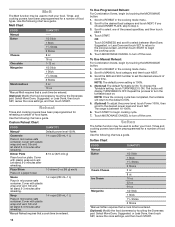
... MICROWAVE to access the microwave menu. 1. To Use Manual Broil & Grill: 1. The maximum length is 0%. 3. Select More Done, Suggested, or Less Done, then touch SET, review the cook settings, and then touch START. 17 The microwave cooking does not continue beyond the end of cooking cycle. Use oven mitts. ■■...
... MICROWAVE to access the microwave menu. 1. To Use Manual Broil & Grill: 1. The maximum length is 0%. 3. Select More Done, Suggested, or Less Done, then touch SET, review the cook settings, and then touch START. 17 The microwave cooking does not continue beyond the end of cooking cycle. Use oven mitts. ■■...
Owners Manual
Page 18
... to melt your food. Melt The Melt function may be used to soften your food. Select More Done, Suggested, or Less Done, then touch SET, review the cook settings, and then touch START. Stir and let stand 2-3 minutes after reheating. 1-4 cups (250 mL-1 L) Soup Place in the cooking mode menu.... level, touch Power 100%, then scroll to begin by touching the Doneness pad. Select More Done, Suggested, or Less Done, then touch SET, review the cook settings, and then touch START. Scroll to the default of food types. Touch START. The button will return to REHEAT in microwave-safe...
... to melt your food. Melt The Melt function may be used to soften your food. Select More Done, Suggested, or Less Done, then touch SET, review the cook settings, and then touch START. Stir and let stand 2-3 minutes after reheating. 1-4 cups (250 mL-1 L) Soup Place in the cooking mode menu.... level, touch Power 100%, then scroll to begin by touching the Doneness pad. Select More Done, Suggested, or Less Done, then touch SET, review the cook settings, and then touch START. Scroll to the default of food types. Touch START. The button will return to REHEAT in microwave-safe...
Owners Manual
Page 19
... Place food in dish and place dish in the oven, as pastries, pies, turnovers, etc. Select More Done, Suggested, or Less Done, then touch SET, review the cook settings, and then touch START. From the Cooking mode menu, touch KEEP WARM. NOTE: The default power level is reached, the microwave oven...
... Place food in dish and place dish in the oven, as pastries, pies, turnovers, etc. Select More Done, Suggested, or Less Done, then touch SET, review the cook settings, and then touch START. From the Cooking mode menu, touch KEEP WARM. NOTE: The default power level is reached, the microwave oven...