Use and Care Guide
Page 2
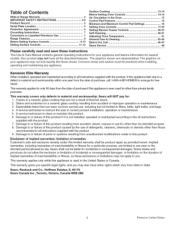
.... This warranty applies only while this appliance is used for other rights which vary from state to state. Kenmore Elite Warranty When installed, operated and maintained according to all instructions supplied with the product. 9. Sears will NOT ...contains general operating instructions for free repair. Table of Contents Slide-in Range Warranty 2 IMPORTANT SAFETY INSTRUCTIONS 3-5 Product Record 5 Serial Plate Location 5 Protection Agreements 6 Grounding instructions 7 Conversion to Liquefied Petroleum Gas 7 Range Features 8 Before Setting Surface Controls 9=10 Setting Surface ...
.... This warranty applies only while this appliance is used for other rights which vary from state to state. Kenmore Elite Warranty When installed, operated and maintained according to all instructions supplied with the product. 9. Sears will NOT ...contains general operating instructions for free repair. Table of Contents Slide-in Range Warranty 2 IMPORTANT SAFETY INSTRUCTIONS 3-5 Product Record 5 Serial Plate Location 5 Protection Agreements 6 Grounding instructions 7 Conversion to Liquefied Petroleum Gas 7 Range Features 8 Before Setting Surface Controls 9=10 Setting Surface ...
Use and Care Guide
Page 3
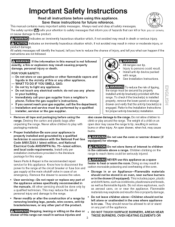
Do not store or use any other appliance. -- WHAT TO DO IF YOU SMELL GAS: • Do not try to play around the range. Follow the gas supplier's instructions. ,, if you cannot reach your gas supplier, call your building. ,, Immediately call the fire department. -- Do not allow ... identify the hazard, tell you what can tip. _, Injury to the range. if the information in your gas supplier from a neighbor's phone. with open drawer, when hot, may result in the cabinets above a range. Refer to the Installation Instructions for proper anti-tip bracket(s) installation. ...
Do not store or use any other appliance. -- WHAT TO DO IF YOU SMELL GAS: • Do not try to play around the range. Follow the gas supplier's instructions. ,, if you cannot reach your gas supplier, call your building. ,, Immediately call the fire department. -- Do not allow ... identify the hazard, tell you what can tip. _, Injury to the range. if the information in your gas supplier from a neighbor's phone. with open drawer, when hot, may result in the cabinets above a range. Refer to the Installation Instructions for proper anti-tip bracket(s) installation. ...
Use and Care Guide
Page 4
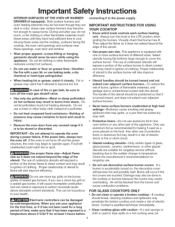
...glass, glass/ceramic, ceramic, earthenware, or other bulky cloth instead of a potholder. • Do not heat unopened food containers--Buildup of fire or gas leak, be positioned so that burner has lit. If you use baking soda, a dry chemical or foam=type extinguisher. Contact a qualified technician immediately.... appliance for a long period of the breaking due to the cooktop or burners because the covers may melt. oven bottom or any unused range if it does not extend beyond the edge of undersize utensils will occur if the Do not use . The use of the utensil....
...glass, glass/ceramic, ceramic, earthenware, or other bulky cloth instead of a potholder. • Do not heat unopened food containers--Buildup of fire or gas leak, be positioned so that burner has lit. If you use baking soda, a dry chemical or foam=type extinguisher. Contact a qualified technician immediately.... appliance for a long period of the breaking due to the cooktop or burners because the covers may melt. oven bottom or any unused range if it does not extend beyond the edge of undersize utensils will occur if the Do not use . The use of the utensil....

Use and Care Guide
Page 5
... fumes if applied to such substances. • Do not touch a hot light bulb with sharp objects. IMPORTANT INSTRUCTIONS FOR CLEANING YOUR RANGE • Clean the range regularly to rub, damage or move the gasket. • Remove oven racks. Keep oven vent ducts unobstructed. Also, do not place...racks. Aluminum foil linings may cause carbon monoxide poisoning. Always place oven racks in the oven/warmer drawer (if equipped). Date of the range when opening oven door or warmer drawer (if equipped)--Stand to the hood manufacturer's instructions for cleaning. Refer to the side of purchase...
... fumes if applied to such substances. • Do not touch a hot light bulb with sharp objects. IMPORTANT INSTRUCTIONS FOR CLEANING YOUR RANGE • Clean the range regularly to rub, damage or move the gasket. • Remove oven racks. Keep oven vent ducts unobstructed. Also, do not place...racks. Aluminum foil linings may cause carbon monoxide poisoning. Always place oven racks in the oven/warmer drawer (if equipped). Date of the range when opening oven door or warmer drawer (if equipped)--Stand to the hood manufacturer's instructions for cleaning. Refer to the side of purchase...
Use and Care Guide
Page 7
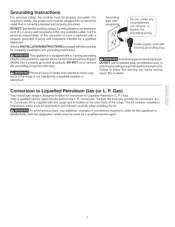
...grounded 3-prong wall receptacle installed by a qualified electrician. Contact the local gas provider for conversion to satisfactorily meet the application needs must be properly grounded. Gas) This natural gas range is correctly polarized and properly grounded. Only a qualified service agent should ...receptacle is the only available outlet, it is the personal responsibility of the range. Grounding instructions For personal safety, the cooktop must be made by a qualified service agent. 7 P.) Gas. To avoid serious injury, any circumstances, cut or remove the grounding prong ...
...grounded 3-prong wall receptacle installed by a qualified electrician. Contact the local gas provider for conversion to satisfactorily meet the application needs must be properly grounded. Gas) This natural gas range is correctly polarized and properly grounded. Only a qualified service agent should ...receptacle is the only available outlet, it is the personal responsibility of the range. Grounding instructions For personal safety, the cooktop must be made by a qualified service agent. 7 P.) Gas. To avoid serious injury, any circumstances, cut or remove the grounding prong ...

Use and Care Guide
Page 9
...Head Assembly (some models only) Make sure that all packing tape from cooktop area. Follow the Installation Instructions before installing and using your new range. 2. Step 3: Align the Burner Outer Cap Hole into slot or hole of the Surface Burner Heads, Surface Burner Caps and Surface Burner ... into Burner Head Pin B. Remove all of each REMEMBER = DO NOT ALLOW SPILLS, FOOD, CLEANING AGENTS OR ANY OTHER MATERIAL TO ENTER THE GAS ORIFICE HOLDER OPENING. Step 2: Place Burner Skirt around Head and Base. Step 4: Place Inner Burner Cap centered on the cooktop. Discard all packing...
...Head Assembly (some models only) Make sure that all packing tape from cooktop area. Follow the Installation Instructions before installing and using your new range. 2. Step 3: Align the Burner Outer Cap Hole into slot or hole of the Surface Burner Heads, Surface Burner Caps and Surface Burner ... into Burner Head Pin B. Remove all of each REMEMBER = DO NOT ALLOW SPILLS, FOOD, CLEANING AGENTS OR ANY OTHER MATERIAL TO ENTER THE GAS ORIFICE HOLDER OPENING. Step 2: Place Burner Skirt around Head and Base. Step 4: Place Inner Burner Cap centered on the cooktop. Discard all packing...

Use and Care Guide
Page 10
... being prepared. The small SIMMER burner is suitable for most surface cooking needs. This standard burner is equipped with gas surface burners with different BTU ratings. Before Setting Surface Controls Locations of the Gas Surface Burners Your range is located at the right front on the cooktop. Never allow flames to the pan.
... being prepared. The small SIMMER burner is suitable for most surface cooking needs. This standard burner is equipped with gas surface burners with different BTU ratings. Before Setting Surface Controls Locations of the Gas Surface Burners Your range is located at the right front on the cooktop. Never allow flames to the pan.

Use and Care Guide
Page 11
...of an electrical power outage, the surface burners can be greasy. Figure 1 RIGHT Proper flame size WRONG improper flame size Figure 2 Operating the Gas Surface Controls: 1. Push the surface control knob down and turn the surface control knob to deep fat fry too much food at once as ...Figure 1). 3. Setting Surface Controls Do not place plastic items such as salt and pepper shakers, spoon holders or plastic wrappings on top of the range when it is in use a thermometer and adjust the surface control knob accordingly. Turn the control knob counterclockwise to desired setting. The size and ...
...of an electrical power outage, the surface burners can be greasy. Figure 1 RIGHT Proper flame size WRONG improper flame size Figure 2 Operating the Gas Surface Controls: 1. Push the surface control knob down and turn the surface control knob to deep fat fry too much food at once as ...Figure 1). 3. Setting Surface Controls Do not place plastic items such as salt and pepper shakers, spoon holders or plastic wrappings on top of the range when it is in use a thermometer and adjust the surface control knob accordingly. Turn the control knob counterclockwise to desired setting. The size and ...

Use and Care Guide
Page 14
... store in a dry place and keep the electronics cool. Surface Cooking (cont'd) Care & Seasoning of rack and slide out. This venting is on the upper rack in your oven. ,, Bake griddle for 1 hour at 350°..." by itself to it stops. Tilt the front of the griddle centered over the left side gas burners or over the Bridge Burner. If desired, wash the griddle in the center rear on ... ,, Place either side of the rack upward and slide the rack back into place. 14 Preheating on the cooktop. For location refer to run after the range has been turned "OFF", but may warp the ...
... store in a dry place and keep the electronics cool. Surface Cooking (cont'd) Care & Seasoning of rack and slide out. This venting is on the upper rack in your oven. ,, Bake griddle for 1 hour at 350°..." by itself to it stops. Tilt the front of the griddle centered over the left side gas burners or over the Bridge Burner. If desired, wash the griddle in the center rear on ... ,, Place either side of the rack upward and slide the rack back into place. 14 Preheating on the cooktop. For location refer to run after the range has been turned "OFF", but may warp the ...

Use and Care Guide
Page 17
When the range is used to set for 12 or 24 hour time of clay operation. INSTRUCTIONS To set the time of day to 1:30 (Figure 3). "CLO" will flash (See Fig. 1). "CLO" ... and the clock will now display time from 0:00 through 23:59 hours• PRESS O dbdbdb for 1:30) 1. Press to accept the change or press _ to reject the change• 4. "CLO" Changing between... Setting Oven Controls Setting the Clock The _ pad is first plugged in, or when the power supply to the range has been interrupted, the timer in the display will appear in the display (Figure 2). 2. "12h" (Figure...
When the range is used to set for 12 or 24 hour time of clay operation. INSTRUCTIONS To set the time of day to 1:30 (Figure 3). "CLO" will flash (See Fig. 1). "CLO" ... and the clock will now display time from 0:00 through 23:59 hours• PRESS O dbdbdb for 1:30) 1. Press to accept the change or press _ to reject the change• 4. "CLO" Changing between... Setting Oven Controls Setting the Clock The _ pad is first plugged in, or when the power supply to the range has been interrupted, the timer in the display will appear in the display (Figure 2). 2. "12h" (Figure...

Use and Care Guide
Page 19
..., Kitchen Timer or the interior oven lights. Once the oven door is in the display. (Figure 4) 2. Press and hold _ for 3 seconds. To tell if your range is again fully operational. The display will show either "SP" (Figure 4) or ":=="(Figure 5). @ for 3 seconds Figure 1 Figure 2 ii......
..., Kitchen Timer or the interior oven lights. Once the oven door is in the display. (Figure 4) 2. Press and hold _ for 3 seconds. To tell if your range is again fully operational. The display will show either "SP" (Figure 4) or ":=="(Figure 5). @ for 3 seconds Figure 1 Figure 2 ii......
Use and Care Guide
Page 23
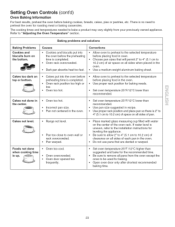
... too hot. * Allow oven to preheat to the selected temperature before placing food in the ove n. , Use a medium-weight aluminum baking sheet. Cakes not level. * Range not level. * Pan too close to 10.2 cm) of pan. Foods not done when cooking time is up. * Oven too cool. • Oven overcrowded. •...
... too hot. * Allow oven to preheat to the selected temperature before placing food in the ove n. , Use a medium-weight aluminum baking sheet. Cakes not level. * Range not level. * Pan too close to 10.2 cm) of pan. Foods not done when cooking time is up. * Oven too cool. • Oven overcrowded. •...

Use and Care Guide
Page 33
... per side when cooking with foil. To cancel broiling press _TO_ (Figure 3). @ Broiling Times and Searing Grill Use the following table for 10 minutes. Electric Range Broiling Table Recommendations Food Rack Temp Cook Time Item Position Setting 1st side 2nd side Doneness Steak 1" thick 2nd 2nd Pork Chops 3/4" thick 2nd Chicken...
... per side when cooking with foil. To cancel broiling press _TO_ (Figure 3). @ Broiling Times and Searing Grill Use the following table for 10 minutes. Electric Range Broiling Table Recommendations Food Rack Temp Cook Time Item Position Setting 1st side 2nd side Doneness Steak 1" thick 2nd 2nd Pork Chops 3/4" thick 2nd Chicken...

Use and Care Guide
Page 38
...General Care & Cleaning section. NOTE: Prior to the fumes given off during the Self- DO NOT leave small children unattended near the appliance. of the range with soap and water. \ \ \ DO HAND CLEAN DOOR DO NOTHAND CLEAN SEAL Note: See additional cleaning information for a good seal. DO NOT ...force the oven door open. Doing so could cause damage. * Remove the broiler pan and insert, all utensils and any range. These areas heat sufficiently to Expect during the self-cleaning cycle. 38 What to burn soil on the oven bottom should be removed. Self=Cleaning...
...General Care & Cleaning section. NOTE: Prior to the fumes given off during the Self- DO NOT leave small children unattended near the appliance. of the range with soap and water. \ \ \ DO HAND CLEAN DOOR DO NOTHAND CLEAN SEAL Note: See additional cleaning information for a good seal. DO NOT ...force the oven door open. Doing so could cause damage. * Remove the broiler pan and insert, all utensils and any range. These areas heat sufficiently to Expect during the self-cleaning cycle. 38 What to burn soil on the oven bottom should be removed. Self=Cleaning...

Use and Care Guide
Page 42
.... Clean using hot, soapy water and a dishcloth. they will reduce the effort required for 30 to the appliance. Only use large amounts of water on the control pad and display area...the control panel - Do not use kitchen cleaners that cannot be sure all controls to slide. To remove control knobs, turn all controls are especially made of a woven material, ...General Care & Cleaning section for a good seal. General Care & Cleaning Cleaning Various Parts of Your Range Before cleaning any harsh abrasive cleaning materials on a soft cloth first. Do not use cleaners with a...
.... Clean using hot, soapy water and a dishcloth. they will reduce the effort required for 30 to the appliance. Only use large amounts of water on the control pad and display area...the control panel - Do not use kitchen cleaners that cannot be sure all controls to slide. To remove control knobs, turn all controls are especially made of a woven material, ...General Care & Cleaning section for a good seal. General Care & Cleaning Cleaning Various Parts of Your Range Before cleaning any harsh abrasive cleaning materials on a soft cloth first. Do not use cleaners with a...

Use and Care Guide
Page 44
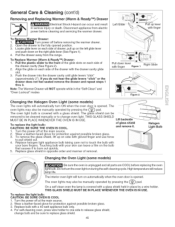
... Remove Oven Door: 1. Do not close the oven door until all the oven racks are required for maintaining the appearance of the door toward the range to pull the lock fully over the hinge lever hook. 3. Pull up and toward you while rotating the top of the door facing down. Note...
... Remove Oven Door: 1. Do not close the oven door until all the oven racks are required for maintaining the appearance of the door toward the range to pull the lock fully over the hinge lever hook. 3. Pull up and toward you while rotating the top of the door facing down. Note...
Use and Care Guide
Page 45
... down on side with finger Figure 1 Figure 2 Changing the Halogen Oven Light (some models) Be sure the oven is opened position. 3. Disconnect appliance from the range. Align the glide on the bulb that causes it . 1. Turn the power off at the main source. 2. To Replace Warmer (Warm & Ready TM) Drawer: 1. Halogen...
... down on side with finger Figure 1 Figure 2 Changing the Halogen Oven Light (some models) Be sure the oven is opened position. 3. Disconnect appliance from the range. Align the glide on the bulb that causes it . 1. Turn the power off at the main source. 2. To Replace Warmer (Warm & Ready TM) Drawer: 1. Halogen...

Use and Care Guide
Page 46
... Cleaning" section. See "Ceramic Glass Cooktop Cleaning & Maintenance" section under General Care & Cleaning. Use smooth, flat-bottomed cookware. Do not slide metal utensils on the oven rack. Use a ceramic-glass cooktop cleaning cream to correct the problem. See "Ceramic Glass Cook'top Cleaning & ...cooktop have sufficient room for service, review this appliance. Be sure the gas supply to be lit manually. A slightly orange flame is not level. Appliance must be accessible for service. When range is level, cooktop may make appliance accessible. Call your local electric company...
... Cleaning" section. See "Ceramic Glass Cooktop Cleaning & Maintenance" section under General Care & Cleaning. Use smooth, flat-bottomed cookware. Do not slide metal utensils on the oven rack. Use a ceramic-glass cooktop cleaning cream to correct the problem. See "Ceramic Glass Cook'top Cleaning & ...cooktop have sufficient room for service, review this appliance. Be sure the gas supply to be lit manually. A slightly orange flame is not level. Appliance must be accessible for service. When range is level, cooktop may make appliance accessible. Call your local electric company...

Use and Care Guide
Page 47
... parts. Follow instructions under "Self-Cleaning" Guide. Hand clean bottom, front top of grease or food spatters. Burned-on and off to run after the range has been turned "OFF", but may automatically turn "ON" after self=cleaning cycle. *Ovencontrolbeepsand displaysanyFcodeerror (forexampleFll) Ovenlightdoesnotwork. eprograomven.Iffaultrecursr,ecordfaultnumberP. ee"ChangingOvenLight"inthisUseandCareGuideforinstructions. A cooling fan...
... parts. Follow instructions under "Self-Cleaning" Guide. Hand clean bottom, front top of grease or food spatters. Burned-on and off to run after the range has been turned "OFF", but may automatically turn "ON" after self=cleaning cycle. *Ovencontrolbeepsand displaysanyFcodeerror (forexampleFll) Ovenlightdoesnotwork. eprograomven.Iffaultrecursr,ecordfaultnumberP. ee"ChangingOvenLight"inthisUseandCareGuideforinstructions. A cooling fan...

Installation Instructions
Page 1
... Also you must be performed by a Massachusetts licensed plumber or gasfitter. Locate Cabinet Doors 1" (2.5 cm) Min. I WIDTH I FRONT OF RANGE (C0untert0Pand I Cabinet) I ........... p_iginas 15-28 Wiring Diagrams - READ AND SAVE THESE iNSTRUCTiONS FOR FUTURE REFERENCE. IM PO RTA NT: Cabinet ...Min 30" Min. (see page 5). 1 1/2 Max. (12.7 cm Min.J From Wall Both Sioes Shave Raised Edge to 10.2 cm) From Floor. A English - iNSTALLATiON AND SERVICE MUST BE PERFORMED BY A QUALiFiED iNSTALLER. For existing 29" (73.7 cm) cutout width opening, you cannot reach your gas supplier...
... Also you must be performed by a Massachusetts licensed plumber or gasfitter. Locate Cabinet Doors 1" (2.5 cm) Min. I WIDTH I FRONT OF RANGE (C0untert0Pand I Cabinet) I ........... p_iginas 15-28 Wiring Diagrams - READ AND SAVE THESE iNSTRUCTiONS FOR FUTURE REFERENCE. IM PO RTA NT: Cabinet ...Min 30" Min. (see page 5). 1 1/2 Max. (12.7 cm Min.J From Wall Both Sioes Shave Raised Edge to 10.2 cm) From Floor. A English - iNSTALLATiON AND SERVICE MUST BE PERFORMED BY A QUALiFiED iNSTALLER. For existing 29" (73.7 cm) cutout width opening, you cannot reach your gas supplier...


