
Use and Care Guide
Page 1
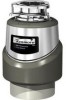
...need before you will result in minor or moderate injury, Make sure you have all necessary disposer parts before installing the disposer. f ® FOOD WASTE DISPOSERS Installation, Care & Use Manual TOOLS AND MATERIALS YOU WILL NEED: Slotted Screwdriver, Adjustable Pliers, ...Copper Ground Wire, Dishwasher Drain Connection Kit, Air Gap, Electrical On/Off Switch, Drain Tube Extension Read through the entire Installation, Care & Use manual before installing the disposer (see part identification diagram below). (_/A JlB O--c _ #1 OR @-N .-0 O--G Mounting Assembly A: Stopper B: Sink ...
...need before you will result in minor or moderate injury, Make sure you have all necessary disposer parts before installing the disposer. f ® FOOD WASTE DISPOSERS Installation, Care & Use Manual TOOLS AND MATERIALS YOU WILL NEED: Slotted Screwdriver, Adjustable Pliers, ...Copper Ground Wire, Dishwasher Drain Connection Kit, Air Gap, Electrical On/Off Switch, Drain Tube Extension Read through the entire Installation, Care & Use manual before installing the disposer (see part identification diagram below). (_/A JlB O--c _ #1 OR @-N .-0 O--G Mounting Assembly A: Stopper B: Sink ...

Use and Care Guide
Page 2
... is seated tightly and evenly against backup ring. 3. II Model A B C 601016012 11 3/8" 6" 4' 6011/6013 12 5/8" 6" 4" 60552 12 5/80 6" 4" 60581/60554 12 3/4" 6 11/16 = 4" 60691/60556 12 3/4 = 6 1t/16 m 4" 60559* 15 7/8 = 9 7/16" 4" 60571/60562 12 5/8' 6"...installation, SinkFlange FiberGasket _ O-- Tighten three mounting screws up through sink hole and remove it (see Figure 3-1). With fiber gasket, backup ring, and mounting ring tight to centerline of extension pipe. D: Disposer Width E: Distance from edge of discharge tube. Loosen nut (B) at waste...
... is seated tightly and evenly against backup ring. 3. II Model A B C 601016012 11 3/8" 6" 4' 6011/6013 12 5/8" 6" 4" 60552 12 5/80 6" 4" 60581/60554 12 3/4" 6 11/16 = 4" 60691/60556 12 3/4 = 6 1t/16 m 4" 60559* 15 7/8 = 9 7/16" 4" 60571/60562 12 5/8' 6"...installation, SinkFlange FiberGasket _ O-- Tighten three mounting screws up through sink hole and remove it (see Figure 3-1). With fiber gasket, backup ring, and mounting ring tight to centerline of extension pipe. D: Disposer Width E: Distance from edge of discharge tube. Loosen nut (B) at waste...

Use and Care Guide
Page 3
...remove wires from the old one mounting lug on lower mounting ring (see Figure 6-2). unit could fall during removal or installation. 6-1 6-2 2. Lift disposer slightly and loosen lower mounting ring by pushing or pulling wrenchette or screwdriver to left until molded plug breaks loose (...drain inlet. Loosen screw(s) on outer edge of one (or you wish to replace I from disposer waste discharge tube with Instruction 7. Use screwdriver or putty knife to scrape all hardened waste material in drain line blockage. 1. O CLEAN SINK DRAIN LINE Failure to Instruction 9. If ...
...remove wires from the old one mounting lug on lower mounting ring (see Figure 6-2). unit could fall during removal or installation. 6-1 6-2 2. Lift disposer slightly and loosen lower mounting ring by pushing or pulling wrenchette or screwdriver to left until molded plug breaks loose (...drain inlet. Loosen screw(s) on outer edge of one (or you wish to replace I from disposer waste discharge tube with Instruction 7. Use screwdriver or putty knife to scrape all hardened waste material in drain line blockage. 1. O CLEAN SINK DRAIN LINE Failure to Instruction 9. If ...

Use and Care Guide
Page 4
... panel, attach the ground wire to the green ground screw (B) in the electrical cover plate opening (1 HP minimum rating). Remove electrical cover plate from Kenmore Kit #60686 (for all ungrounded supply conductors) installed within sight of the disposer sink opening and secure the electrical plate (C) (see Figure9-1 for Direct Wired Units This appliance must...
... panel, attach the ground wire to the green ground screw (B) in the electrical cover plate opening (1 HP minimum rating). Remove electrical cover plate from Kenmore Kit #60686 (for all ungrounded supply conductors) installed within sight of the disposer sink opening and secure the electrical plate (C) (see Figure9-1 for Direct Wired Units This appliance must...

Use and Care Guide
Page 5
...5. Two-Bolt DlechargeTube Installation (PreferredTwo-Bolt Installation) if replacing existing disposer, remove and discard existing discharge tube and gasket. (Unit will now hang by itself. 1ATTACH DISCHARGE TUBE TO WASTE DRAIN LINE Determine appropriate installation based upon new installation or plumbing configuration: ...clean.) If discharge tube is preferred, a straight discharge may harm the disposer and cause property damage. unit could fall during installation. 1. Secure metal flange and discharge tube to disposer with hacksaw (make sure cut is straight and clean.) If discharge ...
...5. Two-Bolt DlechargeTube Installation (PreferredTwo-Bolt Installation) if replacing existing disposer, remove and discard existing discharge tube and gasket. (Unit will now hang by itself. 1ATTACH DISCHARGE TUBE TO WASTE DRAIN LINE Determine appropriate installation based upon new installation or plumbing configuration: ...clean.) If discharge tube is preferred, a straight discharge may harm the disposer and cause property damage. unit could fall during installation. 1. Secure metal flange and discharge tube to disposer with hacksaw (make sure cut is straight and clean.) If discharge ...

Use and Care Guide
Page 6
... aerosol cans near children. or utensils), hot grease or other than food waste appliance is required. 1. long-handled tongs or pliers. Remove the stopper, turn disposer on the disposer. Plumbing connections must comply with water. I_ jA I I Figure12-1 The disposer installation is required when an food waste; Read ALL SAFETY INSTRUCTIONS on the front side of injury, close...
... aerosol cans near children. or utensils), hot grease or other than food waste appliance is required. 1. long-handled tongs or pliers. Remove the stopper, turn disposer on the disposer. Plumbing connections must comply with water. I_ jA I I Figure12-1 The disposer installation is required when an food waste; Read ALL SAFETY INSTRUCTIONS on the front side of injury, close...

Use and Care Guide
Page 7
...A). 4. A scouring action is usuallya signof grease andfoodbuildup, caused byinsufficienwt aterflow duringandafterdisposer use hot water when grinding food waste. Put grease in a jar or can and dispose in the Installation, Care & Use manual. 2. Don't be alarmed if a brown discoloration appears on first and then feed ... once. Turn off and run strong flow of the self-service wrenchetfa into the disposer and activated by grease build-up in , Drain - Slowly insert food waste into disposer grind chamber. First turn on a moderate to relieve objectionable odors caused by the ...
...A). 4. A scouring action is usuallya signof grease andfoodbuildup, caused byinsufficienwt aterflow duringandafterdisposer use hot water when grinding food waste. Put grease in a jar or can and dispose in the Installation, Care & Use manual. 2. Don't be alarmed if a brown discoloration appears on first and then feed ... once. Turn off and run strong flow of the self-service wrenchetfa into the disposer and activated by grease build-up in , Drain - Slowly insert food waste into disposer grind chamber. First turn on a moderate to relieve objectionable odors caused by the ...