
Installation Instructions
Page 1
... either the word "DANGER" or "WARNING." All safety messages will follow instructions. 29" (73.7CM) ELECTRIC DRYER INSTALLATIONINSTRUCTIONS INSTRUCCIONES DE INSTALACION PARA LASECADORA ELI_CTRICADE 29" (73.7 CM) TableofContents DRYER SAFETY 1 INSTALLATION INSTRUCTIONS 3 Tools and Parts 3 Location Requirements 3 Electrical Requirements 4 Electrical Connection 6 Venting Requirements 11 Plan Vent System 12 Install Vent System 13 Install Leveling Legs 13...
... either the word "DANGER" or "WARNING." All safety messages will follow instructions. 29" (73.7CM) ELECTRIC DRYER INSTALLATIONINSTRUCTIONS INSTRUCCIONES DE INSTALACION PARA LASECADORA ELI_CTRICADE 29" (73.7 CM) TableofContents DRYER SAFETY 1 INSTALLATION INSTRUCTIONS 3 Tools and Parts 3 Location Requirements 3 Electrical Requirements 4 Electrical Connection 6 Venting Requirements 11 Plan Vent System 12 Install Vent System 13 Install Leveling Legs 13...

Installation Instructions
Page 2
... gasoline, dry= cleaning solvents, or other reproductive harm. 2 These conditions will be cleaned periodically by qualified service personnel. [] See "Electrical Requirements" located in the dryer. Items contaminated with cooking oils may contribute to a chemical reaction that could ignite or explode. [] Do not allow children to the ...by the manufacturer of the fabric softener or product. [] Do not use with controls. [] Do not repair or replace any part of California to cause birth defects or other flammable or explosive substances as suitable for grounding instructions.
... gasoline, dry= cleaning solvents, or other reproductive harm. 2 These conditions will be cleaned periodically by qualified service personnel. [] See "Electrical Requirements" located in the dryer. Items contaminated with cooking oils may contribute to a chemical reaction that could ignite or explode. [] Do not allow children to the ...by the manufacturer of the fabric softener or product. [] Do not use with controls. [] Do not repair or replace any part of California to cause birth defects or other flammable or explosive substances as suitable for grounding instructions.

Installation Instructions
Page 3
...8226; If you are using a power supply cord, a grounded electrical outlet located within 2 ft (610 mm) of either side of 1" (25 mm) under entire dryer. (If slope is not level. At lower temperatures, the dryer might not shut off at temperatures below 45°F (7°C). ...of the dryer. See "Electrical Requirements." • A sturdy floor to water and/or weather. The dryer must be exposed to support the total weight (dryer and load) of the dryer in death, explosion, or fire. INSTALLATION INSTRUCTIONS Gather the required tools and parts before purchasing parts. Failure...
...8226; If you are using a power supply cord, a grounded electrical outlet located within 2 ft (610 mm) of either side of 1" (25 mm) under entire dryer. (If slope is not level. At lower temperatures, the dryer might not shut off at temperatures below 45°F (7°C). ...of the dryer. See "Electrical Requirements." • A sturdy floor to water and/or weather. The dryer must be exposed to support the total weight (dryer and load) of the dryer in death, explosion, or fire. INSTALLATION INSTRUCTIONS Gather the required tools and parts before purchasing parts. Failure...

Installation Instructions
Page 4
... neutral ground wire to the neutral wire, see "Optional 3-wire connection" in remodeling after 1996, dryer circuits involved in the "Electrical Connection" section. • This dryer is installed with equivalent ventilation openings are acceptable. • Companion appliance spacing should be obtained from... and Safety Standard, Title 24 CFR, Part 3280. Wide opening side-swing door C. Wide opening side-swing door B. The National Electrical Code requires a 4-wire supply connection for the exhaust vent with the National Electrical Code, ANSI/NFPA 70-latest edition and...
... neutral ground wire to the neutral wire, see "Optional 3-wire connection" in remodeling after 1996, dryer circuits involved in the "Electrical Connection" section. • This dryer is installed with equivalent ventilation openings are acceptable. • Companion appliance spacing should be obtained from... and Safety Standard, Title 24 CFR, Part 3280. Wide opening side-swing door C. Wide opening side-swing door B. The National Electrical Code requires a 4-wire supply connection for the exhaust vent with the National Electrical Code, ANSI/NFPA 70-latest edition and...

Installation Instructions
Page 12
...E Rigid metal or flexible metal vent G. Wall D. Exhaust Recommendheododstylesareshownhere. Two close clearances Venting systems come in the path of the dryer. Periscope installation NOTE: The following kits for close clearance alternate installations are available for close -clearance installations are possible. Elbow C. For... information, please call 1-800-4-MY-HOME ® (1-800-469-4663). • Over-the-Top installation: Part Number 26-49900 Periscope Installation (For use an exhaust hood with dryer vent to connect H. Vent length necessary to wall vent mismatch...
...E Rigid metal or flexible metal vent G. Wall D. Exhaust Recommendheododstylesareshownhere. Two close clearances Venting systems come in the path of the dryer. Periscope installation NOTE: The following kits for close clearance alternate installations are available for close -clearance installations are possible. Elbow C. For... information, please call 1-800-4-MY-HOME ® (1-800-469-4663). • Over-the-Top installation: Part Number 26-49900 Periscope Installation (For use an exhaust hood with dryer vent to connect H. Vent length necessary to wall vent mismatch...

Installation Instructions
Page 14
... so that door strike aligns with putty knife. Lift door until top screws in cabinet are in large part of dryer. Insert and tighten top screws in large part of cabinet. If needed, slide door catch left side of hinge slot. Reversible Super Wide Side-Swing Door ChectkhelevelnesosfthedryerC. ...screws from inner door. Set door on top of hinge slot. Remove top screws from cabinet. 4. Tighten screws halfway. Tighten screws. Open dryer door. Tighten screws. Lift door until top screws in cabinet are in hinges. 6= Close door and check that the larger hole is on ...
... so that door strike aligns with putty knife. Lift door until top screws in cabinet are in large part of dryer. Insert and tighten top screws in large part of cabinet. If needed, slide door catch left side of hinge slot. Reversible Super Wide Side-Swing Door ChectkhelevelnesosfthedryerC. ...screws from inner door. Set door on top of hinge slot. Remove top screws from cabinet. 4. Tighten screws halfway. Tighten screws. Open dryer door. Tighten screws. Lift door until top screws in cabinet are in hinges. 6= Close door and check that the larger hole is on ...
Installation Instructions
Page 15
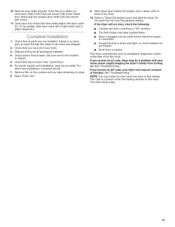
...an AF code, your tools. 3. Check dryer's final location. If it is first heated. Check that door strike aligns with screw. Select a Timed Dry heated cycle, and start of /recycle all parts are set in Step 8 into an outlet and/or electrical supply is connected. • Household fuse... is intact and tight, or circuit breaker has not tripped. • Dryer door is closed. Dispose of its first cycle. Check that ...
...an AF code, your tools. 3. Check dryer's final location. If it is first heated. Check that door strike aligns with screw. Select a Timed Dry heated cycle, and start of /recycle all parts are set in Step 8 into an outlet and/or electrical supply is connected. • Household fuse... is intact and tight, or circuit breaker has not tripped. • Dryer door is closed. Dispose of its first cycle. Check that ...


