
Use and Care Guide
Page 2
...kind of your new product. TABLE OF CONTENTS PROTECTION AGREEMENTS PROTECTION AGREEMENTS 2 WARRANTY 3 DRYER SAFETY 4 INSTALLATION INSTRUCTIONS 5 Tools and Parts 5 Optional Pedestal 5 Location Requirements 5 Electrical Requirements 8 Electrical Connection 9 Venting Requirements 14 Plan Vent System 15 Install Vent System 16 Install Leveling...apply. But like all that it may require preventive maintenance or repair from unexpected hassle and expense. Your new Kenmore ®product is all products, it takes for years of home appliances, garage door openers, water heaters, ...
...kind of your new product. TABLE OF CONTENTS PROTECTION AGREEMENTS PROTECTION AGREEMENTS 2 WARRANTY 3 DRYER SAFETY 4 INSTALLATION INSTRUCTIONS 5 Tools and Parts 5 Optional Pedestal 5 Location Requirements 5 Electrical Requirements 8 Electrical Connection 9 Venting Requirements 14 Plan Vent System 15 Install Vent System 16 Install Leveling...apply. But like all that it may require preventive maintenance or repair from unexpected hassle and expense. Your new Kenmore ®product is all products, it takes for years of home appliances, garage door openers, water heaters, ...
Use and Care Guide
Page 4
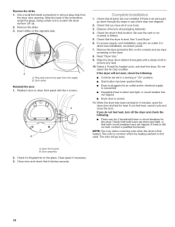
.... iMPORTANT SAFETY iNSTRUCTiONS WARNING: To reduce the risk of injury, and tell you what can kill or hurt you don't immediately follow instructions. DRYER SAFETY Your safety and the safety of the fabric softener or product. [] Do not use fabric softeners or products to eliminate static unless recommended ... symbol and either the word "DANGER" or "WARNING." This is , tell you how to reduce the chance of fire, electric shock, or injury to persons when using the dryer. [] Do not place items exposed to catch fire. [] Do not dry articles that can happen if the instructions are very...
.... iMPORTANT SAFETY iNSTRUCTiONS WARNING: To reduce the risk of injury, and tell you what can kill or hurt you don't immediately follow instructions. DRYER SAFETY Your safety and the safety of the fabric softener or product. [] Do not use fabric softeners or products to eliminate static unless recommended ... symbol and either the word "DANGER" or "WARNING." This is , tell you how to reduce the chance of fire, electric shock, or injury to persons when using the dryer. [] Do not place items exposed to catch fire. [] Do not dry articles that can happen if the instructions are very...
Use and Care Guide
Page 5
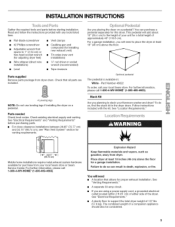
... the dryer on a pedestal? Check existing electrical supply and venting. You will need • A location that all parts are using a power supply cord, a grounded electrical outlet located within 2 ft (61... cm) of either side of approximately 46" (116.8 cm). See "Electrical Requirements." Check that allows for this dryer. Parts needed Check local codes. Are you will need to support the total dryer weight of a companion appliance should also be considered. Part Number 46822 To order, call your Kenmore washer and dryer...
... the dryer on a pedestal? Check existing electrical supply and venting. You will need • A location that all parts are using a power supply cord, a grounded electrical outlet located within 2 ft (61... cm) of either side of approximately 46" (116.8 cm). See "Electrical Requirements." Check that allows for this dryer. Parts needed Check local codes. Are you will need to support the total dryer weight of a companion appliance should also be considered. Part Number 46822 To order, call your Kenmore washer and dryer...
Use and Care Guide
Page 8
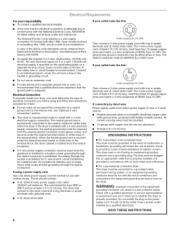
...all local codes and ordinances. The 4-wire power supply cord, at least 4 ft (1.22 m) long, must determine the type of electrical connection you are in doubt as to the equipment-grounding terminal or lead on the dryer. If your outlet looks like this : 3-wire receptacle (10-30R) Then...in remodeling after 1996, dryer circuits involved in conformance with a 4-wire electrical supply connection, the neutral ground wire must be either green or bare. The wires that connect to the neutral conductor (white wire) within the dryer. The 3-wire power supply cord, at least 4 ft (1.22 m) long,...
...all local codes and ordinances. The 4-wire power supply cord, at least 4 ft (1.22 m) long, must determine the type of electrical connection you are in doubt as to the equipment-grounding terminal or lead on the dryer. If your outlet looks like this : 3-wire receptacle (10-30R) Then...in remodeling after 1996, dryer circuits involved in conformance with a 4-wire electrical supply connection, the neutral ground wire must be either green or bare. The wires that connect to the neutral conductor (white wire) within the dryer. The 3-wire power supply cord, at least 4 ft (1.22 m) long,...

Use and Care Guide
Page 10
... strain relief). Tighten strain relief screw against the direct wire cable. * If local codes do not permit the use of electrical connection: 4-wire (recommended) 3-wire (if 4-wire is inside the terminal block opening, screw the removable conduit connector onto the... strain relief threads. Spade terminals with the dryer cabinet and be in a horizontal position. Removable conduit connector B. Style 2: Direct wire strain relief Unscrew the removable conduit connector and any...
... strain relief). Tighten strain relief screw against the direct wire cable. * If local codes do not permit the use of electrical connection: 4-wire (recommended) 3-wire (if 4-wire is inside the terminal block opening, screw the removable conduit connector onto the... strain relief threads. Spade terminals with the dryer cabinet and be in a horizontal position. Removable conduit connector B. Style 2: Direct wire strain relief Unscrew the removable conduit connector and any...

Use and Care Guide
Page 11
...silver-colored terminal block screw B. Tighten screw. Center silver-colored terminal block screw C. Direct wire cable must have completed your electrical connection. 1, Remove center silver-colored terminal block screw. 2. Dotted line shows position of NEUTRAL ground wire before being moved ... screw B. Remove neutral ground wire from 3 remaining wires. Insert tab of extra length so dryer can be moved if needed. Secure cover with hold-down screw. 7, You have 5 ft (1.52 m) of terminal block cover into a hook shape. Center silver-colored terminal block screw...
...silver-colored terminal block screw B. Tighten screw. Center silver-colored terminal block screw C. Direct wire cable must have completed your electrical connection. 1, Remove center silver-colored terminal block screw. 2. Dotted line shows position of NEUTRAL ground wire before being moved ... screw B. Remove neutral ground wire from 3 remaining wires. Insert tab of extra length so dryer can be moved if needed. Secure cover with hold-down screw. 7, You have 5 ft (1.52 m) of terminal block cover into a hook shape. Center silver-colored terminal block screw...

Use and Care Guide
Page 12
...plug C. Neutral prong D. Tighten strain relief screws. 5. Direct wire cable must have 5 ft (1.52 m) of cable. Strip 31/2'' (8.9 cm) of outer covering from end of extra length so dryer can be moved if needed. Ground wire (green or bare) of the other wires ... cm) UL Iisted strain relief D. Neutral ground wire C. You have completed your electrical connection. Neutral wire (white er center wire) E. ¾" (1.9 cm) UL listed strain relief 3. You have completed your electrical connection. Tighten screw. Tighten screws. !! !! If using 3-wire cable with ground...
...plug C. Neutral prong D. Tighten strain relief screws. 5. Direct wire cable must have 5 ft (1.52 m) of cable. Strip 31/2'' (8.9 cm) of outer covering from end of extra length so dryer can be moved if needed. Ground wire (green or bare) of the other wires ... cm) UL Iisted strain relief D. Neutral ground wire C. You have completed your electrical connection. Neutral wire (white er center wire) E. ¾" (1.9 cm) UL listed strain relief 3. You have completed your electrical connection. Tighten screw. Tighten screws. !! !! If using 3-wire cable with ground...

Use and Care Guide
Page 13
...conductor to an adequate ground. 13 Connect neutral ground wire and the neutral wire (white or center wire) of dryer rear panel. Tighten screw. You have completed your electrical connection. Neutral ground wire C. Insert tab of terminal block cover into slot of power supply cord/cable under ...ground conductor screw B. Place the hooked end of the neutral wire (white or center wire) of direct wire cable under the center screw of dryer rear panel. Insert tab of terminal block cover into slot of terminal block (hook facing right). Secure cover with hold -down screw. 6. Tighten ...
...conductor to an adequate ground. 13 Connect neutral ground wire and the neutral wire (white or center wire) of dryer rear panel. Tighten screw. You have completed your electrical connection. Neutral ground wire C. Insert tab of terminal block cover into slot of power supply cord/cable under ...ground conductor screw B. Place the hooked end of the neutral wire (white or center wire) of direct wire cable under the center screw of dryer rear panel. Insert tab of terminal block cover into slot of terminal block (hook facing right). Secure cover with hold -down screw. 6. Tighten ...

Use and Care Guide
Page 15
...installation C. Rigid metal or flexible metal vent G. Failure to follow these instructions can be securely fastened to have the dryer converted. Bottom exhaust installation (not an option with the following kits for close clearance alternate installations are available for close ... for mobile home installations The exhaust vent must not terminate beneath the mobile home. Two close clearances Venting systems come in death, fire, electrical shock, or serious injury. A B A. Dryer B. A B A. F G A. Less than 5" (12.7 cm) mismatch Part Number 26-49908 - 5" (12.7 cm) to ...
...installation C. Rigid metal or flexible metal vent G. Failure to follow these instructions can be securely fastened to have the dryer converted. Bottom exhaust installation (not an option with the following kits for close clearance alternate installations are available for close ... for mobile home installations The exhaust vent must not terminate beneath the mobile home. Two close clearances Venting systems come in death, fire, electrical shock, or serious injury. A B A. Dryer B. A B A. F G A. Less than 5" (12.7 cm) mismatch Part Number 26-49908 - 5" (12.7 cm) to ...
Use and Care Guide
Page 18
...circuit breakers have all of your tools. 3. The odor will not start the dryer. Remove the strike 3. Check the dryer's final location. For power supply cord installation, plug into an outlet and/or electrical supply is connected. • Household fuse is intact and tight, or circuit... breaker has not tripped. • Dryer door is plugged into an outlet. Reverse the strike 1. Check that all packaging materials. 4....
...circuit breakers have all of your tools. 3. The odor will not start the dryer. Remove the strike 3. Check the dryer's final location. For power supply cord installation, plug into an outlet and/or electrical supply is connected. • Household fuse is intact and tight, or circuit... breaker has not tripped. • Dryer door is plugged into an outlet. Reverse the strike 1. Check that all packaging materials. 4....

Use and Care Guide
Page 19
... the load. STATUS Wet _ Cool DDaomwpn_Qj[ Power AUTO CYCLES Delicate Casual WriCnkloletheGsuaDrrdy_O _MoNreormal Jeans Controls Locked Check Lint Screen _ Dryness Level AbO CYCSO_aY DRYER USE TIMED d' _, \t;,N E0 _IME _2Fr_A¢4,/_ CYCLTEiSmed O_edcyele _,ETL/_ DErxypress Dry Touch Up i_ust #_"._ r.kl_ _0C_ MODIFIERS & OPTIONS I... it (even after washing). Do not dry anything that has ever had anything that has ever had any type of fire, electric shock, or injury to follow these instructions can result in death or fire. WARNING: To reduce the risk of oil on ...
... the load. STATUS Wet _ Cool DDaomwpn_Qj[ Power AUTO CYCLES Delicate Casual WriCnkloletheGsuaDrrdy_O _MoNreormal Jeans Controls Locked Check Lint Screen _ Dryness Level AbO CYCSO_aY DRYER USE TIMED d' _, \t;,N E0 _IME _2Fr_A¢4,/_ CYCLTEiSmed O_edcyele _,ETL/_ DErxypress Dry Touch Up i_ust #_"._ r.kl_ _0C_ MODIFIERS & OPTIONS I... it (even after washing). Do not dry anything that has ever had anything that has ever had any type of fire, electric shock, or injury to follow these instructions can result in death or fire. WARNING: To reduce the risk of oil on ...

Use and Care Guide
Page 26
.... See "Cleaning the Lint Screen." Moving care For power supply cord-connected dryers: 1. Electrical Shock Hazard Disconnect power before operating. Unplug the power supply cord. 2. For direct-wired dryers: 1. From the Exhaust Vent Lint should : 1. Use masking tape to secure dryer door. 26 If you will be done by a qualified person. Vacation care Operate...
.... See "Cleaning the Lint Screen." Moving care For power supply cord-connected dryers: 1. Electrical Shock Hazard Disconnect power before operating. Unplug the power supply cord. 2. For direct-wired dryers: 1. From the Exhaust Vent Lint should : 1. Use masking tape to secure dryer door. 26 If you will be done by a qualified person. Vacation care Operate...

Use and Care Guide
Page 27
...." Check with lint, restricting air movement? is the correct power supply available? Was the Start button firmly pressed? Electric dryers use ? Unusualsounds • Has the dryer had a period of operation. Is the clothing knotted or balled up , the load will bounce, causing the...use a metal foil vent. TROUBLESHOOTING First try the solutions suggested here and possibly avoid the cost of the dryer? Dryer will increase drying times. Check to side? Electric dryers require 240 volt power supply. The drum may be turning, but you do not feel air movement, clean ...
...." Check with lint, restricting air movement? is the correct power supply available? Was the Start button firmly pressed? Electric dryers use ? Unusualsounds • Has the dryer had a period of operation. Is the clothing knotted or balled up , the load will bounce, causing the...use a metal foil vent. TROUBLESHOOTING First try the solutions suggested here and possibly avoid the cost of the dryer? Dryer will increase drying times. Check to side? Electric dryers require 240 volt power supply. The drum may be turning, but you do not feel air movement, clean ...

Use and Care Guide
Page 28
...cycle? • Was the dryer overloaded? Closet doors must have an odor. Cycle time too short Lint on Auto Cycles. Fabric softener sheets added to do so can result in death, explosion, or fire. • Is the dryer located in a closet? The new electric heating element may not be ...gone after the first cycle. Level the dryer. Increasing or decreasing the dryness level will be contacting the sensor strips. Failure to a partially...
...cycle? • Was the dryer overloaded? Closet doors must have an odor. Cycle time too short Lint on Auto Cycles. Fabric softener sheets added to do so can result in death, explosion, or fire. • Is the dryer located in a closet? The new electric heating element may not be ...gone after the first cycle. Level the dryer. Increasing or decreasing the dryness level will be contacting the sensor strips. Failure to a partially...


