
Instruction Manual
Page 2
... Dual Zone System Setting B.M.S. (Bass Management System) B.M.S. Contents English Warning 3 Safety precautions 4 About Sirius Satellite radio tuner 5 Notes on playing MP3 6 About CDs 8 General features 9 Power Selecting the Source Volume System Q Audio Control Speaker Setting Non-fading Output ... 22 Menu System Security Code Touch Sensor Tone Manual Clock Adjustment DSI (Disabled System Indicator) Selectable Illumination Switching Display Type Illumination Color Setting Contrast Adjustment Dimmer System Q Switching preout Built-in Auxiliary input Setting CD Read Setting Basic...
... Dual Zone System Setting B.M.S. (Bass Management System) B.M.S. Contents English Warning 3 Safety precautions 4 About Sirius Satellite radio tuner 5 Notes on playing MP3 6 About CDs 8 General features 9 Power Selecting the Source Volume System Q Audio Control Speaker Setting Non-fading Output ... 22 Menu System Security Code Touch Sensor Tone Manual Clock Adjustment DSI (Disabled System Indicator) Selectable Illumination Switching Display Type Illumination Color Setting Contrast Adjustment Dimmer System Q Switching preout Built-in Auxiliary input Setting CD Read Setting Basic...

Instruction Manual
Page 9
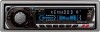
Decreasing Volume Turn the [VOL] knob counterclockwise. -9- Source required Display Tuner "TUNER" CD "CD" External disc (Optional accessory) "DISC CH"/ "CD2" Auxiliary input "AUX"/ "AUX1" (Optional accessory: KDC-X569/ MP522/ MPV622/ X469/ 422/ 4022/ 3022/ 322 ) Standby (Illumination only ...-X569/MP522/MPV622/MPV6022/X469/422/4022 Selecting the Source Press the [SRC] button. When the power is ON, the (page 22) is displayed as "CODE ON" or "CODE OFF".
Decreasing Volume Turn the [VOL] knob counterclockwise. -9- Source required Display Tuner "TUNER" CD "CD" External disc (Optional accessory) "DISC CH"/ "CD2" Auxiliary input "AUX"/ "AUX1" (Optional accessory: KDC-X569/ MP522/ MPV622/ X469/ 422/ 4022/ 3022/ 322 ) Standby (Illumination only ...-X569/MP522/MPV622/MPV6022/X469/422/4022 Selecting the Source Press the [SRC] button. When the power is ON, the (page 22) is displayed as "CODE ON" or "CODE OFF".

Instruction Manual
Page 22
... are displayed afterwards their setting content is after this unit is the original setting.) Also, the explanation for at least 1 second. Menu display Security Code Because authorization by the Security Code is a help in the chart is by step. When other items. 4 Exit Menu mode Press the [MENU] button. You can continue by returning... the [FM] or [AM] button. Example: When you want to step 2 and setting other items that aren't applicable (etc.) are entered step by using the Security Code is required when it switches "Beep ON"/ "BEEP ON" or "Beep OFF"/ "BEEP OFF".
... are displayed afterwards their setting content is after this unit is the original setting.) Also, the explanation for at least 1 second. Menu display Security Code Because authorization by the Security Code is a help in the chart is by step. When other items. 4 Exit Menu mode Press the [MENU] button. You can continue by returning... the [FM] or [AM] button. Example: When you want to step 2 and setting other items that aren't applicable (etc.) are entered step by using the Security Code is required when it switches "Beep ON"/ "BEEP ON" or "Beep OFF"/ "BEEP OFF".

Instruction Manual
Page 23
... or [¢] button. 4 Exit Clock adjustment mode Press the [MENU] button. - 23 - When "ENTER" is displayed, "CODE" is displayed. 3 Enter Security Code mode Press the [4] or [¢] button for at least 3 seconds. "APPROVED" is heard. Manual Clock Adjustment 1 Select Clock Adjustment... the [4] or [¢] button. 5 Select the Security Code numbers Press the [FM] or [AM] button. 6 Repeat steps 4 and 5, and complete the Security Code. 7 Confirm the Security Code Press the [¢] button for at least 1 second. The Security Code function activates. The clock display blinks. 3 Adjust the...
... or [¢] button. 4 Exit Clock adjustment mode Press the [MENU] button. - 23 - When "ENTER" is displayed, "CODE" is displayed. 3 Enter Security Code mode Press the [4] or [¢] button for at least 3 seconds. "APPROVED" is heard. Manual Clock Adjustment 1 Select Clock Adjustment... the [4] or [¢] button. 5 Select the Security Code numbers Press the [FM] or [AM] button. 6 Repeat steps 4 and 5, and complete the Security Code. 7 Confirm the Security Code Press the [¢] button for at least 1 second. The Security Code function activates. The clock display blinks. 3 Adjust the...


