
User Guide
Page 11
... ...10-9 Flash Sync Modes for Optional Speedlights 10-11 Flash Exposure Compensation...10-12 Using Optional Speedlights ...10-13 Notes for Using an Optional Speedlight 10-15 11 Working with Images on the Camera Reviewing Images...11-1 Selecting an Image Mode ...11-1 Changing the Duration of the Image Mode Menu Display 11-2 Single...
... ...10-9 Flash Sync Modes for Optional Speedlights 10-11 Flash Exposure Compensation...10-12 Using Optional Speedlights ...10-13 Notes for Using an Optional Speedlight 10-15 11 Working with Images on the Camera Reviewing Images...11-1 Selecting an Image Mode ...11-1 Changing the Duration of the Image Mode Menu Display 11-2 Single...

User Guide
Page 12
... Bar...11-7 Selecting an Image ...11-7 Overexposure Indicator ...11-8 Changing Display Contrast and Brightness 11-8 Auto Review...11-9 Slide Show...11-9 Starting/Stopping a Slide Show ...11-10 Deleting Images...11-11 Tagging Images...11-12 Recording Sound ...12-1 Enabling/Disabling External Video...12-2 13 Connecting to Your Computer Advantages to an IEEE 1394 Connection ...13-1 Advantages to a Card Reader...13-1 Connecting Your Camera to the Computer ...13-2 Quitting-Disconnecting from the Computer 13-4 Using the Card Reader ...13-4 14 Camera Care Handling ...14-1 Cleaning ...14-2...
... Bar...11-7 Selecting an Image ...11-7 Overexposure Indicator ...11-8 Changing Display Contrast and Brightness 11-8 Auto Review...11-9 Slide Show...11-9 Starting/Stopping a Slide Show ...11-10 Deleting Images...11-11 Tagging Images...11-12 Recording Sound ...12-1 Enabling/Disabling External Video...12-2 13 Connecting to Your Computer Advantages to an IEEE 1394 Connection ...13-1 Advantages to a Card Reader...13-1 Connecting Your Camera to the Computer ...13-2 Quitting-Disconnecting from the Computer 13-4 Using the Card Reader ...13-4 14 Camera Care Handling ...14-1 Cleaning ...14-2...
User Guide
Page 15
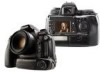
...Review the Important Safeguards and Precautions. • Register your camera. • Go to the following Web site for system requirements: www.kodak.com/go /DCSRegister • Complete the Registration card (included with your camera). System Requirements for Your Computer Refer to www.kodak.com/go /dcs...register your KODAK PROFESSIONAL DCS Pro 14n Digital Camera. 1 Important Information Thank you for purchasing your camera in one of Eastman Kodak Company and NIKON Corporation, allows you to capture and store high-resolution, high-quality digital images. This portable camera system, ...
...Review the Important Safeguards and Precautions. • Register your camera. • Go to the following Web site for system requirements: www.kodak.com/go /DCSRegister • Complete the Registration card (included with your camera). System Requirements for Your Computer Refer to www.kodak.com/go /dcs...register your KODAK PROFESSIONAL DCS Pro 14n Digital Camera. 1 Important Information Thank you for purchasing your camera in one of Eastman Kodak Company and NIKON Corporation, allows you to capture and store high-resolution, high-quality digital images. This portable camera system, ...

User Guide
Page 30
... pixels, few pixels in the LCD that are able to fully utilize all the camera features and performance in this instance. • Use tabbed menus to access digital functions NOTE: The Image LCD screen shown here appears when the camera is in number, do not affect the evaluation of a scene, the exposure or... Aperture Custom Setting Battery power Flash Sync Mode Image LCD Focus area Auto Exposure bracketing Using the Image LCD you can: • Conveniently evaluate and review images in the camera NOTE: Occasionally there are a few in Advanced mode.
... pixels, few pixels in the LCD that are able to fully utilize all the camera features and performance in this instance. • Use tabbed menus to access digital functions NOTE: The Image LCD screen shown here appears when the camera is in number, do not affect the evaluation of a scene, the exposure or... Aperture Custom Setting Battery power Flash Sync Mode Image LCD Focus area Auto Exposure bracketing Using the Image LCD you can: • Conveniently evaluate and review images in the camera NOTE: Occasionally there are a few in Advanced mode.

User Guide
Page 32
interactive shortcuts to associated menu options on card Raw resolution JPEG resolution JPEG quality Review-related status information: When the Image LCD is in Advanced mode. CF Card SD/MMC Card Crop aspect ratio White balance ISO Estimated ... turned off, or when you perform operations, appropriate messages appear. 2-12 April 29, 2004 About Your Camera Digital Status LCD The Digital Status LCD provides the following information: Status information Capture-related information - White balance Current folder Current image Raw resolution JPEG resolution Helpful messages: As...
interactive shortcuts to associated menu options on card Raw resolution JPEG resolution JPEG quality Review-related status information: When the Image LCD is in Advanced mode. CF Card SD/MMC Card Crop aspect ratio White balance ISO Estimated ... turned off, or when you perform operations, appropriate messages appear. 2-12 April 29, 2004 About Your Camera Digital Status LCD The Digital Status LCD provides the following information: Status information Capture-related information - White balance Current folder Current image Raw resolution JPEG resolution Helpful messages: As...

User Guide
Page 33
... Advanced mode. Each tab has an icon at the top representing the type of digital functions. The tabbed menus are five tabs. Capture Review Image Tools Custom Settings April 29, 2004 2-13 In Basic mode (see page 2-16). Using the Menus About Your Camera Your camera provides a variety of digital functions available on the Image LCD.
... Advanced mode. Each tab has an icon at the top representing the type of digital functions. The tabbed menus are five tabs. Capture Review Image Tools Custom Settings April 29, 2004 2-13 In Basic mode (see page 2-16). Using the Menus About Your Camera Your camera provides a variety of digital functions available on the Image LCD.

User Guide
Page 57
... LCD displays information about the selected image. Press and hold the Digital Status button, and press the right or left of the Four-way switch to associated menu options on the Image LCD. Review-related status information: When the Image LCD is turned off, or when you ...lightly press the Shutter Release button, the Digital Status LCD displays capture-related information and provides shortcuts to sequence through the ...
... LCD displays information about the selected image. Press and hold the Digital Status button, and press the right or left of the Four-way switch to associated menu options on the Image LCD. Review-related status information: When the Image LCD is turned off, or when you ...lightly press the Shutter Release button, the Digital Status LCD displays capture-related information and provides shortcuts to sequence through the ...

User Guide
Page 100
... the Image LCD off the Image LCD (see page 6-3). 4. Select Single Image review mode (see page 6-12). 5. The write speed for the last saved image appears. Set the RAW resolution to 13.5 (see page 11-1). 6. NOTE: Repeat steps 6 - 8 at which your camera writes data to standby and remove the card (see page 6-2). 3. If...
... the Image LCD off the Image LCD (see page 6-3). 4. Select Single Image review mode (see page 6-12). 5. The write speed for the last saved image appears. Set the RAW resolution to 13.5 (see page 11-1). 6. NOTE: Repeat steps 6 - 8 at which your camera writes data to standby and remove the card (see page 6-2). 3. If...
User Guide
Page 148
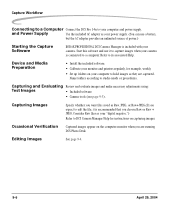
... monitor. (The Image LCD is disabled when this is complete, insert the memory card in use the Image LCD regularly to review images while still on location. These applications allow you locate the images. • Backup your computer. You can send them in a...save the images in any image editing application. Refer to do enhanced DCS-specific image editing. It reconstructs extended dynamic range/color gamut images and displays a preview. If you save images as JPEG on your camera. KODAK PROFESSIONAL DCS Photo Desk-Allows you can perform a limited set of formats. ...
... monitor. (The Image LCD is disabled when this is complete, insert the memory card in use the Image LCD regularly to review images while still on location. These applications allow you locate the images. • Backup your computer. You can send them in a...save the images in any image editing application. Refer to do enhanced DCS-specific image editing. It reconstructs extended dynamic range/color gamut images and displays a preview. If you save images as JPEG on your camera. KODAK PROFESSIONAL DCS Photo Desk-Allows you can perform a limited set of formats. ...
User Guide
Page 150
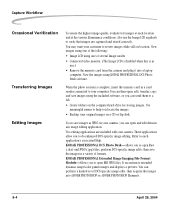
... of power.) Starting the Capture Software KODAK PROFESSIONAL DCS Camera Manager is included with your computer and power supply. Capturing Images Specify whether you want files saved as Raw, JPEG, or Raw+JPEG.(If you expect to edit the file, it to capture images when your "digital negative.") Refer to DCS Camera Manager Help for example, weekly...
... of power.) Starting the Capture Software KODAK PROFESSIONAL DCS Camera Manager is included with your computer and power supply. Capturing Images Specify whether you want files saved as Raw, JPEG, or Raw+JPEG.(If you expect to edit the file, it to capture images when your "digital negative.") Refer to DCS Camera Manager Help for example, weekly...

User Guide
Page 167
... mode highlighted. Browse through the Image modes in Image mode. April 29, 2004 11-1 It shows the four Image modes with Images on the Camera Reviewing Images To review images on in the following order: Single Image, Zoom, Histogram, and Multiple Image. Selecting an Image Mode • Single Image (see page 11-2) •...
... mode highlighted. Browse through the Image modes in Image mode. April 29, 2004 11-1 It shows the four Image modes with Images on the Camera Reviewing Images To review images on in the following order: Single Image, Zoom, Histogram, and Multiple Image. Selecting an Image Mode • Single Image (see page 11-2) •...

User Guide
Page 168
... from the Review menu, then highlight Off, 1 sec, 2 sec, or 3 sec. 2. Histogram Mode 11-2 When Histogram mode is clipped during normal processing. April 29, 2004 Single-Image Mode The selected image (see page 11-7), its display or turn it off. 1. Press the OK button. Working with Images on the Camera Changing the.../date of image capture • Exposure mode • Exposure compensation (when relevant) • Tag icon (if image has been tagged) NOTE: Highlight data in the DCS Host software.
... from the Review menu, then highlight Off, 1 sec, 2 sec, or 3 sec. 2. Histogram Mode 11-2 When Histogram mode is clipped during normal processing. April 29, 2004 Single-Image Mode The selected image (see page 11-7), its display or turn it off. 1. Press the OK button. Working with Images on the Camera Changing the.../date of image capture • Exposure mode • Exposure compensation (when relevant) • Tag icon (if image has been tagged) NOTE: Highlight data in the DCS Host software.

User Guide
Page 172
...the Image LCD is off, it turns on the card containing the currently selected folder. 1. NOTE: If there are two cards in the camera, the Nav+ button navigates on . The Nav+ overlay shows the selected folder highlighted and the location bar indicates the position of the ...Four-way switch to highlight other folders on the Camera Selecting a Review Folder The Nav+ button provides a shortcut for quickly navigating among folders and images within a folder. The last-accessed Image mode appears ...
...the Image LCD is off, it turns on the card containing the currently selected folder. 1. NOTE: If there are two cards in the camera, the Nav+ button navigates on . The Nav+ overlay shows the selected folder highlighted and the location bar indicates the position of the ...Four-way switch to highlight other folders on the Camera Selecting a Review Folder The Nav+ button provides a shortcut for quickly navigating among folders and images within a folder. The last-accessed Image mode appears ...

User Guide
Page 174
.... Press the OK button. Choose Overexp. Choose Display Contrast from the Review menu, then highlight Off or On. 3. Changing Display Contrast and Brightness You can indicate areas of overexposure flash on the Camera Overexposure Indicator You can change the contrast and lighten or darken the images... displayed on the Image LCD. 1. Use the gray scale bar to move the slider bar and lighten or darken the image. Indicator from the Review menu. 3. When the...
.... Press the OK button. Choose Overexp. Choose Display Contrast from the Review menu, then highlight Off or On. 3. Changing Display Contrast and Brightness You can indicate areas of overexposure flash on the Camera Overexposure Indicator You can change the contrast and lighten or darken the images... displayed on the Image LCD. 1. Use the gray scale bar to move the slider bar and lighten or darken the image. Indicator from the Review menu. 3. When the...

User Guide
Page 175
In Continuous Loop mode all selected images have appeared once or until you manipulate any digital buttons while the image is repeated until you want the slide show to appear on a video monitor (see page 12-1). 2. If you press the Cancel ... the Cancel button. 11-9 In Single Show mode, the slide show of camera images on the Image LCD and video monitor, or just on the Image LCD. 1. Auto Review Working with Images on the Camera When you enable the Auto Review feature, the Image LCD turns on when you capture an image then displays...
In Continuous Loop mode all selected images have appeared once or until you manipulate any digital buttons while the image is repeated until you want the slide show to appear on a video monitor (see page 12-1). 2. If you press the Cancel ... the Cancel button. 11-9 In Single Show mode, the slide show of camera images on the Image LCD and video monitor, or just on the Image LCD. 1. Auto Review Working with Images on the Camera When you enable the Auto Review feature, the Image LCD turns on when you capture an image then displays...

User Guide
Page 176
Starting/Stopping a Slide Show • Choose Slide Show from the Review menu, then highlight Start to start the show. • Press the Cancel button at any time to display: Choose Slide Show from the Review menu, then highlight All on cards, All in folder, Tagged on the Camera 3. Select the length of time for each image to stop the show : Choose Slide Show from the Review menu, then highlight 3 sec., 5 sec., or 10 sec. Working with Images on cards, or Tagged in the slide show . 11-10 April 29, 2004 Select the images to appear in folder. 4.
Starting/Stopping a Slide Show • Choose Slide Show from the Review menu, then highlight Start to start the show. • Press the Cancel button at any time to display: Choose Slide Show from the Review menu, then highlight All on cards, All in folder, Tagged on the Camera 3. Select the length of time for each image to stop the show : Choose Slide Show from the Review menu, then highlight 3 sec., 5 sec., or 10 sec. Working with Images on cards, or Tagged in the slide show . 11-10 April 29, 2004 Select the images to appear in folder. 4.

User Guide
Page 177
...: You may be deleted. 6. To delete images in Image mode. Press the OK button to accept the change to turn it on in a folder, select a review folder. Press the Delete button. 4. Associated sound files are saved. If you capture a JPEG, Raw, or Raw+JPEG image to one image is off, press... the OK button to Image mode. 2. April 29, 2004 11-11 Deleting Images Working with Images on the Camera You can delete a single image, all images in a folder or on a card, or all copies are deleted.
...: You may be deleted. 6. To delete images in Image mode. Press the OK button to accept the change to turn it on in a folder, select a review folder. Press the Delete button. 4. Associated sound files are saved. If you capture a JPEG, Raw, or Raw+JPEG image to one image is off, press... the OK button to Image mode. 2. April 29, 2004 11-11 Deleting Images Working with Images on the Camera You can delete a single image, all images in a folder or on a card, or all copies are deleted.

User Guide
Page 179
.... 3. April 29, 2004 11-13 If the Image LCD is off, press the OK button to turn it . Working with Images on the Camera Recording Sound Files You can record a sound file to annotate the selected image, either immediately after you capture it or later when you review it on in Image mode... less than one second, you release the Tag/Record button in the Digital Status LCD. 4. If you delete the image using camera controls, or copy or delete it using the DCS Photo Desk software, you copy or delete images without using the DCS Photo Desk software, the sound file will also be copied or...
.... 3. April 29, 2004 11-13 If the Image LCD is off, press the OK button to turn it . Working with Images on the Camera Recording Sound Files You can record a sound file to annotate the selected image, either immediately after you capture it or later when you review it on in Image mode... less than one second, you release the Tag/Record button in the Digital Status LCD. 4. If you delete the image using camera controls, or copy or delete it using the DCS Photo Desk software, you copy or delete images without using the DCS Photo Desk software, the sound file will also be copied or...

User Guide
Page 181
You can review images and menus on the connected video monitor. The Video Output port is a 2.5mm stereo jack. April 29, 2004 12-1 When you capture an image, it and make necessary camera adjustments. • Connect a video cable (not included) to the Video Output port. NOTE: Kodak sells a cable that fits your camera (catalog j number 1817774). 12 Using the Video Output Port Connecting You can review it automatically appears on an external video monitor.
You can review images and menus on the connected video monitor. The Video Output port is a 2.5mm stereo jack. April 29, 2004 12-1 When you capture an image, it and make necessary camera adjustments. • Connect a video cable (not included) to the Video Output port. NOTE: Kodak sells a cable that fits your camera (catalog j number 1817774). 12 Using the Video Output Port Connecting You can review it automatically appears on an external video monitor.

User Guide
Page 182
Choose Off to view images on an external monitor. Using the Video Output Port Enabling/Disabling External Video You can specify the video standard used to disable. 3. Choose NTSC or PAL to enable. Press the OK button. 12-2 April 29, 2004 NTSC-North America (default) PAL-Europe and Asia 1. Choose External Video from the Review menu. 2.
Choose Off to view images on an external monitor. Using the Video Output Port Enabling/Disabling External Video You can specify the video standard used to disable. 3. Choose NTSC or PAL to enable. Press the OK button. 12-2 April 29, 2004 NTSC-North America (default) PAL-Europe and Asia 1. Choose External Video from the Review menu. 2.


