User Guide
Page 38
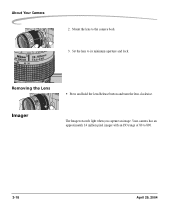
Your camera has an approximately 14 million pixel imager with an ISO range of 80 to its minimum aperture and lock. Set the lens to 800. 2-18 April 29, 2004 Mount the lens to the camera body. 3. Removing the Lens • Press and hold the Lens Release button and turn the lens clockwise. 22 22 35 28 28 50 m ft 70 85 105 Imager The Imager records light when you capture an image. About Your Camera 2.
Your camera has an approximately 14 million pixel imager with an ISO range of 80 to its minimum aperture and lock. Set the lens to 800. 2-18 April 29, 2004 Mount the lens to the camera body. 3. Removing the Lens • Press and hold the Lens Release button and turn the lens clockwise. 22 22 35 28 28 50 m ft 70 85 105 Imager The Imager records light when you capture an image. About Your Camera 2.

User Guide
Page 40
... controlled in Programmed Auto or Shutter-Priority Auto Exposure mode, and down to -subject distance, for example, in close-up photography. About Your Camera Depth of Field Preview Button The depth of field is the zone of acceptable focus in front of and behind the subject. • Press...lens mounting flange to confirm the depth of field through the viewfinder, you can confirm the approximate depth of the imager plane inside the camera body. Imager Plane Indicator The Imager Plane indicator shows the standard line of the shooting distance and indicates the position of field with the given...
... controlled in Programmed Auto or Shutter-Priority Auto Exposure mode, and down to -subject distance, for example, in close-up photography. About Your Camera Depth of Field Preview Button The depth of field is the zone of acceptable focus in front of and behind the subject. • Press...lens mounting flange to confirm the depth of field through the viewfinder, you can confirm the approximate depth of the imager plane inside the camera body. Imager Plane Indicator The Imager Plane indicator shows the standard line of the shooting distance and indicates the position of field with the given...

User Guide
Page 50
Turn off the camera. 2. Mounting the Lens 1. The Basics • To remove, lift the latch, turn the latch counterclockwise, and slide the battery out. Mount the lens to the camera body. 4-2 April 29, 2004
Turn off the camera. 2. Mounting the Lens 1. The Basics • To remove, lift the latch, turn the latch counterclockwise, and slide the battery out. Mount the lens to the camera body. 4-2 April 29, 2004

User Guide
Page 53
... grip with your right hand. • Stand with your elbow propped against your body for situations where autofocus may produce unexpected results. 3. Set the Exposure Mode dial to cradle the camera with one foot forward a half step and keep your subject and lightly press the Shutter Release... button. Center the focus brackets on your upper body still. 2. Use Manual focus (see page 5-14) using autofocus, ...
... grip with your right hand. • Stand with your elbow propped against your body for situations where autofocus may produce unexpected results. 3. Set the Exposure Mode dial to cradle the camera with one foot forward a half step and keep your subject and lightly press the Shutter Release... button. Center the focus brackets on your upper body still. 2. Use Manual focus (see page 5-14) using autofocus, ...

User Guide
Page 188
...with a soft, clean cloth. Using a damp cloth, clean only the outside of the camera. 4. NOTE: Do not use liquid cleaners or aerosol cleaners on the outside of these surfaces. 6. Avoid directly touching any of the camera body, the Top Status LCD, the Back Status LCD, and the Image LCD. NOTE: ...Do not lubricate the camera. 14-2 April 29, 2004 Disconnect the camera from the AC adapter and from the mirror or focusing screen, gently ...
...with a soft, clean cloth. Using a damp cloth, clean only the outside of the camera. 4. NOTE: Do not use liquid cleaners or aerosol cleaners on the outside of these surfaces. 6. Avoid directly touching any of the camera body, the Top Status LCD, the Back Status LCD, and the Image LCD. NOTE: ...Do not lubricate the camera. 14-2 April 29, 2004 Disconnect the camera from the AC adapter and from the mirror or focusing screen, gently ...
