User Guide
Page 10
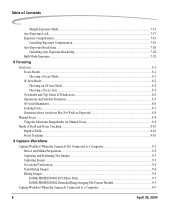
... Electronic Rangefinder for Manual Focus 8-9 Depth of Field and Focus Tracking ...8-10 Depth of Field ...8-10 Focus Tracking ...8-10 9 Capture Workflow Capture Workflow When the Camera Is Not Connected to a Computer 9-1 Device and Media Preparation ...9-2 Capturing and Evaluating Test Images ...9-3 Capturing Images ...9-3 Occasional Verification ...9-4 Transferring Images...9-4 Editing Images ...9-4 KODAK PROFESSIONAL DCS Photo Desk 9-5 KODAK PROFESSIONAL Extended Range...
... Electronic Rangefinder for Manual Focus 8-9 Depth of Field and Focus Tracking ...8-10 Depth of Field ...8-10 Focus Tracking ...8-10 9 Capture Workflow Capture Workflow When the Camera Is Not Connected to a Computer 9-1 Device and Media Preparation ...9-2 Capturing and Evaluating Test Images ...9-3 Capturing Images ...9-3 Occasional Verification ...9-4 Transferring Images...9-4 Editing Images ...9-4 KODAK PROFESSIONAL DCS Photo Desk 9-5 KODAK PROFESSIONAL Extended Range...

User Guide
Page 20
...or relocate the receiving antenna. • Increase the separation between your camera and receiver. • Connect your camera into an outlet on the standard of the Voluntary Control Council for a Class B digital device, pursuant to Part 15 of the FCC Rules. Important Information Electromagnetic...limits are designed to provide reasonable protection against harmful interference in a domestic environment, it may cause harmful interference to the instruction manual. 1-6 April 29, 2004 This equipment generates, uses and can be determined by turning the equipment off and on, the ...
...or relocate the receiving antenna. • Increase the separation between your camera and receiver. • Connect your camera into an outlet on the standard of the Voluntary Control Council for a Class B digital device, pursuant to Part 15 of the FCC Rules. Important Information Electromagnetic...limits are designed to provide reasonable protection against harmful interference in a domestic environment, it may cause harmful interference to the instruction manual. 1-6 April 29, 2004 This equipment generates, uses and can be determined by turning the equipment off and on, the ...

User Guide
Page 40
... Field Preview Button The depth of field is 46.5 mm. 2-20 April 29, 2004 Use this indicator when actually measuring camera-to-subject distance, for example, in Aperture-Priority Auto or Manual Exposure mode. The distance from the lens mounting flange to the imager plane is the zone of acceptable focus in... field through the viewfinder, you can confirm the approximate depth of field with the given aperture. Pressing the Depth of the imager plane inside the camera body.
... Field Preview Button The depth of field is 46.5 mm. 2-20 April 29, 2004 Use this indicator when actually measuring camera-to-subject distance, for example, in Aperture-Priority Auto or Manual Exposure mode. The distance from the lens mounting flange to the imager plane is the zone of acceptable focus in... field through the viewfinder, you can confirm the approximate depth of field with the given aperture. Pressing the Depth of the imager plane inside the camera body.

User Guide
Page 49
... turn the latch clockwise. 4 The Basics This chapter helps you quickly start using its full range of the manual.) As you can begin using your KODAK PROFESSIONAL DCS Pro 14n Digital Camera. Inserting/Removing Batteries 1. To insert, slide a charged battery (see page 3-2) in other areas of functionality. latch April 29, 2004 4-1 Use this chapter to familiarize yourself ...
... turn the latch clockwise. 4 The Basics This chapter helps you quickly start using its full range of the manual.) As you can begin using your KODAK PROFESSIONAL DCS Pro 14n Digital Camera. Inserting/Removing Batteries 1. To insert, slide a charged battery (see page 3-2) in other areas of functionality. latch April 29, 2004 4-1 Use this chapter to familiarize yourself ...

User Guide
Page 53
...page 8-1) or use Focus Lock (see page 8-9). April 29, 2004 4-5 Slowly press the Shutter Release button. Use Manual focus (see page 8-7). • See page 8-8 for support. • Grasp the camera hand grip with your right hand. • Stand with your elbow propped against your left hand to P (Programmed ...on your upper body still. 2. NOTE: You can capture images in the viewfinder. Set the Exposure Mode dial to cradle the camera with one foot forward a half step and keep your subject and lightly press the Shutter Release button. Composing, Focusing, and Capturing 1.
...page 8-1) or use Focus Lock (see page 8-9). April 29, 2004 4-5 Slowly press the Shutter Release button. Use Manual focus (see page 8-7). • See page 8-8 for support. • Grasp the camera hand grip with your right hand. • Stand with your elbow propped against your left hand to P (Programmed ...on your upper body still. 2. NOTE: You can capture images in the viewfinder. Set the Exposure Mode dial to cradle the camera with one foot forward a half step and keep your subject and lightly press the Shutter Release button. Composing, Focusing, and Capturing 1.

User Guide
Page 75
... the maximum number of changes allowed in a folder. Auto Restart-Names are to 0 on your camera. Press the OK button. To enable a firmware feature on the camera. Manual Restart-Names are only available with a key. Configuring your Camera Firmware Features A few specialized features are built into the firmware and are reset to be saved...
... the maximum number of changes allowed in a folder. Auto Restart-Names are to 0 on your camera. Press the OK button. To enable a firmware feature on the camera. Manual Restart-Names are only available with a key. Configuring your Camera Firmware Features A few specialized features are built into the firmware and are reset to be saved...

User Guide
Page 91
NOTE: The Self Timer will release in Manual Exposure mode, shutter speed is activated, the shutter will not work if the shutter cannot be released, for two seconds before the shutter is released. Use a tripod or place the camera on a stable surface before pressing the Shutter Release button. When ...button. April 29, 2004 5-23 If you are using an Exposure mode (see page 7-10) other than Manual, cover the eyepiece with the supplied eyepiece cap or with your Camera Using the Self Timer Drive Mode Selector Lock release Self Timer Drive Mode selector Use the Self Timer when ...
NOTE: The Self Timer will release in Manual Exposure mode, shutter speed is activated, the shutter will not work if the shutter cannot be released, for two seconds before the shutter is released. Use a tripod or place the camera on a stable surface before pressing the Shutter Release button. When ...button. April 29, 2004 5-23 If you are using an Exposure mode (see page 7-10) other than Manual, cover the eyepiece with the supplied eyepiece cap or with your Camera Using the Self Timer Drive Mode Selector Lock release Self Timer Drive Mode selector Use the Self Timer when ...

User Guide
Page 120
... whether you set any exposure mode, first set the shutter speed and/or lens aperture automatically or manually. Your camera has four exposure modes: • Programmed Auto (P) • Shutter-Priority Auto (S) • Aperture-Priority Auto (A) • Manual (M) NOTE: When you want to its minimum aperture setting, fEE blinks in a correct exposure. The proper...
... whether you set any exposure mode, first set the shutter speed and/or lens aperture automatically or manually. Your camera has four exposure modes: • Programmed Auto (P) • Shutter-Priority Auto (S) • Aperture-Priority Auto (A) • Manual (M) NOTE: When you want to its minimum aperture setting, fEE blinks in a correct exposure. The proper...

User Guide
Page 121
For more complex situations, use Manual Exposure mode. 1. If the subject is helpful when you want to concentrate only on ISO. This mode is too dark, Lo appears in the Top ... Status LCD and viewfinder. Rotate the Exposure Mode dial to P. 2. Use an ND filter. Controlling Exposure Programmed Auto Exposure In Programmed Auto Exposure mode, the camera automatically controls Mode exposure according to the exposure combination in the program chart (see page 7-20). NOTE: You can only use Programmed Auto Exposure mode...
For more complex situations, use Manual Exposure mode. 1. If the subject is helpful when you want to concentrate only on ISO. This mode is too dark, Lo appears in the Top ... Status LCD and viewfinder. Rotate the Exposure Mode dial to P. 2. Use an ND filter. Controlling Exposure Programmed Auto Exposure In Programmed Auto Exposure mode, the camera automatically controls Mode exposure according to the exposure combination in the program chart (see page 7-20). NOTE: You can only use Programmed Auto Exposure mode...

User Guide
Page 123
...the Main-Command dial. 1. Controlling Exposure Shutter-Priority Auto Exposure Mode Shutter-Priority Auto Exposure mode lets you manually set the shutter speed. 3. In this case, use a Speedlight. 7-13 If the subject is too dark, Lo appears in the Top Status LCD and viewfinder, and the shutter ...cannot be released. blinks in the Top Status LCD and viewfinder. April 29, 2004 NOTE: You can only use Shutter-Priority Auto Exposure mode if you change to S. 2. The camera ...
...the Main-Command dial. 1. Controlling Exposure Shutter-Priority Auto Exposure Mode Shutter-Priority Auto Exposure mode lets you manually set the shutter speed. 3. In this case, use a Speedlight. 7-13 If the subject is too dark, Lo appears in the Top Status LCD and viewfinder, and the shutter ...cannot be released. blinks in the Top Status LCD and viewfinder. April 29, 2004 NOTE: You can only use Shutter-Priority Auto Exposure mode if you change to S. 2. The camera ...

User Guide
Page 124
... You can sharpen the background and foreground, or blur the background. Rotate the Exposure Mode dial to set the aperture. If you use Manual Exposure mode. 1. blinks in the Top Status LCD and viewfinder, and the shutter cannot be released. Controlling Exposure Aperture-Priority Auto Exposure...Auto Exposure mode lets you are using a CPU NIKKOR lens. In flash photography, varying the aperture changes the flash-shooting distance. The camera automatically selects a suitable shutter speed. By varying the aperture, and thus controlling the depth of field, you can only use Aperture-...
... You can sharpen the background and foreground, or blur the background. Rotate the Exposure Mode dial to set the aperture. If you use Manual Exposure mode. 1. blinks in the Top Status LCD and viewfinder, and the shutter cannot be released. Controlling Exposure Aperture-Priority Auto Exposure...Auto Exposure mode lets you are using a CPU NIKKOR lens. In flash photography, varying the aperture changes the flash-shooting distance. The camera automatically selects a suitable shutter speed. By varying the aperture, and thus controlling the depth of field, you can only use Aperture-...

User Guide
Page 125
... the lens aperture ring. Rotate the Main-Command dial to set both shutter speed and aperture manually. With the electronic analog exposure display in the Top Status LCD and viewfinder. NOTE: If you use the camera's exposure meter. 1. You cannot use a non-CPU lens, f-- Shutter speed appears in the electronic analog ... If the warning remains, use a Speedlight. Rotate the Exposure Mode dial to buLb. 7-15 Select a smaller aperture. If the warning remains, use an ND filter. Manual Exposure mode lets you can set Bulb mode in the Top Status LCD and viewfinder. Controlling Exposure...
... the lens aperture ring. Rotate the Main-Command dial to set both shutter speed and aperture manually. With the electronic analog exposure display in the Top Status LCD and viewfinder. NOTE: If you use the camera's exposure meter. 1. You cannot use a non-CPU lens, f-- Shutter speed appears in the electronic analog ... If the warning remains, use a Speedlight. Rotate the Exposure Mode dial to buLb. 7-15 Select a smaller aperture. If the warning remains, use an ND filter. Manual Exposure mode lets you can set Bulb mode in the Top Status LCD and viewfinder. Controlling Exposure...

User Guide
Page 133
...Auto Exposure mode without cancelling buLb, buLb blinks and the shutter locks. Use the LCD illuminator (see page 2-19) to view the LCDs in Manual Exposure mode and you fully press the Shutter Release button. 7-23 IMPORTANT: If buLb is selected in the dark. The shutter remains open as ...long as you change to avoid camera shake. Controlling Exposure Bulb Mode Exposure Bulb Mode exposure is useful when you are capturing nighttime scenes that require extended exposure of more than buLb...
...Auto Exposure mode without cancelling buLb, buLb blinks and the shutter locks. Use the LCD illuminator (see page 2-19) to view the LCDs in Manual Exposure mode and you fully press the Shutter Release button. 7-23 IMPORTANT: If buLb is selected in the dark. The shutter remains open as ...long as you change to avoid camera shake. Controlling Exposure Bulb Mode Exposure Bulb Mode exposure is useful when you are capturing nighttime scenes that require extended exposure of more than buLb...

User Guide
Page 135
... you can set up your KODAK PROFESSIONAL DCS Pro 14n Digital Camera to focus automatically (described below) or you release the button. • Set the Focus Mode selector to properly focus an image. 8 Focusing 35 2 50 Autofocus Focus Modes Choosing a Focus Mode You can focus manually (see page 8-9). There are...Release button, focus tracking occurs until focus locks. Focus then locks and the focus indicator appears in the viewfinder. With autofocus, the camera does much of the work required to S (Single Servo AF with Focus Priority) or C (Continuous Servo AF with Release Priority...
... you can set up your KODAK PROFESSIONAL DCS Pro 14n Digital Camera to focus automatically (described below) or you release the button. • Set the Focus Mode selector to properly focus an image. 8 Focusing 35 2 50 Autofocus Focus Modes Choosing a Focus Mode You can focus manually (see page 8-9). There are...Release button, focus tracking occurs until focus locks. Focus then locks and the focus indicator appears in the viewfinder. With autofocus, the camera does much of the work required to S (Single Servo AF with Focus Priority) or C (Continuous Servo AF with Release Priority...

User Guide
Page 142
Low-contrast scenes For example, where the subject is in shadow 8-8 April 29, 2004 In these situations, focus manually using the clear matte field (see page 8-9), or focus on a different subject at different distances from the camera For example, when shooting an animal in a cage or a person in a forest Patterned subject or scene...
Low-contrast scenes For example, where the subject is in shadow 8-8 April 29, 2004 In these situations, focus manually using the clear matte field (see page 8-9), or focus on a different subject at different distances from the camera For example, when shooting an animal in a cage or a person in a forest Patterned subject or scene...

User Guide
Page 143
... time. You can release the shutter at any of f/5.6 or faster (including AF NIKKOR when operated manually). 1. Set the Focus Mode selector to M. 50 70 85 105 April 29, 2004 2. Using the Electronic Rangefinder for Manual Focus The Electronic Rangefinder works with most NIKKOR lenses with any time. You can activate the... with a maximum aperture of the five focus brackets selected. 8-9 Lightly press the Shutter Release button. Set the Focus Mode selector to M. 70 85 105 2. 50 Manual Focus Focusing Use manual focus in the clear matte field.
... time. You can release the shutter at any of f/5.6 or faster (including AF NIKKOR when operated manually). 1. Set the Focus Mode selector to M. 50 70 85 105 April 29, 2004 2. Using the Electronic Rangefinder for Manual Focus The Electronic Rangefinder works with most NIKKOR lenses with any time. You can activate the... with a maximum aperture of the five focus brackets selected. 8-9 Lightly press the Shutter Release button. Set the Focus Mode selector to M. 70 85 105 2. 50 Manual Focus Focusing Use manual focus in the clear matte field.

User Guide
Page 152
... by the camera's through-the-lens (TTL) multi-sensor and analyzed in combination with data on the current sensitivity (ISO equivalency) setting, aperture, lens focal length, exposure compensation, and distance information provided by the lens. All types Standard TTL Flash for Digital SLR: Flash output... without taking the background into account. Other CPU lens Multi-Sensor Balanced Fill-Flash for Digital SLR: As above, except that the main subject is used. Not available in Manual Exposure mode or when Spot Metering is not included in regulating flash output. It is recommended...
... by the camera's through-the-lens (TTL) multi-sensor and analyzed in combination with data on the current sensitivity (ISO equivalency) setting, aperture, lens focal length, exposure compensation, and distance information provided by the lens. All types Standard TTL Flash for Digital SLR: Flash output... without taking the background into account. Other CPU lens Multi-Sensor Balanced Fill-Flash for Digital SLR: As above, except that the main subject is used. Not available in Manual Exposure mode or when Spot Metering is not included in regulating flash output. It is recommended...

User Guide
Page 153
... to Matrix or Center-Weighted metering. 2. Set the Exposure mode and confirm shutter speed and aperture. NOTE: Automatic Balanced Fill-Flash for Digital SLR is executed when you set Exposure mode to Programmed Auto, Shutter-Priority Auto, or Aperture-Priority Auto. The Speedlight starts to set the ...Flash Sync mode. 4. Standard TTL Flash for Digital SLR is executed when you set Exposure mode to Manual. April 29, 2004 10-3 NOTE: To conserve power when the Speedlight is not in use, close it by pressing ...
... to Matrix or Center-Weighted metering. 2. Set the Exposure mode and confirm shutter speed and aperture. NOTE: Automatic Balanced Fill-Flash for Digital SLR is executed when you set Exposure mode to Programmed Auto, Shutter-Priority Auto, or Aperture-Priority Auto. The Speedlight starts to set the ...Flash Sync mode. 4. Standard TTL Flash for Digital SLR is executed when you set Exposure mode to Manual. April 29, 2004 10-3 NOTE: To conserve power when the Speedlight is not in use, close it by pressing ...

User Guide
Page 154
...set (1/125-1/60 sec.) Automatically set Shutter-Priority Auto 1/125-30 sec.1 Aperture-Priority Auto Automatically set (1/125-1/60 sec.) Desired setting2 Manual 1/125-30 sec.1, buLb 1 Shutter speed shifts automatically to 1/125 second when the shutter speed is set the aperture according to the...April 29, 2004 In a dark environment, the AF-Assist Illuminator automatically turns on the selected ISO and aperture. In Aperture-Priority Auto or Manual Exposure mode, set faster than 1/125 second and the flash is fired (or an attached optional Speedlight is underexposed, adjust settings (for ...
...set (1/125-1/60 sec.) Automatically set Shutter-Priority Auto 1/125-30 sec.1 Aperture-Priority Auto Automatically set (1/125-1/60 sec.) Desired setting2 Manual 1/125-30 sec.1, buLb 1 Shutter speed shifts automatically to 1/125 second when the shutter speed is set the aperture according to the...April 29, 2004 In a dark environment, the AF-Assist Illuminator automatically turns on the selected ISO and aperture. In Aperture-Priority Auto or Manual Exposure mode, set faster than 1/125 second and the flash is fired (or an attached optional Speedlight is underexposed, adjust settings (for ...

User Guide
Page 163
... flash for Digital SLR Flash mode D-TTL AA The following Speedlights support D-TTL flash control: A M REAR Speedlight D-TTL SB-80DX/SB-28DX ✓ SB-50DX ✓ Auto Non-TTL Manual Repeating Rear- aperture auto flash curtain sync ✓ ✓ ✓ ✓ ✓ ✓ ✓ Red-eye reduction ✓ April 29, 2004 10-13 D-TTL...
... flash for Digital SLR Flash mode D-TTL AA The following Speedlights support D-TTL flash control: A M REAR Speedlight D-TTL SB-80DX/SB-28DX ✓ SB-50DX ✓ Auto Non-TTL Manual Repeating Rear- aperture auto flash curtain sync ✓ ✓ ✓ ✓ ✓ ✓ ✓ Red-eye reduction ✓ April 29, 2004 10-13 D-TTL...


