Owner's Manual (English)
Page 2
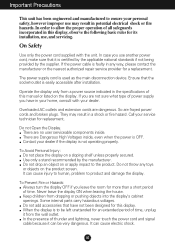
... the display OFF if you use may result in this display. The power supply cord is easily accessible after installation. Ensure that have in the specifications of power supply you are not sure what type of this manual or listed on the product screen. To Avoid Personal Injury : Do not place...
... the display OFF if you use may result in this display. The power supply cord is easily accessible after installation. Ensure that have in the specifications of power supply you are not sure what type of this manual or listed on the product screen. To Avoid Personal Injury : Do not place...

Owner's Manual (English)
Page 13
... PICTURE BRIGHTNESS CONTRAST GAMMA MENU : Exit : Decrease : Increase SET : Select another sub-menu • sRGB: Set the screen color to fit the SRGB standard color specification. • 6500K: Slightly reddish white. • 9300K: Slightly bluish white. Set your own green color levels. Set your own gamma value. : -50/0/50 On the...
... PICTURE BRIGHTNESS CONTRAST GAMMA MENU : Exit : Decrease : Increase SET : Select another sub-menu • sRGB: Set the screen color to fit the SRGB standard color specification. • 6500K: Slightly reddish white. • 9300K: Slightly bluish white. Set your own green color levels. Set your own gamma value. : -50/0/50 On the...

Owner's Manual (English)
Page 15
.... If necessary, perform the white balance function again. This function will automatically be enabled only when the input signal is different the required specifications, the color level may deteriorate due to video signal distortion. Press the , buttons to fit into the standard output level of the video...Using this function to ON or OFF. WHITE BALANCE If the output of the video card in the screen. OSD To adjust position of the monitor to set the power indicator on the front side of the OSD window POSITION on . POWER MENU : Exit : Adjust INDICATOR : Adjust SET ...
.... If necessary, perform the white balance function again. This function will automatically be enabled only when the input signal is different the required specifications, the color level may deteriorate due to video signal distortion. Press the , buttons to fit into the standard output level of the video...Using this function to ON or OFF. WHITE BALANCE If the output of the video card in the screen. OSD To adjust position of the monitor to set the power indicator on the front side of the OSD window POSITION on . POWER MENU : Exit : Adjust INDICATOR : Adjust SET ...

Owner's Manual (English)
Page 17
.... A16 power indicator blue or green? ● Is the power indicator flickering? • If the display is in power saving mode, try again. See the 'Specifications' section of horizontal or vertical the screen?
.... A16 power indicator blue or green? ● Is the power indicator flickering? • If the display is in power saving mode, try again. See the 'Specifications' section of horizontal or vertical the screen?

Owner's Manual (English)
Page 20
A19 Specifications 17 inch Display Sync Input Video Input Resolution Plug&Play Power Consumption Dimensions &Weight Tilt Range Power Input Environmental Conditions Stand Base Signal cable Power cord 17 inches (43.2 cm) Flat Panel Active matrix-TFT LCD Anti-Glare coating Visible diagonal size: 43.2 cm 0.264 mm pixel pitch Horizontal Freq. Input...
A19 Specifications 17 inch Display Sync Input Video Input Resolution Plug&Play Power Consumption Dimensions &Weight Tilt Range Power Input Environmental Conditions Stand Base Signal cable Power cord 17 inches (43.2 cm) Flat Panel Active matrix-TFT LCD Anti-Glare coating Visible diagonal size: 43.2 cm 0.264 mm pixel pitch Horizontal Freq. Input...

Owner's Manual (English)
Page 21
... 90 % non-Condensing Attached( ), Detached ( O ) Attached( ), Detached ( O ) Wall-outlet type or PC-outlet type NOTE Information in this document is subject to change without notice. Specifications 19 inch Display Sync Input Video Input Resolution Plug&Play Power Consumption Dimensions &Weight Tilt Range Power Input Environmental Conditions Stand Base Signal cable Power cord...
... 90 % non-Condensing Attached( ), Detached ( O ) Attached( ), Detached ( O ) Wall-outlet type or PC-outlet type NOTE Information in this document is subject to change without notice. Specifications 19 inch Display Sync Input Video Input Resolution Plug&Play Power Consumption Dimensions &Weight Tilt Range Power Input Environmental Conditions Stand Base Signal cable Power cord...

Owner's Manual (English)
Page 22
Specifications Preset Modes (Resolution) Display Modes (Resolution) 1 640 x 350 2 720 x 400 3 640 x 480 4 640 x 480 5 800 x 600 6 800 x 600 7 832 x 624 8 1024 x 768 9 1024 x 768 10 1152 x 870 11 1152 x 900 *12 1280 x 1024 **13 1280 x 1024 Horizontal Freq. (kHz) 31.469 31.468 31.469 37.500 37.879 46.875 49.725 48.363 60.123 68.681 61.805 63.981 79.976 Vertical Freq. (Hz) 70 70 60 75 60 75 75 60 75 75 65 60 75 * Recommend Mode ** Only Analog Mode Indicator MODE On Mode Sleep Mode Off Mode LED Color blue flicker Off A21
Specifications Preset Modes (Resolution) Display Modes (Resolution) 1 640 x 350 2 720 x 400 3 640 x 480 4 640 x 480 5 800 x 600 6 800 x 600 7 832 x 624 8 1024 x 768 9 1024 x 768 10 1152 x 870 11 1152 x 900 *12 1280 x 1024 **13 1280 x 1024 Horizontal Freq. (kHz) 31.469 31.468 31.469 37.500 37.879 46.875 49.725 48.363 60.123 68.681 61.805 63.981 79.976 Vertical Freq. (Hz) 70 70 60 75 60 75 75 60 75 75 65 60 75 * Recommend Mode ** Only Analog Mode Indicator MODE On Mode Sleep Mode Off Mode LED Color blue flicker Off A21

Owner's Manual (English)
Page 23
... plate(Separate purchase) This is stand-type or wall mount type and is purchased. Installing the Wall mount plate This monitor satisfies the specifications of the Wall mount plate or the interchange device. 1. Place the monitor with Wall mount plate. Separate the stand by pushing the PUSH button. .3 Install the Wall mount plate.
... plate(Separate purchase) This is stand-type or wall mount type and is purchased. Installing the Wall mount plate This monitor satisfies the specifications of the Wall mount plate or the interchange device. 1. Place the monitor with Wall mount plate. Separate the stand by pushing the PUSH button. .3 Install the Wall mount plate.
