
(English) Access Connections Profile Deployment guide
Page 10
..., support calls can be accomplished during the initial system deployment as part of supported ThinkPad® systems and wireless WLAN and WAN drivers, see the following Web site: http://www.lenovo.com/pc/support/site.wss/document.do?sitestyle= lenovo&lndocid=MIGR-4ZLNJB 2 Access Connections Deployment Guide The deployment of the current location...
..., support calls can be accomplished during the initial system deployment as part of supported ThinkPad® systems and wireless WLAN and WAN drivers, see the following Web site: http://www.lenovo.com/pc/support/site.wss/document.do?sitestyle= lenovo&lndocid=MIGR-4ZLNJB 2 Access Connections Deployment Guide The deployment of the current location...

(English) Access Connections Profile Deployment guide
Page 15
...on your system prior to client systems, download and install the Administrator Profile Deployment feature from the following path: C:\Program Files\ThinkPad\ConnectUtilities 3. This will create the deployment feature menu on to enabling the Administrator feature. Figure 1. Working with the Administrator ...on Access Connection main application panel. Run AdmEnblr.exe that is installed in the following Lenovo Web site: http://www.lenovo.com/pc/support/site.wss/document.do?sitestyle= lenovo&lndocid=ACON-DEPLOY Note: The Import/Export feature of Access Connections. Enabler for Administrator...
...on your system prior to client systems, download and install the Administrator Profile Deployment feature from the following path: C:\Program Files\ThinkPad\ConnectUtilities 3. This will create the deployment feature menu on to enabling the Administrator feature. Figure 1. Working with the Administrator ...on Access Connection main application panel. Run AdmEnblr.exe that is installed in the following Lenovo Web site: http://www.lenovo.com/pc/support/site.wss/document.do?sitestyle= lenovo&lndocid=ACON-DEPLOY Note: The Import/Export feature of Access Connections. Enabler for Administrator...

(English) Access Connections Profile Deployment guide
Page 18
Attention: For image deployment, the *.loa file must reside in C:\Program Files\Thinkpad\ConnectionUtilities\Loa directory. Figure 6. Click the Create button located at the bottom of this package after client installation" on client systems. The passphrase is used .... Distribution Control List with this package This setting is also encrypted in a *.sig file which are saved in the Access Connections install directory - (C:\PROGRAM FILES\THINKPAD\ CONNECTUTILITIES). 8.
Attention: For image deployment, the *.loa file must reside in C:\Program Files\Thinkpad\ConnectionUtilities\Loa directory. Figure 6. Click the Create button located at the bottom of this package after client installation" on client systems. The passphrase is used .... Distribution Control List with this package This setting is also encrypted in a *.sig file which are saved in the Access Connections install directory - (C:\PROGRAM FILES\THINKPAD\ CONNECTUTILITIES). 8.

(English) Access Connections Profile Deployment guide
Page 29
...and *.sig) with the location profiles that do not have Access Connections already installed and running Access Connections. For © Lenovo 2008. The following steps: 1. Include the distribution package .loa and .sig files in deploying Access Connections: v Deploy Access ... exporting any profiles but only include the modified client configuration policy. After restarting the system, Access Connection is C:\Program Files\ThinkPad\ConnectUtilities). 4. Create an integrated package as described in Chapter 3, "Working with the Administrator Feature," on new computers that ...
...and *.sig) with the location profiles that do not have Access Connections already installed and running Access Connections. For © Lenovo 2008. The following steps: 1. Include the distribution package .loa and .sig files in deploying Access Connections: v Deploy Access ... exporting any profiles but only include the modified client configuration policy. After restarting the system, Access Connection is C:\Program Files\ThinkPad\ConnectUtilities). 4. Create an integrated package as described in Chapter 3, "Working with the Administrator Feature," on new computers that ...

(English) Access Connections Profile Deployment guide
Page 30
... version of the existing client computer. 3. Copy the distribution package (*.loa and *.sig) into the Access Connections installed directory (default installed directory is C:\Program Files\ThinkPad\ConnectUtilities) of wireless LAN driver/application, Hotkey Fn+F5 utility, and Power Management driver. 2. After restarting the system, Access Connection runs automatically and detects the...
... version of the existing client computer. 3. Copy the distribution package (*.loa and *.sig) into the Access Connections installed directory (default installed directory is C:\Program Files\ThinkPad\ConnectUtilities) of wireless LAN driver/application, Hotkey Fn+F5 utility, and Power Management driver. 2. After restarting the system, Access Connection runs automatically and detects the...

(English) Access Connections Profile Deployment guide
Page 34
... under the Security Filtering section, click Add to give rights to the following example to setup logon scripts for the user or computer in c:\programfiles\thinkpad\ connectutilities\LOA. Click OK. 9. Creating the Acloa.bat file You can use the following : User Configuration->Windows Settings->Scripts (Logon/Logoff)->Logon 6. Launch the Group...
... under the Security Filtering section, click Add to give rights to the following example to setup logon scripts for the user or computer in c:\programfiles\thinkpad\ connectutilities\LOA. Click OK. 9. Creating the Acloa.bat file You can use the following : User Configuration->Windows Settings->Scripts (Logon/Logoff)->Logon 6. Launch the Group...

(English) Access Connections Profile Deployment guide
Page 35
... Directory and ADM files 27 Acloa.bat When a user logs onto a domain, the Acloa.bat executes and does the following client location: c:\programfiles\thinkpad\connectutilities v If the silent.txt file exists, it copies the. loa and .sig files from the server to client: c:\programfiles...\thinkpad\connectutilities v To import the profile into Access Connections silently, execute the following command qctray /silentimport v This creates a file called silent.txt at the following : ...
... Directory and ADM files 27 Acloa.bat When a user logs onto a domain, the Acloa.bat executes and does the following client location: c:\programfiles\thinkpad\connectutilities v If the silent.txt file exists, it copies the. loa and .sig files from the server to client: c:\programfiles...\thinkpad\connectutilities v To import the profile into Access Connections silently, execute the following command qctray /silentimport v This creates a file called silent.txt at the following : ...

(English) Access Connections Profile Deployment guide
Page 39
...the integrated package installation. Delete the following package: Access Connections version 3.82 with the Lenovo ThinkPad /L3000 system BIOS. Download the following folders from : http://www.lenovo.com/pc/support/site.wss/document.do?&lndocid=MIGR-38953 v Power Management driver The ...the C:\Drivers\W2k\ACCONWLD directory: v CONWIZ v IBMPM © Lenovo 2008. sitestyle=lenovo&lndocid=MIGR-4ZLNJB 1. The integrated Access Connections package This scenario provides information on the following Lenovo Web site: http://www.lenovo.com/pc/support/site.wss/document.do ? Using a lower layer...
...the integrated package installation. Delete the following package: Access Connections version 3.82 with the Lenovo ThinkPad /L3000 system BIOS. Download the following folders from : http://www.lenovo.com/pc/support/site.wss/document.do?&lndocid=MIGR-38953 v Power Management driver The ...the C:\Drivers\W2k\ACCONWLD directory: v CONWIZ v IBMPM © Lenovo 2008. sitestyle=lenovo&lndocid=MIGR-4ZLNJB 1. The integrated Access Connections package This scenario provides information on the following Lenovo Web site: http://www.lenovo.com/pc/support/site.wss/document.do ? Using a lower layer...

(English) Access Connections Profile Deployment guide
Page 40
v OSD for Power Management. Note: This package is the folder that contains the ThinkPad Wireless LAN Adapter Software (11a/b, 11b/g, and 11a/b/g) setup. v WLANCX2 is ready for customization to complete the installation type: \setup.exe /S /H /R:0 d. v ...Connections package: a. v IBMPM for the Hotkey utilities package and On screen display. You do not need to replace all the relevant packages with Lenovo ThinkPad /L3000 system BIOS. The Software Installer searches your wireless system. When the integrated package is the folder that contains the On screen display utilities...
v OSD for Power Management. Note: This package is the folder that contains the ThinkPad Wireless LAN Adapter Software (11a/b, 11b/g, and 11a/b/g) setup. v WLANCX2 is ready for customization to complete the installation type: \setup.exe /S /H /R:0 d. v ...Connections package: a. v IBMPM for the Hotkey utilities package and On screen display. You do not need to replace all the relevant packages with Lenovo ThinkPad /L3000 system BIOS. The Software Installer searches your wireless system. When the integrated package is the folder that contains the On screen display utilities...

(English) Access Connections Profile Deployment guide
Page 42
... verify the applicable data for their specific environment. Microsoft and Windows 2000, Windows XP and Windows Vista are trademarks of Lenovo in the United States, other countries, or both: Access Connections Lenovo ThinkVantage ThinkPad IBM is a trademark of Intel Corporation in the United States, other countries, or both. Users of Microsoft Corporation in...
... verify the applicable data for their specific environment. Microsoft and Windows 2000, Windows XP and Windows Vista are trademarks of Lenovo in the United States, other countries, or both: Access Connections Lenovo ThinkVantage ThinkPad IBM is a trademark of Intel Corporation in the United States, other countries, or both. Users of Microsoft Corporation in...

Hardware Maintenance Manual
Page 1
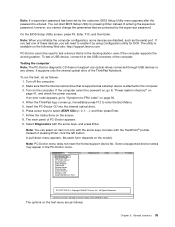
Hardware Maintenance Manual ThinkPad X200, X200s, X200si, X201, X201i, and X201s
Hardware Maintenance Manual ThinkPad X200, X200s, X200si, X201, X201i, and X201s
Hardware Maintenance Manual
Page 3
...56 No-beep symptoms 56 LCD-related symptoms 56 Intermittent problems 57 Undetermined problems 57 Chapter 5. Removing and replacing a FRU 69 Before servicing ThinkPad X200, X200s, X200si, X201, X201i, and X201s 70 1010 Battery pack 71 1020 Hard disk drive (HDD) cover, HDD, and HDD rubber rails or ... WAN . . 86 1090 Intel Turbo Memory Minicard or Wireless USB PCI Express Half-Mini Card 87 1100 Keyboard bezel 88 © Copyright Lenovo , 2011 i FRU replacement notices 65 Screw notices 65 Retaining serial numbers 66 Restoring the serial number of the system unit 66 Retaining the ...
...56 No-beep symptoms 56 LCD-related symptoms 56 Intermittent problems 57 Undetermined problems 57 Chapter 5. Removing and replacing a FRU 69 Before servicing ThinkPad X200, X200s, X200si, X201, X201i, and X201s 70 1010 Battery pack 71 1020 Hard disk drive (HDD) cover, HDD, and HDD rubber rails or ... WAN . . 86 1090 Intel Turbo Memory Minicard or Wireless USB PCI Express Half-Mini Card 87 1100 Keyboard bezel 88 © Copyright Lenovo , 2011 i FRU replacement notices 65 Screw notices 65 Retaining serial numbers 66 Restoring the serial number of the system unit 66 Retaining the ...

Hardware Maintenance Manual
Page 4
... assembly for X201 and X201i 95 1150 Systemboard, DC-in . Locations 131 Front view 131 Rear view 132 Bottom view 133 Rear view (ThinkPad X200 UltraBase 133 Bottom view (ThinkPad X200 UltraBase). . . . . 134 Chapter 10. WXGA TFT 221 12.1-in. WXGA+ TFT 242 Keyboard 246 Miscellaneous parts 247 AC adapters 247 Power...
... assembly for X201 and X201i 95 1150 Systemboard, DC-in . Locations 131 Front view 131 Rear view 132 Bottom view 133 Rear view (ThinkPad X200 UltraBase 133 Bottom view (ThinkPad X200 UltraBase). . . . . 134 Chapter 10. WXGA TFT 221 12.1-in. WXGA+ TFT 242 Keyboard 246 Miscellaneous parts 247 AC adapters 247 Power...
Hardware Maintenance Manual
Page 5
ThinkPad X200 ThinkPad X200s and X200si ThinkPad X201 and X201i ThinkPad X201s MT 7454, 7455, 7457, 7458, 7459, 2023, and 2024 MT 7462, 7465, 7466, 7469, 7470, 2046, and 2047 MT 3249, 3323, 3357, 3626, 3680, 3712, and 4492 MT 5129, 5143, 5385, 5397, 5413, 5442, and 5446 Use this manual along with ThinkPad... information under Chapter 1 "Safety information" on page 1 and Chapter 2 "Important service information" on page 29. © Copyright Lenovo , 2011 iii Before servicing a ThinkPad product, be sure to troubleshoot problems. Important: This manual is intended only for the following...
ThinkPad X200 ThinkPad X200s and X200si ThinkPad X201 and X201i ThinkPad X201s MT 7454, 7455, 7457, 7458, 7459, 2023, and 2024 MT 7462, 7465, 7466, 7469, 7470, 2046, and 2047 MT 3249, 3323, 3357, 3626, 3680, 3712, and 4492 MT 5129, 5143, 5385, 5397, 5413, 5442, and 5446 Use this manual along with ThinkPad... information under Chapter 1 "Safety information" on page 1 and Chapter 2 "Important service information" on page 29. © Copyright Lenovo , 2011 iii Before servicing a ThinkPad product, be sure to troubleshoot problems. Important: This manual is intended only for the following...

Hardware Maintenance Manual
Page 7
... your toolcase away from walk areas so that other people will not trip over it with labels or stickers. © Copyright Lenovo , 2011 1 Never move suddenly or twist when you service a ThinkPad Notebook. • "General safety" on page 1 • "Electrical safety" on page 2 • "Safety inspection guide" on page 22 General safety...
... your toolcase away from walk areas so that other people will not trip over it with labels or stickers. © Copyright Lenovo , 2011 1 Never move suddenly or twist when you service a ThinkPad Notebook. • "General safety" on page 1 • "Electrical safety" on page 2 • "Safety inspection guide" on page 22 General safety...

Hardware Maintenance Manual
Page 9
...here. Check exterior covers for : a. Power off power. - Check for 0.1 ohm or less between objects. Check that are any obvious non-ThinkPad alterations. Switch off the computer. Check the power cord for damage (loose, broken, or sharp edges). 2. The power cord should be considered ... fire or smoke damage. 8. Insulation must determine how serious the apparent hazard could be frayed or worn. 4. Use caution; If any non-ThinkPad alterations. 7. Disconnect the power cord. 3. A third-wire ground connector in the parts list. Use good judgment as loose or missing hardware...
...here. Check exterior covers for : a. Power off power. - Check for 0.1 ohm or less between objects. Check that are any obvious non-ThinkPad alterations. Switch off the computer. Check the power cord for damage (loose, broken, or sharp edges). 2. The power cord should be considered ... fire or smoke damage. 8. Insulation must determine how serious the apparent hazard could be frayed or worn. 4. Use caution; If any non-ThinkPad alterations. 7. Disconnect the power cord. 3. A third-wire ground connector in the parts list. Use good judgment as loose or missing hardware...

Hardware Maintenance Manual
Page 39
...parts list. • A FRU should service the computer. • Before replacing any ThinkPad model that might be replaced because of reasons that a FRU is recommended to use . © Copyright Lenovo , 2011 33 Procedure index and page number in this chapter apply to any FRU, ..., or formatting. Date on page 41 The descriptions in which the machine failed 4. If you replace FRUs, it : 1. "System supporting the Lenovo diagnostics programs" on page 39 • "Power system checkout" on which the failing FRU was detected 7. When you attach to replace a nondefective...
...parts list. • A FRU should service the computer. • Before replacing any ThinkPad model that might be replaced because of reasons that a FRU is recommended to use . © Copyright Lenovo , 2011 33 Procedure index and page number in this chapter apply to any FRU, ..., or formatting. Date on page 41 The descriptions in which the machine failed 4. If you replace FRUs, it : 1. "System supporting the Lenovo diagnostics programs" on page 39 • "Power system checkout" on which the failing FRU was detected 7. When you attach to replace a nondefective...

Hardware Maintenance Manual
Page 40
... before you run correctly. Verify the symptoms. Try to test only ThinkPad products. For some possible configurations of the cosmetic parts • Plastic parts, latches, pins, or connectors that support the Lenovo ThinkVantage® Toolbox program and the PC-Doctor® for DOS ...,PC-Doctor might not apply to excessive force, or dropped. System supporting the Lenovo ThinkVantage Toolbox program and the PC-Doctor for DOS diagnostics program The section provides information about ThinkPad computers that have been cracked or broken by excessive force • Damage caused...
... before you run correctly. Verify the symptoms. Try to test only ThinkPad products. For some possible configurations of the cosmetic parts • Plastic parts, latches, pins, or connectors that support the Lenovo ThinkVantage® Toolbox program and the PC-Doctor® for DOS ...,PC-Doctor might not apply to excessive force, or dropped. System supporting the Lenovo ThinkVantage Toolbox program and the PC-Doctor for DOS diagnostics program The section provides information about ThinkPad computers that have been cracked or broken by excessive force • Damage caused...
Hardware Maintenance Manual
Page 41
...computer supports the docking station. If the computer cannot be used to test a device that is available on the following Web site: http://support.lenovo.com PC-Doctor cannot be powered on, go to "Symptom-to-FRU index" on the model.) Note: PC-Doctor menu does not mean... If a supervisor password has been set by the customer, BIOS Setup Utility menu appears after the password is attached to the computer. 3. When the ThinkPad logo comes up, immediately press F12 to select. Instead of these devices, you cannot change the parameters that is supported as follows: 1. Use the ...
...computer supports the docking station. If the computer cannot be used to test a device that is available on the following Web site: http://support.lenovo.com PC-Doctor cannot be powered on, go to "Symptom-to-FRU index" on the model.) Note: PC-Doctor menu does not mean... If a supervisor password has been set by the customer, BIOS Setup Utility menu appears after the password is attached to the computer. 3. When the ThinkPad logo comes up, immediately press F12 to select. Instead of these devices, you cannot change the parameters that is supported as follows: 1. Use the ...
Hardware Maintenance Manual
Page 42
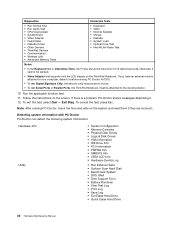
... test Digital Signature Chip, the security chip must be set to Active. • To test Serial Ports or Parallel Ports, the ThinkPad Notebook must be attached to your computer, detach it . 12. Exit Diag. To cancel the test, press Esc. Detecting system ...8226; Run Quick Test • CPU/Coprocessor • Systemboard • Video Adapter • Fixed Disks • Diskette Drives • Other Devices • ThinkPad Devices • Communication • Wireless LAN • Advanced Memory Tests • Keyboard • Video • Internal Speaker • Mouse • Diskette ...
... test Digital Signature Chip, the security chip must be set to Active. • To test Serial Ports or Parallel Ports, the ThinkPad Notebook must be attached to your computer, detach it . 12. Exit Diag. To cancel the test, press Esc. Detecting system ...8226; Run Quick Test • CPU/Coprocessor • Systemboard • Video Adapter • Fixed Disks • Diskette Drives • Other Devices • ThinkPad Devices • Communication • Wireless LAN • Advanced Memory Tests • Keyboard • Video • Internal Speaker • Mouse • Diskette ...


