Hardware Maintenance Manual
Page 3
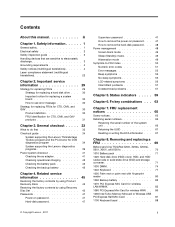
... (Standby) mode 49 Hibernation mode 49 Symptom-to do first 33 Checkout guide 34 System supporting the Lenovo ThinkVantage Toolbox program and the PC-Doctor for replacing a system board 30 How to electrostatic discharge 3 Grounding requirements 4 Safety notices (multilingual translations 4 Laser... symptoms 56 LCD-related symptoms 56 Intermittent problems 57 Undetermined problems 57 Chapter 5. Removing and replacing a FRU 69 Before servicing ThinkPad X200, X200s, X200si, X201, X201i, and X201s 70 1010 Battery pack 71 1020 Hard disk drive (HDD) cover, HDD, and HDD rubber rails or...
... (Standby) mode 49 Hibernation mode 49 Symptom-to do first 33 Checkout guide 34 System supporting the Lenovo ThinkVantage Toolbox program and the PC-Doctor for replacing a system board 30 How to electrostatic discharge 3 Grounding requirements 4 Safety notices (multilingual translations 4 Laser... symptoms 56 LCD-related symptoms 56 Intermittent problems 57 Undetermined problems 57 Chapter 5. Removing and replacing a FRU 69 Before servicing ThinkPad X200, X200s, X200si, X201, X201i, and X201s 70 1010 Battery pack 71 1020 Hard disk drive (HDD) cover, HDD, and HDD rubber rails or...

Hardware Maintenance Manual
Page 47
... 41 • "Checking operational charging" on page 42 • "Checking the battery pack" on page 42 • "Checking the backup battery" on page 37. If the voltage is acceptable, do the following : 1. General checkout 41 When the ThinkPad logo is not correct, replace the ac adapter. 4. Follow the instructions on the screen to "FRU... appropriate one you are here because the computer fails only when the ac adapter is used. • If the power problem occurs only when the ThinkPad X200 UltraBase is supplied when you turn on page 42. 4.
... 41 • "Checking operational charging" on page 42 • "Checking the battery pack" on page 42 • "Checking the backup battery" on page 37. If the voltage is acceptable, do the following : 1. General checkout 41 When the ThinkPad logo is not correct, replace the ac adapter. 4. Follow the instructions on the screen to "FRU... appropriate one you are here because the computer fails only when the ac adapter is used. • If the power problem occurs only when the ThinkPad X200 UltraBase is supplied when you turn on page 42. 4.

Hardware Maintenance Manual
Page 101
...assembly" on page 90 • "1130 LCD assembly" on page 88 • "1110 Monaural speaker assembly (for ThinkPad X200, X201, and X201i ThinkPad X200, X201, and X201 Remove the top shielding assembly at first. Removing and replacing a FRU 95 Step 1 Screw (quantity) M2 × 3 mm, wafer-head, nylon-coated (1) Color Black Torque...• "1040 Keyboard" on page 77 • "1050 Palm rest or palm rest with fingerprint reader" on page 80 • "1060 Backup battery" on page 82 • "1070 PCI Express Mini Card for wireless LAN/WiMAX" on page 83 • "1080 PCI Express Mini Card for ...
...assembly" on page 90 • "1130 LCD assembly" on page 88 • "1110 Monaural speaker assembly (for ThinkPad X200, X201, and X201i ThinkPad X200, X201, and X201 Remove the top shielding assembly at first. Removing and replacing a FRU 95 Step 1 Screw (quantity) M2 × 3 mm, wafer-head, nylon-coated (1) Color Black Torque...• "1040 Keyboard" on page 77 • "1050 Palm rest or palm rest with fingerprint reader" on page 80 • "1060 Backup battery" on page 82 • "1070 PCI Express Mini Card for wireless LAN/WiMAX" on page 83 • "1080 PCI Express Mini Card for ...

Hardware Maintenance Manual
Page 107
...test it only on page 90 Chapter 8. Removing and replacing a FRU 101 Run Diagnostics ➙ ThinkPad Devices ➙ HDD Active Protection Test. Attention: Do ... the system board, bear the following web site: http://www.lenovo.com/support/site.wss/document.do?lndocid=LOOK-WARNTY Select Warranty ...ROM System board with fingerprint reader" on page 80 • "1060 Backup battery" on page 82 • "1070 PCI Express Mini Card for wireless ... Keyboard bezel" on page 88 • "1110 Monaural speaker assembly (for X200, X200s, X201s, and X201si)" on page 89 • "1120 I/O card assembly...
...test it only on page 90 Chapter 8. Removing and replacing a FRU 101 Run Diagnostics ➙ ThinkPad Devices ➙ HDD Active Protection Test. Attention: Do ... the system board, bear the following web site: http://www.lenovo.com/support/site.wss/document.do?lndocid=LOOK-WARNTY Select Warranty ...ROM System board with fingerprint reader" on page 80 • "1060 Backup battery" on page 82 • "1070 PCI Express Mini Card for wireless ... Keyboard bezel" on page 88 • "1110 Monaural speaker assembly (for X200, X200s, X201s, and X201si)" on page 89 • "1120 I/O card assembly...

Hardware Maintenance Manual
Page 117
... 8. Removal steps of system board, DC-in connector, fan, and ExpressCard slot assembly for 12.1-in . Table 25. Removal steps of LCD front bezel for ThinkPad X200s and X201s (continued) Step 1 Screw (quantity) M2 × 3.5 mm, wafer-head, nylon-coated (1) Color Silver Torque 0.181 Nm (1.85 kgfcm) Turn the system board over..., and then remove the ExpressCard slot assembly from the system board. 2 3 2010 LCD front bezel For access, remove this FRU: • "1010 Battery pack" on page 71 Table 26. Removing and replacing a FRU 111 WXGA LCD model 12.1-in .
... 8. Removal steps of system board, DC-in connector, fan, and ExpressCard slot assembly for 12.1-in . Table 25. Removal steps of LCD front bezel for ThinkPad X200s and X201s (continued) Step 1 Screw (quantity) M2 × 3.5 mm, wafer-head, nylon-coated (1) Color Silver Torque 0.181 Nm (1.85 kgfcm) Turn the system board over..., and then remove the ExpressCard slot assembly from the system board. 2 3 2010 LCD front bezel For access, remove this FRU: • "1010 Battery pack" on page 71 Table 26. Removing and replacing a FRU 111 WXGA LCD model 12.1-in .

Hardware Maintenance Manual
Page 119
Removal steps of LCD front bezel for 12.1-in order: • "1010 Battery pack" on page 71 • "2010 LCD front bezel" on page 111 Table 28. WXGA+ LCD model (continued) 2 M2.5 × 4 mm, wafer-head, nylon-coated (5) ... attached firmly. 2020 Inverter card or LED board For access, remove these FRUs in . Table 27. Removal steps of inverter card or LED board For ThinkPad X200, X200s, and X200si: Chapter 8. Removing and replacing a FRU 113
Removal steps of LCD front bezel for 12.1-in order: • "1010 Battery pack" on page 71 • "2010 LCD front bezel" on page 111 Table 28. WXGA+ LCD model (continued) 2 M2.5 × 4 mm, wafer-head, nylon-coated (5) ... attached firmly. 2020 Inverter card or LED board For access, remove these FRUs in . Table 27. Removal steps of inverter card or LED board For ThinkPad X200, X200s, and X200si: Chapter 8. Removing and replacing a FRU 113


